


Docker Compose and container orchestration
We continue with our series of articles on containers. First, we started with creating our own images with Docker Build and saw how to run them with Docker run. But today we will learn what Docker Compose is and start our journey into the world of container orchestration.
Up to now we have managed containers manually and separately, which for some specific test may be valid and functional. But when the number of containers to manage starts growing, this method becomes infeasible. Here is where container orchestration comes into play to manage multiple containers efficiently.
What is container orchestration?
Container orchestration consists of centralized and efficient container management and monitoring. Not only from the containers themselves but also from their environment, including their relationships and connections.
An orchestration tool must have at least 4 key elements:
- Deployment
- Scaling
- Network
- Reliability
The deployment, as its name suggests, is the ability to deploy containers efficiently. Generally, this deployment is done by making use of manifests. (We will see these manifests later).
Scaling refers to the possibility of increasing the number of containers running in a simple way. If, for example, you have a container running a web server and the traffic grows, you can scale it and duplicate the same container as many times as necessary to satisfy the demand. However, scaling not only works in the sense of growth, you can also decrease the number of container replicas if the traffic drops, for example.
A good orchestrator must be able to manage the internal network that interconnects the containers. As we learned, containers are usually disposable, we can activate or stop them according to the specific needs of our application, so it is very difficult to manage the IP addresses of each container. To that end orchestration tools are capable of generating internal network segments for your applications, in addition to having network balancers and a DNS service that will allow you to refer to the different elements of your application by name, without managing IP addresses.
Reliability: an orchestrator must be able to keep your application operational. Once you declare the containers that you need to have deployed for your application, the orchestrator will take care of keeping them always available. We know that containers are disposable, they stop and die. In those cases you have to run them again or even activate a completely new one to replace a dead container. An orchestrator is able to perform these tasks automatically, activating the containers that die according to what you declare.
All this may sound a bit complicated, but don’t worry, as soon as you get down to work you will see that these are simple concepts to understand, and that it is really the orchestrator the one who takes care of the complicated tasks. You just have to worry about correctly declaring what you want the orchestrator to do.
In our case, to start our journey with the orchestrators we are going to use one of the simplest, Docker Compose, which contains all the elements described above and is very easy to use.
What is Docker Compose?
It is a tool that allows to run multiple intercommunicating containers in a simple way, making use of manifests, in this case in YAML format. This manifest is where we will define the desired status. Docker Compose will take care of all the actions necessary to keep that status, and even better, it can be done with a single command.
This article is not intended to be a reference for the use of Docker Compose and all its possibilities, for that we have the official Docker documentation (https://docs.docker.com/compose/compose-file/ ) where you may find all the available options and their syntax. The intention is to introduce Docker Compose as a simple alternative to containerized application deployment and an introduction to container orchestration.
In general, for using any orchestrator, the desired state is declared in one or more manifests; it is basically the beginning of the Infrastructure as Code (IaC).
Manifests in Docker Compose are written in YAML format, which is a very common format in other types of orchestrators that are also very widespread such as Kubernetes or Docker Swarn, so what we learned here will be useful when we move on to these more powerful and complex tools.
An example of a simple Docker Compose yaml manifest for a Mysql database might be:
version: '3.1'

services:

db:

image: rameijeiras/pandorafms-percona-base

environment:

MYSQL_ROOT_PASSWORD: pandora

MYSQL_DATABASE: pandora

MYSQL_USER: pandora

MYSQL_PASSWORD: pandora

ports:

- "3306:3306"
As you can see, it is similar to what we do in a Docker run command, but in YAML format.
This manifest is equivalent to the command’s manual execution:
docker run --name db \

-p 3306:3306 \

-e MYSQL_ROOT_PASSWORD=pandora \

-e MYSQL_DATABASE=pandora \

-e MYSQL_USER=pandora \

-e MYSQL_PASSWORD=pandora \

-d rameijeiras/pandorafms-percona-base
Once you have a manifest saved, usually in a docker-compose.yml file, go to the file’s directory and execute the command docker-compose up. Automatically, Docker Compose will do the necessary tasks to activate the container: it will download the image, if you don’t have it locally, it will define the declared environment variables and it will expose the container port 3306 to host 3306, as we have declared.
For this container, the benefits of compose over executing the Docker run command are not highly appreciated. In this case, it is just not launching a long command and being able to do it in a simpler one, but when you have to manage more than one container and interconnect them, that is where the usefulness of an orchestrator like Docker Compose comes out.
Docker Compose Installation
In order to use Docker Compose, you must have Docker installed on your machine or on a server. If you don’t know how to install Docker, follow the steps from its official documentation ( https://docs.docker.com/engine/install/ ) for the different operating systems.
Docker Compose installation is very simple. Here I leave the documentation, ( https://docs.docker.com/compose/install/ ) although the steps are very simple.
On Linux systems, just run a couple of commands:
sudo curl -L "https://github.com/docker/compose/releases/download/1.26.2/docker-compose-$(uname -s)-$(uname -m)" -o /usr/local/bin/docker-compose
sudo chmod +x /usr/local/bin/docker-compose
On Windows systems with Docker installation for Windows, Docker Compose is installed by default.
You can check the installation on any system by executing the command
docker-compose -v
Linux

imagen: WindowsTerminal_G4P8jVQxNG.png
Windows (powershell):

imagen: WindowsTerminal_ruyy7PUpug.png
Running Pandora FMS Community with Docker Compose
Now we will see a practical example and, of course, we will use our favorite application: Pandora FMS. In previous articles we learned how to generate your own images and run them using the Docker run command. Today we will do it in a much easier way by simply using a manifest in yaml format and the docker-compose up command.
If you haven’t read the previous articles, don’t worry; We have published the results in the repository https://github.com/rafaelameijeiras/PandoraFMS and we have published the images generated in Docker hub, so you can follow the tutorial to run Pandora FMS with no issues.
The manifest that we will use will be:
version: '3.1'

services:

db:

image: rameijeiras/pandorafms-percona-base

restart: always

command: ["mysqld", "--innodb-buffer-pool-size=300M"]

environment:

MYSQL_ROOT_PASSWORD: pandora

MYSQL_DATABASE: pandora

MYSQL_USER: pandora

MYSQL_PASSWORD: pandora

networks:

- pandora
pandora:

image: rameijeiras/pandorafms-community

restart: always

depends_on:

- db

environment:

MYSQL_ROOT_PASSWORD: pandora

DBHOST: db

DBNAME: pandora

DBUSER: pandora

DBPASS: pandora

DBPORT: 3306

INSTANCE_NAME: pandora01

SLEEP: 10

RETRIES: 5

volumes:

- mysql:/var/lib/mysql

networks:

- pandora

ports:

- "8080:80"

- "41121:41121"

- "162:162/udp"
networks:

pandora:

volumes:

mysql:
If you have downloaded the repository it will be in the directory PandoraFMS/pandorafms_community/docker-compose.yml
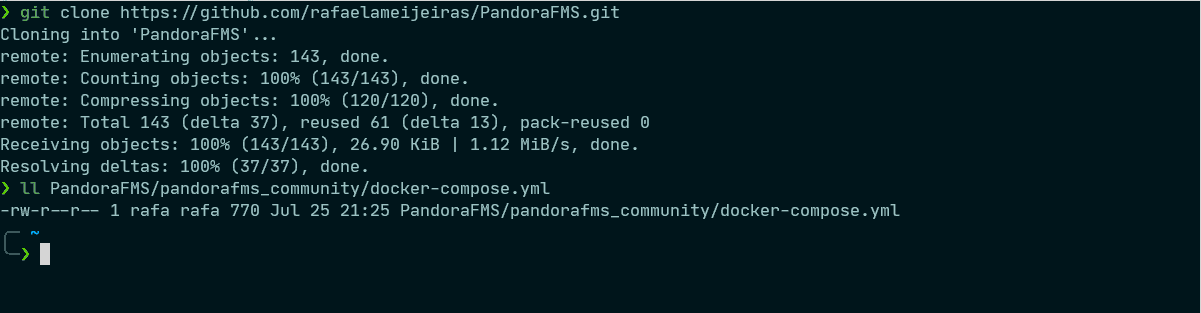
imagen: WindowsTerminal_ZqL7HX9JOj.png
Now just run the command:
docker-compose -f PandoraFMS/pandorafms_community/docker-compose.yml up
As you can see, we have used the -f (file) parameter to define the manifest file that we want to use, without having to move to the directory that contains it. We can also use another name for the file, different from docker-compose.yaml, if we use the -f argument followed by the path and name of the yaml file.
Once the command is launched, the execution of the necessary tasks to activate and interconnect the declared containers will start. If you don’t have the images locally, it will download them before activating the containers. Much easier than running each container independently.
imagen: compose-up.gif
By default, when executing the command, the screen will be the log of both containers. You can use ctrl + z to send it to the background or, better yet, you can execute the command with the -d flag that by default will launch the containers in the background leaving the terminal available for use.
docker-compose -f PandoraFMS/pandorafms_community/docker-compose.yml up -d
To see the status of all the containers declared in this manifest, it is as simple as running:
docker-compose -f PandoraFMS/pandorafms_community/docker-compose.yml ps

imagen: WindowsTerminal_yDo0HjuAZw.png
Now just go to your browser and enter the IP of your Docker server followed by a colon “:” and the port that you exposed in the manifest, slash “/” pandora_console. In this particular case I am running it locally so I will use 127.0.0.1:8080/pandora_console
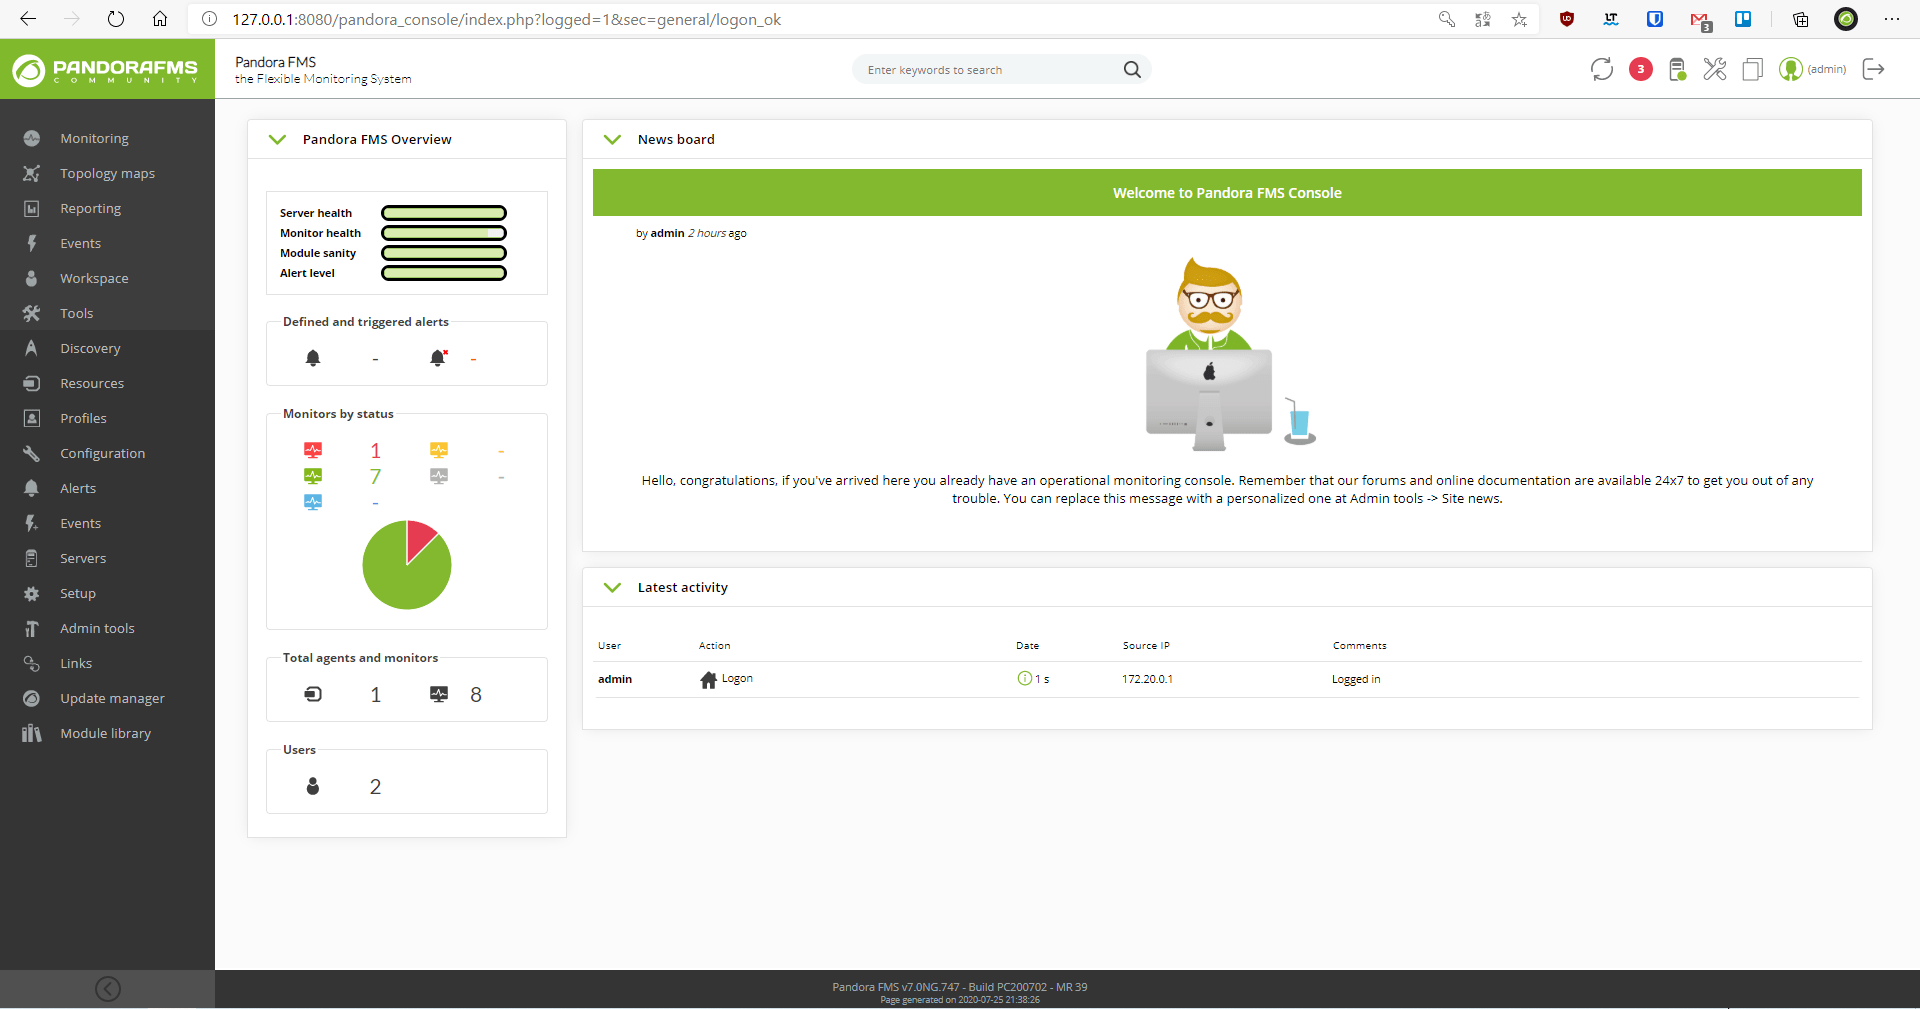
imagen: yTJF7R3Z6h.png
As you can see, you already have Pandora FMS Community Version running with just the execution of a single command. A clean and fast deployment.
To stop the containers declared in the manifest, just execute:
docker-compose -f PandoraFMS/pandorafms_community/docker-compose.yml stop
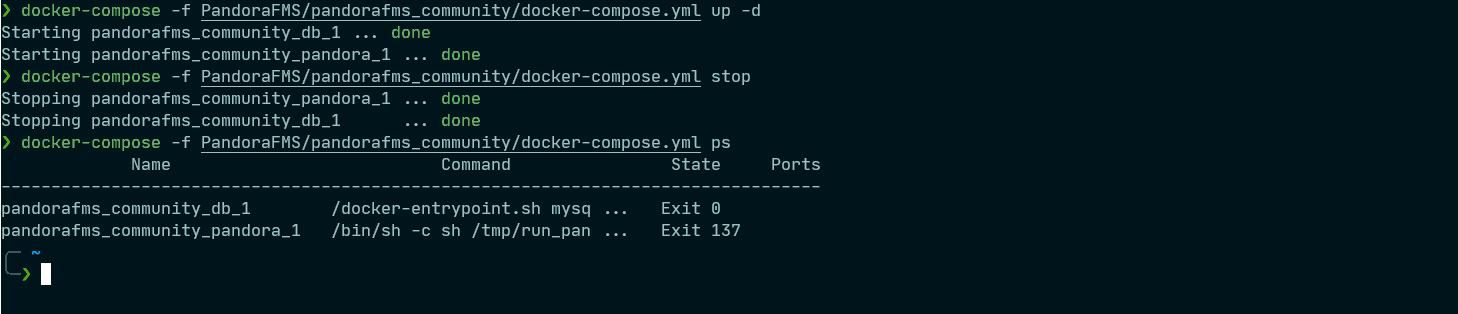
imagen: WindowsTerminal_iCFmhaMMFZ.png
As you can see from the manifest, we are storing the database information on the mysql local volume, so no matter how many times you stop or activate the container, the database container data is persistent.
If you want to delete all the data without leaving a trace, including the persistent data from the database, execute the command:
docker-compose -f PandoraFMS/pandorafms_community/docker-compose.yml down
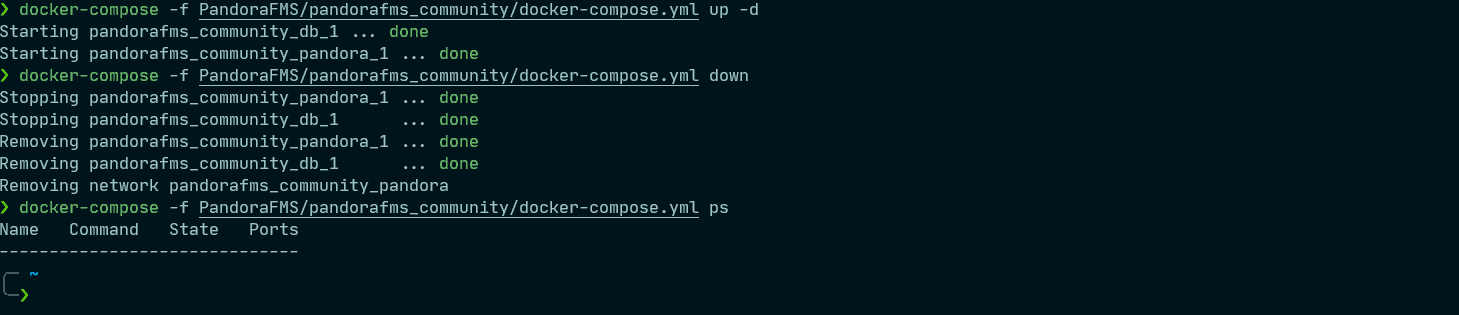
imagen: WindowsTerminal_kjiqQWXJRu.png
It will destroy the containers and all their associated data.
As you can see, using Docker compose will make deployments much easier. It is a very versatile and powerful tool, but it can be complicated at first. If that is your case, do not worry, it is very difficult to see all its possibilities in a single post.
So if you like the world of containers and want to learn more about Docker Compose and other more advanced orchestrators like Kubernetes, stay tuned.
Before finishing off, remember that if you have to monitor more than 100 devices you can enjoy a FREE 30-day Pandora FMS Enterprise TRIAL . Get it here.
If you have a small number of devices to monitor, you can use Pandora FMS OpenSource version. Find more information here .

Project Manager at Pandora FMS. More than 15 years of experience in the IT world. Lover of technology and open source, DevOps culture. Fan and promoter of automation, containerization and container orchestration. Project manager in Pandora FMS. More than 15 years of experience in the IT world. Technology and open source lover, DevOps culture. Fan and promoter of the automation, containment and orchestration of containers.