Geoserver configuration and installation
Introduction
This guide is intended for a minimal test environment. To set up a production environment, please check out the GeoServer documentation.
This documentation was tested with GeoServer version 2.13.0.
GeoServer is an application written in Java, so a JRE v8 is required to run it. It can also be launched using a Java application server such as Tomcat.
Run ./bin/startup.sh in the root of the GeoServer directory.
After starting the server, you may access the Configuration Web Console from:
http://localhost:8080/geoserver
Use the admin user and the password geoserver.
Add your own maps
In the welcome screen you will see three options that will be necessary to add your own maps:
- Add workspaces.
- Add warehouses.
- Add layers.
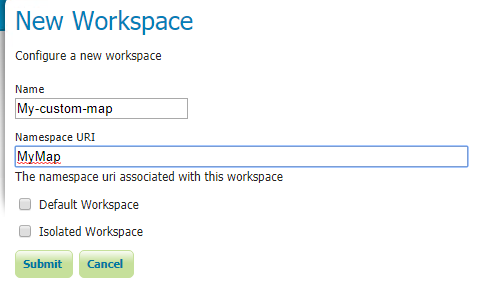
Add workspace
In this first step, it is only necessary to enter a name (without spaces) under which the working warehouses and layers will be found later. An alias can be entered in the URI field.
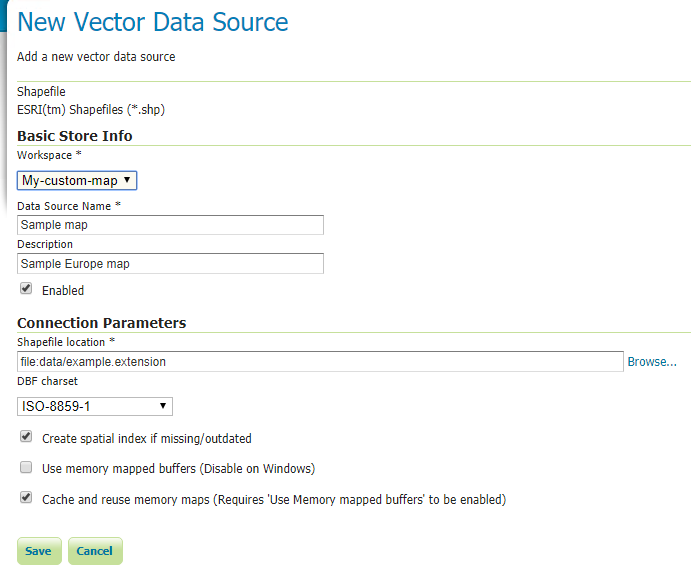
Add warehouses
First choose the type of data, which will depend on the file to be used. Depending on the type, more options may appear, but the basic key is to choose the workspace created earlier, assign a name to this store and indicate the path to the file to be used.
Adding layers
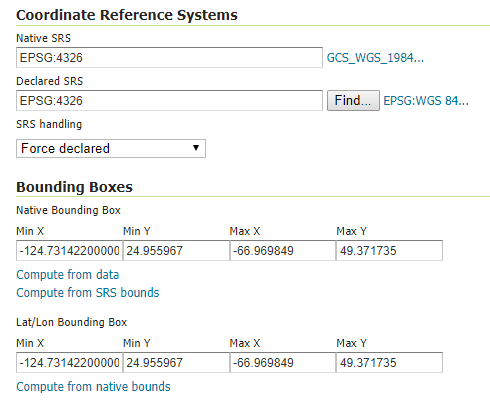
Once the warehouse is created, a layer must be published to expose the file through the service. After selecting the previously created vault, access a form with information about the layer.
The first thing to do is to enter the name of the layer. Next, enter the coordinate reference system, which varies depending on the file you wish to publish. Finally, the layer frame must be added. The frame values can be retrieved from the file used (Compute from data) or from the chosen coordinate reference system (Compute from SRS bounds).
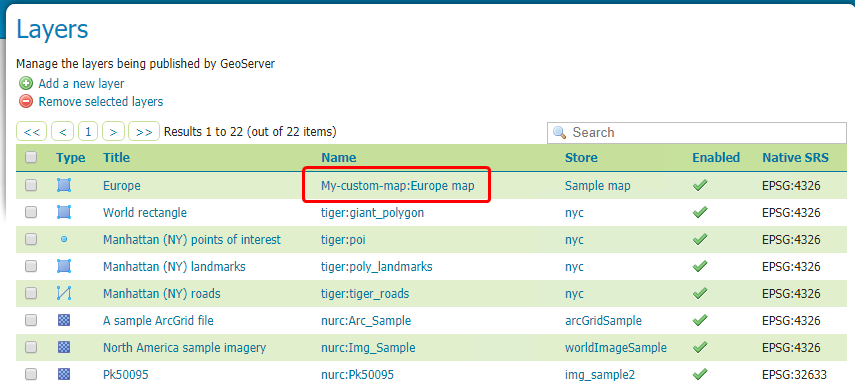
After adding the layer successfully, you will be able to create a connection in Pandora FMS GIS maps. To do this use the identifier of the new layer created.
To add new map files, the data warehouse and layer addition steps must be repeated.


 Home
Home


