HWg-STE Temperature Sensor Configuration
Introduction
This quick configuration guide explains how to use Pandora FMS to monitor a HWg-STE temperature sensor with email alerts and a basic report.
Installation and configuration
Step 1. Installing Pandora FMS
Online installation is recommended.
Step 2. Sensor installation
Sensor model: HWg-STE.
Manufacturer's documentation:
http://www.hw-group.com/products/HWg-STE/STE_ip_temperature_sensor_en.html
Sensor manual link:
https://web.archive.org/web/20100307054059/https://www.hw-group.com/download/HWg-STE_MAN_en.pdf
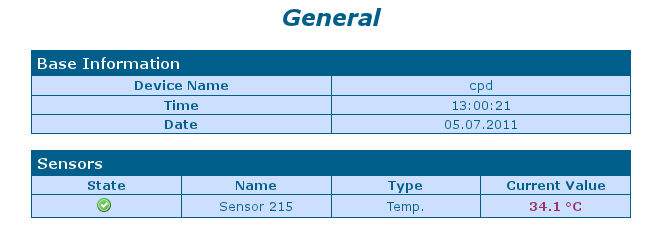
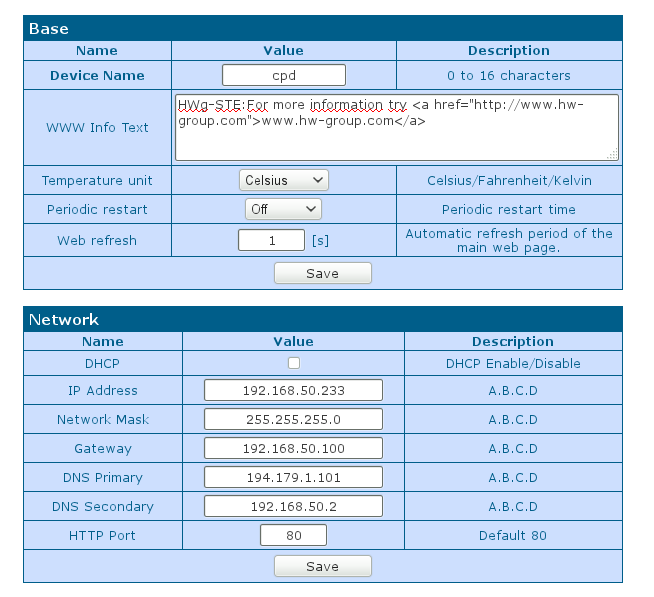
The most important thing is to configure the access IP address and make sure that the temperature sensor is connected and to know its OID. To do this, access the device through the web and configure:
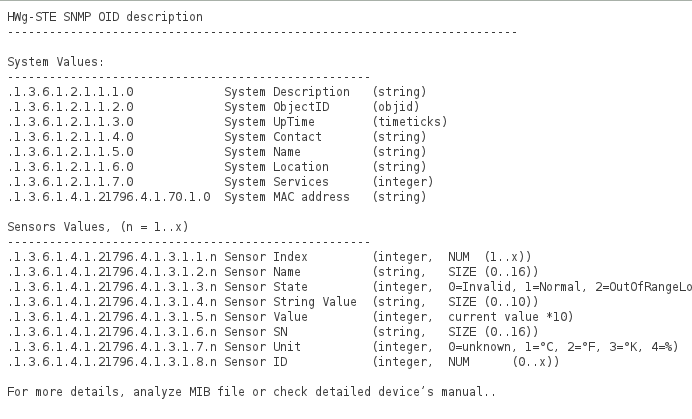
In the System → TXT List of common SNMP OID's screen, the OID of the sensor can be queried:
Since there is only one sensor, the OID will be:
.1.3.6.1.4.1.21796.4.1.3.1.5.1
It should be noted that the device returns the temperature in degrees Celsius without decimal separator. The value must be divided by 10 in order to display the real value, this post-processing is done in Pandora FMS.
The IP address of the device is queried:
Step 3. Sensor configuration in Pandora FMS
Go to the agent configuration screen. Create an agent and fill in the relevant information. The agent must have the queried IP address of the sensor. A Numeric data Remote SNMP network agent module is defined in modules.
In the SNMP OID field, the previously obtained SNMP OID is placed. By default the SNMP community is public.
In the advanced section specify a postprocess that divides the value by 10:
Click on create module. You should see something like this image:
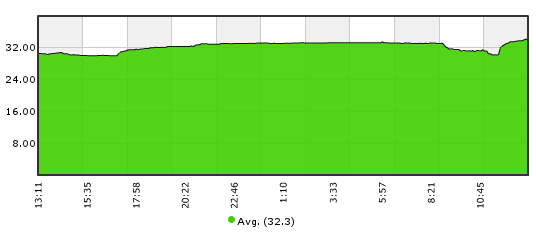
You will be able to see the data obtained from the sensor, in a few hours you will have enough data for a graph like this one:
Step 4. Set up an alert
So that when 38 degrees Celsius is exceeded, an alert is generated by e-mail. The thresholds are modified so that CRITICAL is set at 38 ºC and above:
An alert action is defined to send an email to a specific address. Go to the menu Management → Alerts → List of alerts and create a new one. Define an alert action for generic mailing, for any module that is set in CRITICAL status. After creating the action, just define an alert in the agent containing the sensor.
Edit the agent and go to the alerts tab, create a new alert, starting from the default alert template “Critical condition”. Once all these steps are done, the alert will be ready.
Step 5. Creating a basic report
To create a report with a simple temperature graph, and the average and maximum value.
Go to menu Operation → Reporting → Custom reports → Create report.
Go to the key tab to add items to the report and choose an Simple graph item.
In the same way, two elements of type AVG (Average) and MAX (Maximum value) must be created. Once they have been created, to display them, click on the report display tab (the first one on the left).


 Home
Home


