Monitoring with Policies
Policies
The policy system is conceived to make large monitoring environment management easier. It allows to propagate modules, alerts, external alerts, plugins, remote inventories and collections to the agents in a centralized and homogeneous way.
To apply any changes you may have made in policies, apply the policy in the corresponding section (queue).
You can also get more information: “Differences between Templates, Policies and Massive Operations”.
Policy management
- Policy management is done in the Management → Configuration → Manage policies section, located on the left side of the Pandora FMS Web Console.
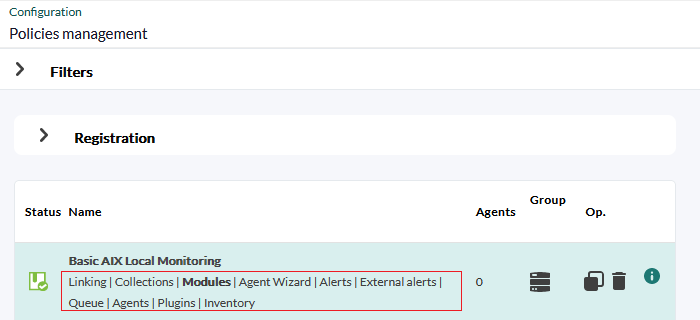
The components of any policy can be quickly accessed by clicking on the corresponding links.
- In the configuration section of each agent (menu Management → Resources → agent edition) a specific policy tab is available for each agent. The interface is similar to that of the monitoring policies, it only affects the agent in the section and joint operations can be performed by selecting several policies at once and applying or deleting them simultaneously. Agents added in this way will also appear in the main section of the monitoring policies and can be managed in bulk.
Policy search
You may search policies in Pandora FMS from the search header both in the Command Center (Metaconsole) and node.
Command Center (Metaconsole) searches return two types of results:
- Centralized search: Policies shown are those in the Command Center itself.
- Non-centralized search: The policies shown are obtained directly from each node, indicating their origin.
Adding a Policy
Management → Configuration → Manage policies → Create button. Enter the name and group and specify whether it will apply to secondary groups and whether it will be force apply for agents without remote configuration enabled (Force Apply option). Click Create again to save.
Duplicating a Policy
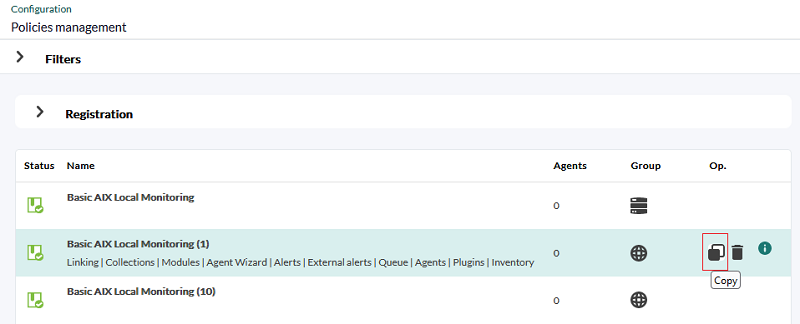
Click on the corresponding icon in the options column:
The created policy copy will appear as “not applied”, regardless of the original policy's state.
Export and import monitoring policies
See section for import and export in PRD format.
Deleting a Policy
To delete any policy, it must not have any agents associated.
If a policy contains agents, the delete button is disabled and a button to delete all its agents is shown.
This button will add the delete process to the queue. Once processed, the policy delete button will be enabled again.
Policy queue management
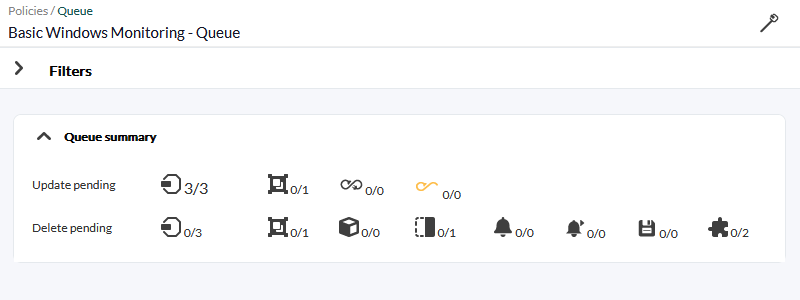
The policy operations queue contains a summary of the elements changed since its last application:
This list contains the elements yet to be updated and the ones yet to be deleted. This summary shows whether the policy should be applied or not. Sometimes, a button will be shown to apply them next to the icon of agents pending to be applied.
- If the pending changes only affect the database, e.g. changes in alerts, this button will apply the changes just at that level, so the application will be faster.
- However, if the configuration that affects configuration files has been changed, e.g. if collections or local modules have been modified, the application is complete.
- Below the summary, on the right side, there is a button to apply all, regardless of the type of pending modifications.
Policy configuration
To configure the policy, click on the policy name. Once inside, you can access the different configuration sections through the top right menu.
Within the configuration of a policy, in addition to setup, the following tabs are available:
- Agents.
- Modules.
- inventory module.
- Alerts.
- External alerts.
- Collections.
- Linking.
- Queue.
- Agents Plugins.
- Wizards Agents.
The possible operations in a policy are:
- Add/Remove one or more existing Agents to the policy.
- Create/Edit/Delete a Module.
- Define/Edit/Remove an Agent plugin.
- Create/Edit/Delete an alert.
- Create/Edit/Delete an external alert.
- Add/Remove an existing collection.
- Add/Remove an existing Inventory Module.
- Link one or more adopted Modules to the policy.
- Implement the changes made in the policy.
- The various actions that can be taken will not be applied until the policy is implemented.
- If a policy is applied and elements are modified or deleted, the changes will not be made until the next application.
- All changes will be reflected in the window Queue , section from which the changes will be applied.
Agents
To add agents to the policy, you have at the top filtering options to select the agents you need in bulk by selecting them through the keys Ctrl or Shift. At the bottom, there is a list with all agents associated to the policy, including those that are yet to be deleted from the policy.
The agent list has a filter by group, sub string or application status.
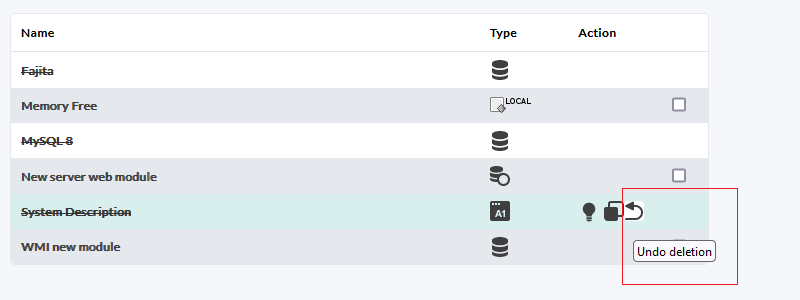
- When an agent is deleted, its name will appear crossed out and the delete button will be replaced by a button to undo the deletion and link the agent to the policy again.
- Of course, adding or deleting policy agents will take effect when the policy is applied on the Queue page.
Groups
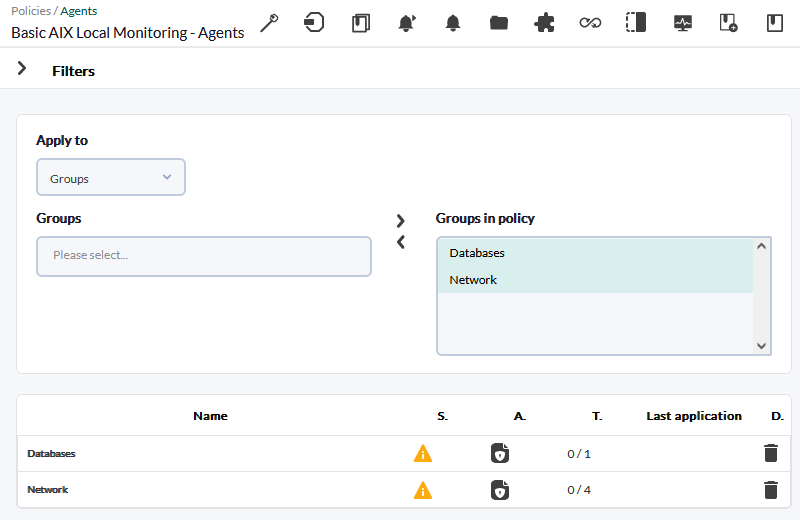
From version 760 onwards, if new agents are assigned to any of the groups configured in this option, they will automatically receive the policy settings.
Under Apply to select Groups and then browse and select the required groups. Then add Groups in policy to the list. In the lower part of the window a list of all groups associated with the policy is displayed, including those that are pending removal from the policy.
When a group is deleted it will appear with the name crossed out and instead of the deleted button a button to undo the deletion and re-associate the group to the policy will appear. The Agents that belonged to the group will also appear crossed out.
Adding or removing groups from the policy will not become effective until the policy is enforced.
Modules
The modules menu allows to configure the modules to be added to the policy.
In order to add modules, choose the type of module in the drop-down menu. Select one of the available ones, and click Create:
Creating a Data Server module
Data Server modules are modules added to software agents. In order to work with these modules, the agents must have remote configuration enabled.
Select the option Create a new data server module and click Create in order to create a new data server module.
Later, configure all module fields. The field called Data Configuration is the one that allows to enter the module's code which is applied to the agents subscribed to this policy. This change will be displayed in this particular agent's file, pandora_agent.conf.
Either fill out the fields, or if you defined previously a local component, select it. Finde more information about the description of said fields in Templates and components.
Creating a Network Server Module
To create a Network Server module, choose the option Create a new Network Server Module and click on Create.
Configure all the fields of the Module. The description of the fields in these screens are the same as explained in the Templates and components. Once you have filled in all the fields click on the Create button.
Creating a Plug-in Server module
Choose the option Create a new Plugin server module and then Create. Enter a name and then go to the Advanced options section and select under Plugin one of the registered plugins.
Once you have filled in all the fields, click on the Create button.
Use macros to configure dynamic parameters, such as an Agent's IP address with _address_.
Creating a WMI Server module
To create a WMI Server module, click on Create a new WMI Server Module and click on Create. Assign a name and then configure the Module fields.
For Target IP (address) there are three options:
- Auto: It is always updated with the first IP address that the agent has.
- Force primary key: The module is created with the agent's primary IP address at the time the policy is applied, if the agent's IP address is changed, the old IP address is kept.
- Custom: Allows you to assign a specific IP address in the policy, a text box will appear when you choose this option.
Check the description of the fields of these screens in the Templates and components section. Once all the fields have been filled out appropriately, click on Create.
For more information, check Windows remote monitoring through WMI.
Create a Prediction server module
The Prediction server must be enabled for this option to appear in the Web Console. The token should be configured like this: predictionserver 1.
To create a Prediction server module, select the Create a new prediction server module option and click on the Create button. Assign a name and then configure the Module fields. Except for the service ones, you can choose the modules of the same policy or allow to take the modules of each agent that is included in this policy.
Creating a Web Server module
To create a Web Server module, select the option called Create a new Web Server module and click on the Create button. Configure the Module fields and access the Web checks section. Later access Advanced options. To save use the Create button again.
In the particular case of Web modules, there are no components.
Modifying a previously created module
It is possible to modify all modules assigned to a policy. In order to do so, click on the module's name so the module configuration options are shown.
If the policy module is renamed, the name will be updated like any other field when the policy is applied.
Once they have been modified appropriately, click on Update.
If a policy module is renamed but a module with the new name already exists in one of the agents, this module will be adopted while the module with the old name is deleted.
Deleting an already created Module
To delete a Module from the policy and remove it from the Agents' configuration you must click on the trash can icon to the right of the Module. When you do so, the Module will remain in the list but with the name crossed out and the trash can button will become a button to undo the deletion.
If you need to delete several modules, you can select the box to the right of the trash can and click the Delete button.
Inventory modules
It is also possible to create inventory modules within a policy by picking one from the list of the available ones in the system, thereby picking an interval and the credentials.
Like the rest of the policy elements, if you remove an inventory module, it will appear crossed out. The “Undo” button will replace the delete one to undo the action.
For more information about adding remote inventory modules check Inventory modules.
Policy module states
When a module is created based on a policy is applied, it is referenced through the policy icon.
Linked Modules
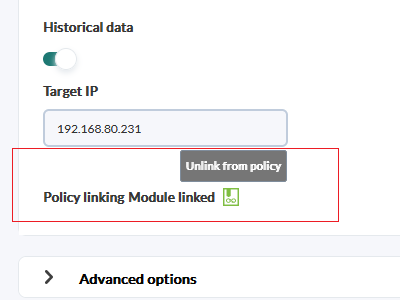
These modules are created in the policy and once the policy is applied, they are also created within the agent. You may link and unlink modules from the module setup page by clicking on this button.
Unlinked Modules
Unlinked modules are modules that belong to a policy but which are not affected by policy changes. They can be useful because the enable establishing individual exceptions to modules that belong to a certain policy. That way you may customize a specific agent module within a policy without taking it out from said policy.
Policy changes are only applied if the module is linked again.
Adopted Modules
These modules were created within the policy with the same name of an already existing module within the agent. When applying the policy, Pandora FMS uses the existing module's data instead of creating a new module and it will keep on being managed from the agent.
- Policy changes do not affect this type of modules.
- If you delete a policy, adopted modules are not deleted from the agents.
Linked adopted modules
An adopted module can be linked to use the definition set in the policy instead of the local one. That way, when managing the module from the policy, when there is some change the module changes too.
When an agent is deleted from a policy, linked modules are deleted and just the linked and linked adopted modules stay.)
Alerts
Adding Alerts
In order to add an alert, link it to one of the predefined alert templates or to a module that belongs to the policy and click on Add.
Modifying Alerts
It is possible to add actions to alerts, set them on stand-by mode or disable them. If you intend to change any module or template, delete it and create a new one.
Deleting Alerts
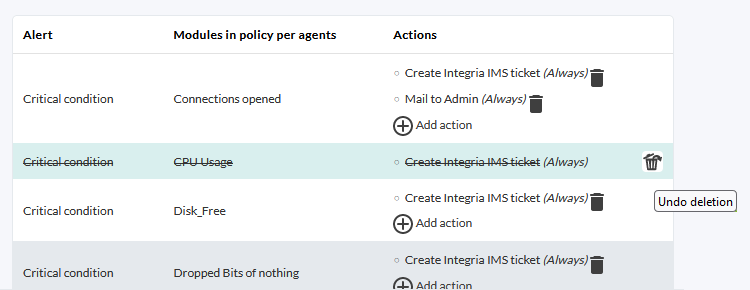
In order to delete an alert from the policy and remove it from the agents that have it installed, click on the trash button at the right of the module's name. Once done, the alert will still be visible but crossed out. Then, the “Delete” button will be replaced by an “Undo” button.
External Alerts
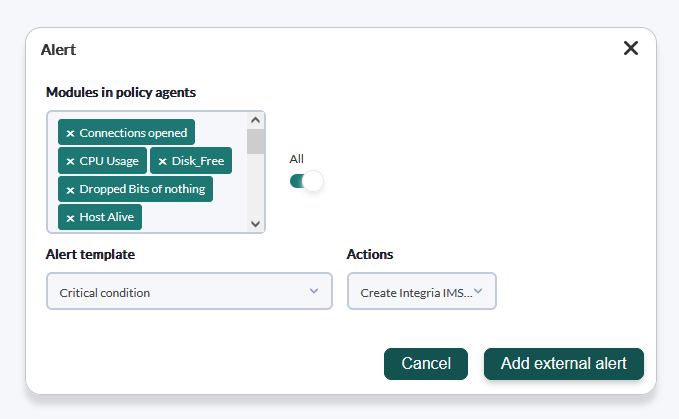
External alerts allow to link alerts to agent modules not included in the policy module's main list. It is sometimes very useful to assign alerts to some agent modules but not to all of them.
Adding External Alerts
In order to create an external alert, fill out this form.
This feature is available both in the Command Center (Metaconsole) and the nodes.
Modifying External Alerts
The only editing allowed is the addition or deletion of actions from the external alert. For other changes you will have to delete and create again.
Deleting External Alerts
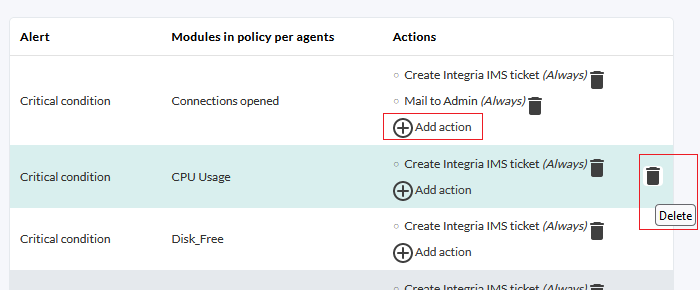
In order to delete an external alert from the policy and remove it from the agents that have it installed, click on the trash button on the right of the external alert.
The deletion system is the same as the one of the regular alerts. The deletion does not take effect until the policy is applied.
External alerts from several policies
One or several modules may have different actions from different policies.
This feature can be found in the Command Center (Metaconsole) too.
Agent plugins
The process to add policy plugins is the same as that of the agent. Check the section "Plugins in software agents".
In order for the agent plugin to be applied by a policy, the plugin must exist in the path specified by the agent.
File collections
File collections are resources used to massively deploy scripts or plugins to be used in Software Agents, Agent Monitoring Policies and Satellite servers.
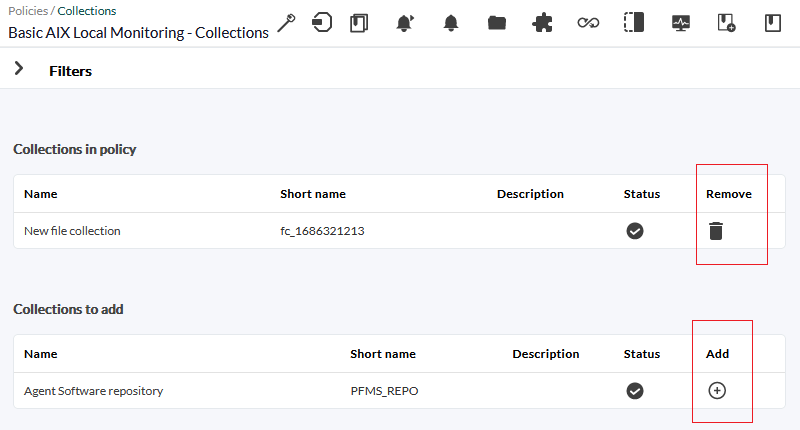
When editing a monitoring policy and clicking on the Collections tab, a list with the available collections will be shown. You will be able to add or remove to then apply the Queue of changes.
Policy management from Command Center (Metaconsole)
It is possible to manage policies from the Command Center. The process consists of distributing the information to all the nodes for each of the servers in charge of applying them. This distribution of information is complex because it is important that all nodes have the same data as the Command Center.


 Home
Home

