Operation
Monitoring
Assistant / Wizard
![]() The monitoring Wizard is used to configure agents, modules and their alerts from the Metaconsole.
The monitoring Wizard is used to configure agents, modules and their alerts from the Metaconsole.
Issues to consider
- The operation of modules will be implemented as both local and network components. This is not intended to create modules “from scratch”
- Agents that can be created from scratch, with a simplified configuration, setting up the remaining fields by default.
- Modules created in the instance cannot be edited in the Wizard.
- Modules created in the Wizard will not be distinguished from those created in the agent by other means. These modules can be edited and deleted from both the Wizard and from the instance setup directly.
Example:
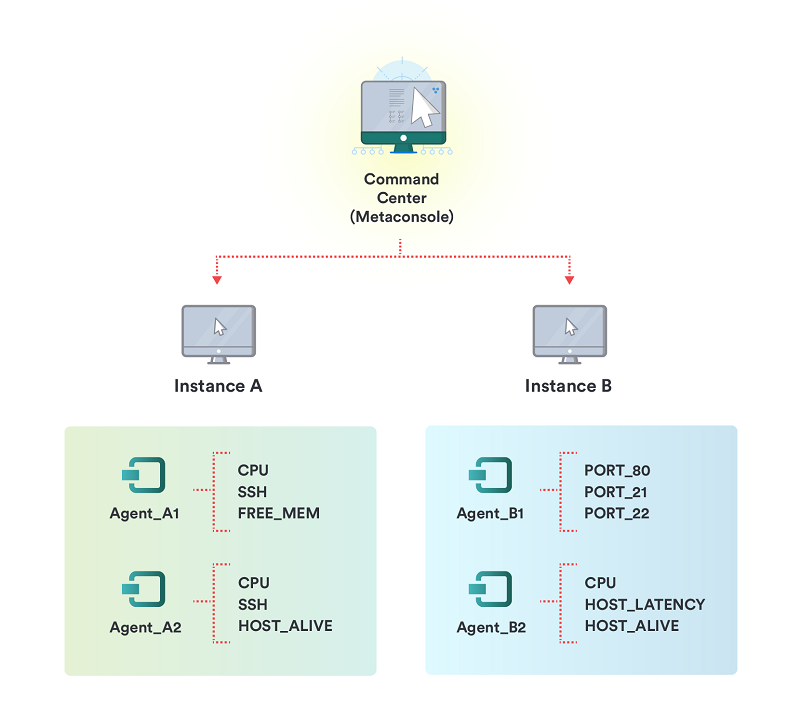
There is a metaconsole and two pandora instances, where you have full access (read and administration permissions).
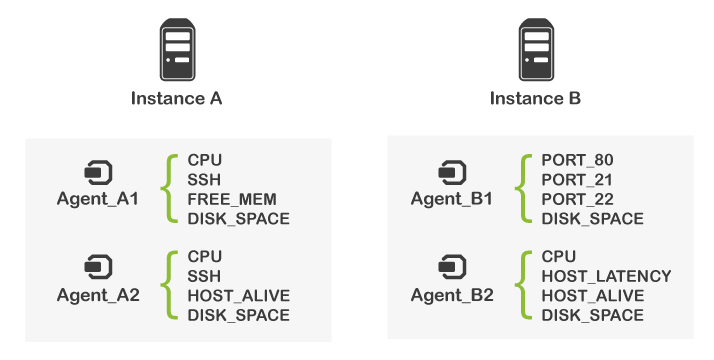
The instances have two agents with three modules each one:
The first time you enter the metaconsole wizard, you will see the agents, but not the modules:
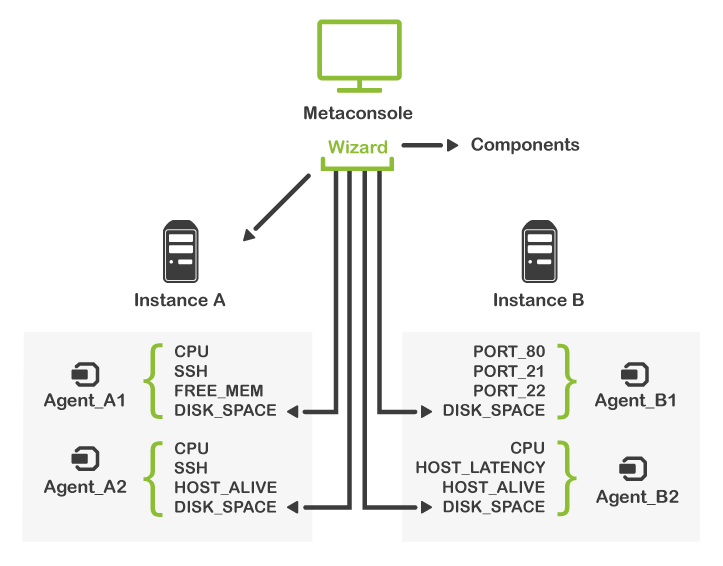
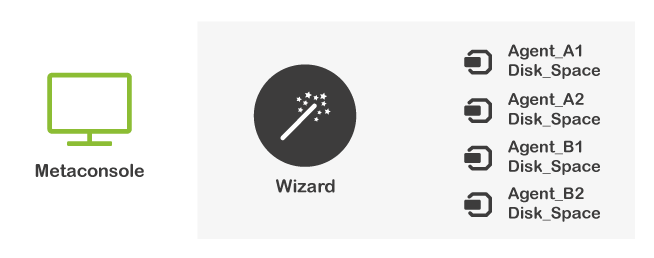
Create from the metaconsole a module to monitor the harddisk in each agent.
Now, from the wizard, you can see and edit the created modules:
And from each Pandora FMS instance you may see the modules and edit them.
A different case is that of the Metaconsole three view, where all modules you have access to can be seen, regardless of the actions of the Wizard. You may also view and delete (but not edit) the modules created from the Instance, when editing an agent from the Wizard.
Access
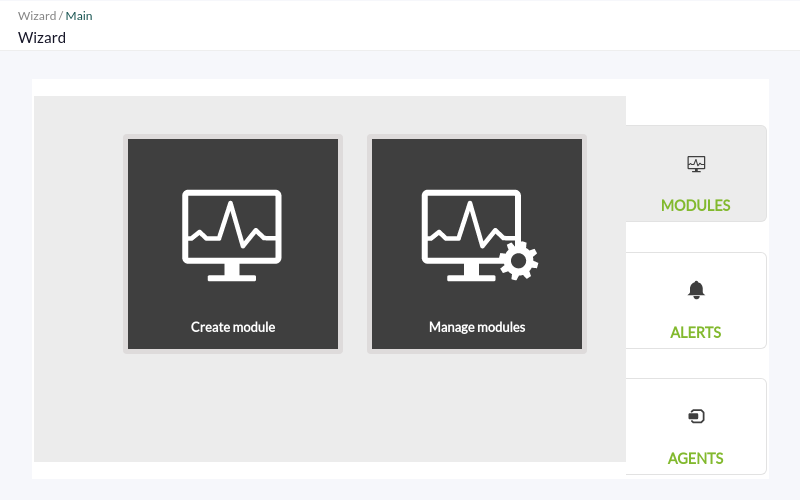
There are two ways to access the wizard:
- Direct access to the Wizard from the main page of the Metaconsole.
- From the top menu, in the monitoring section.
All users with wizard access will be able to access to monitor and alert configuration. Agent configuration must be activated “per user”, on demand.
Action Flow
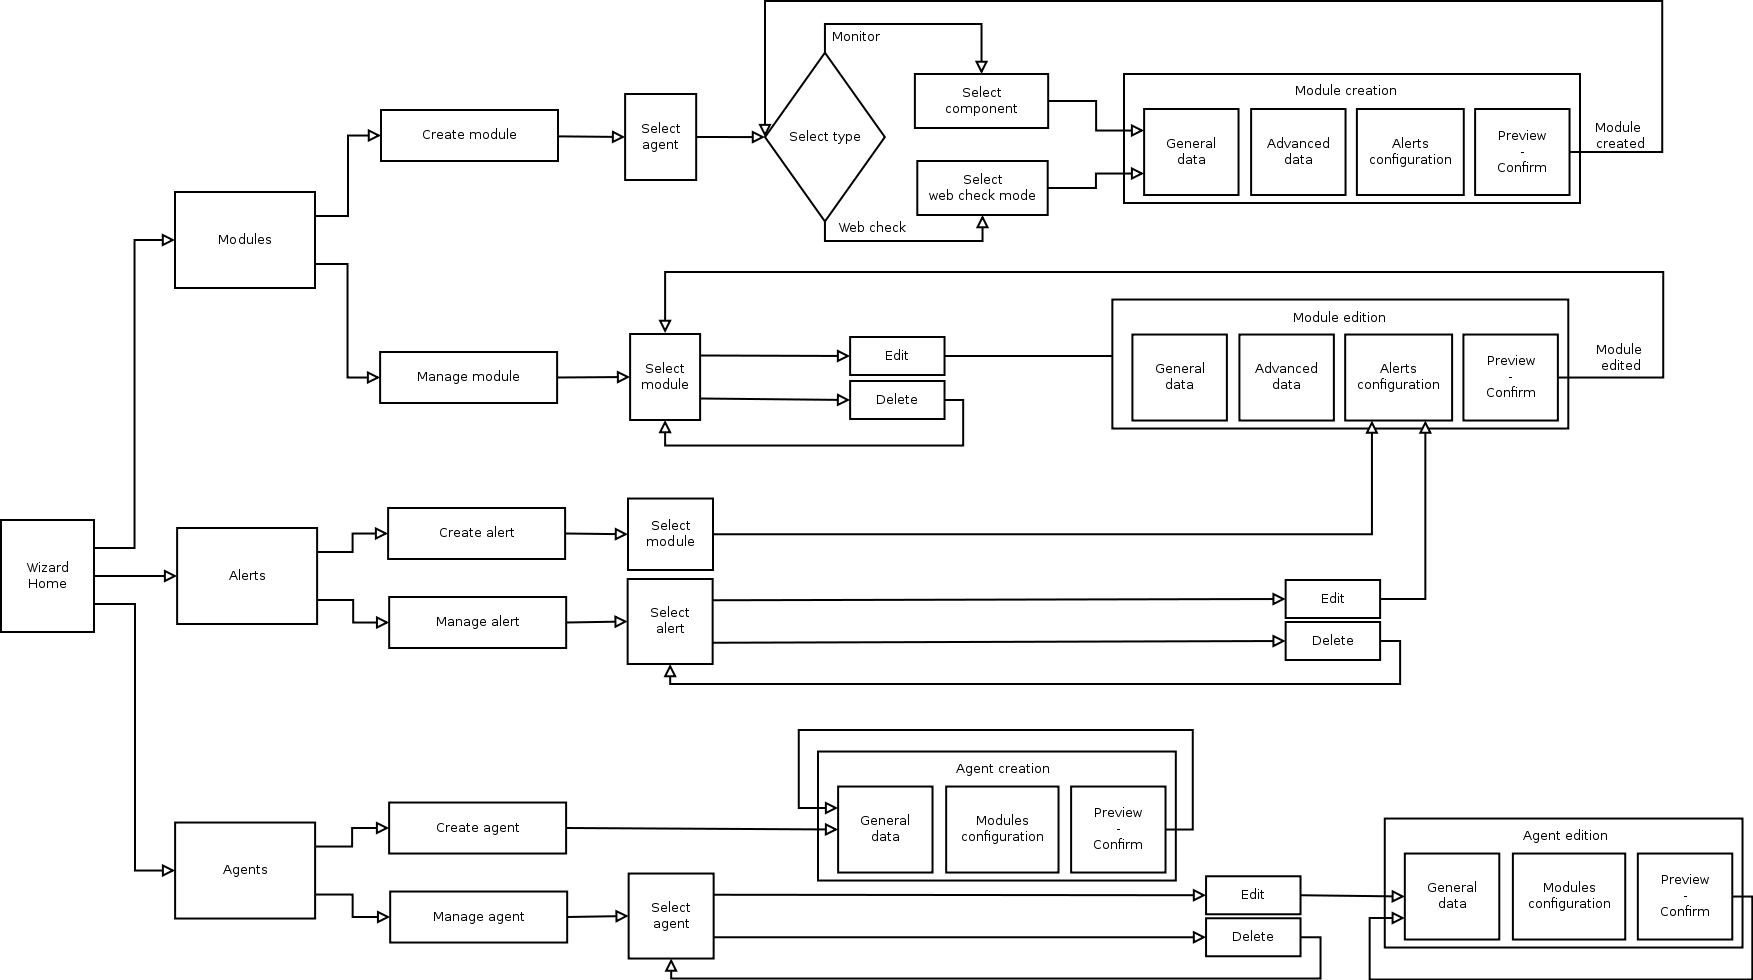
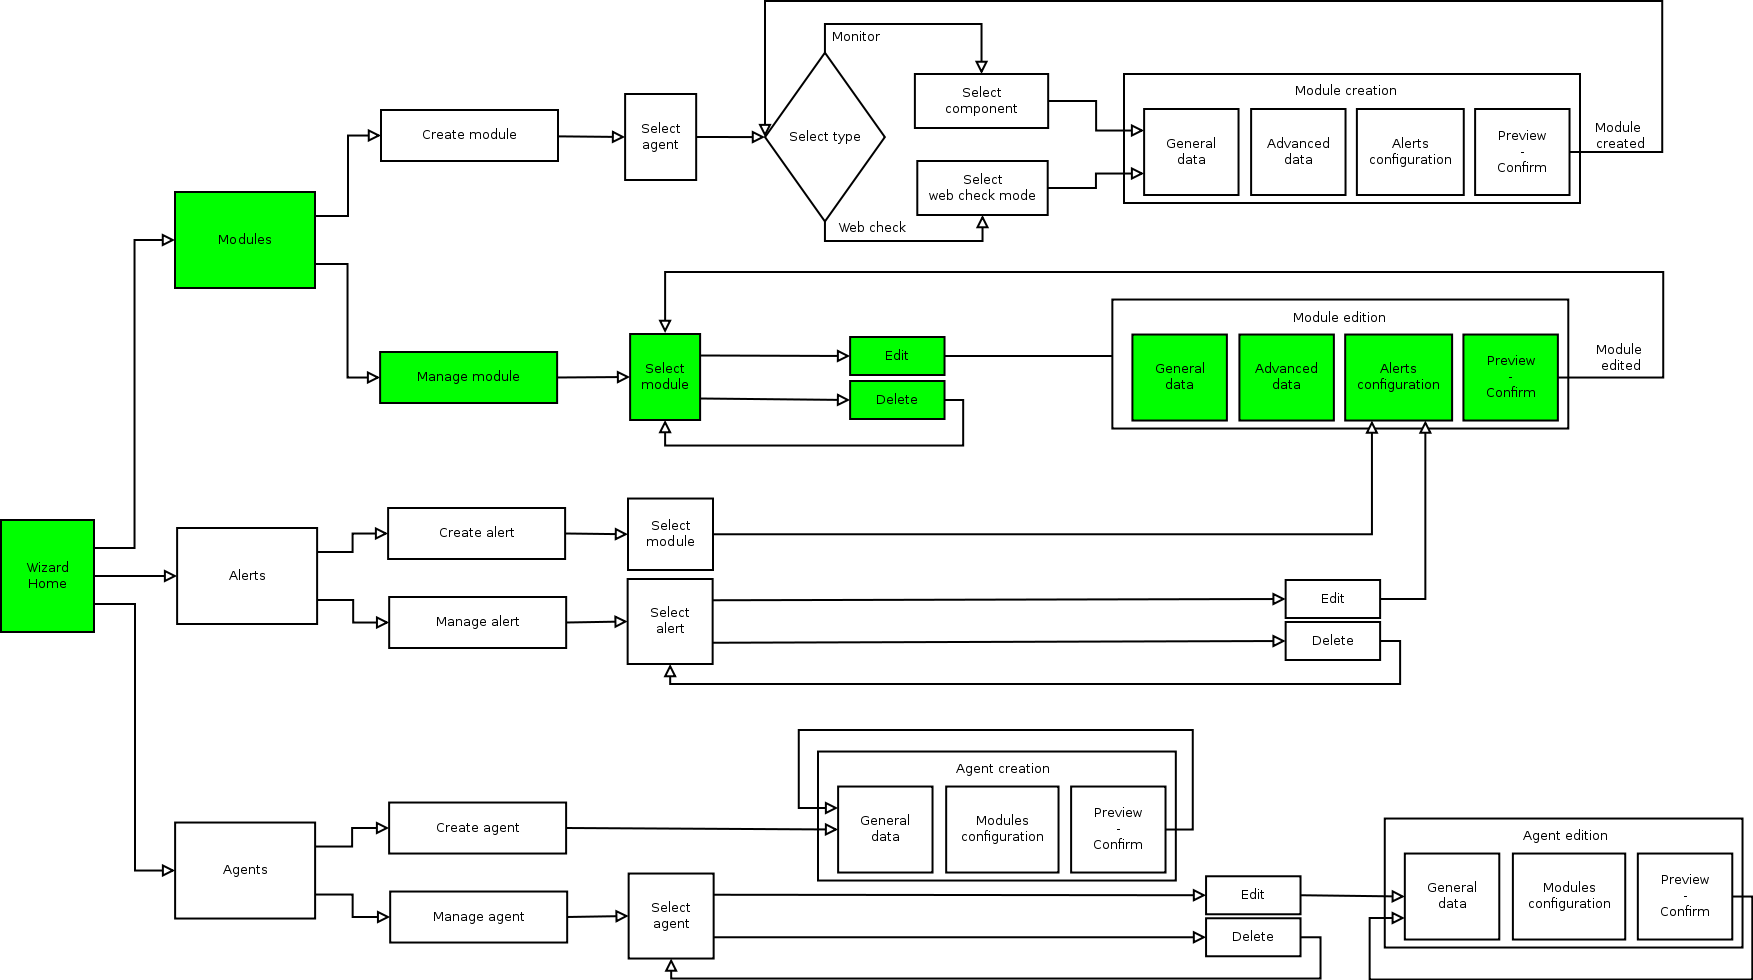
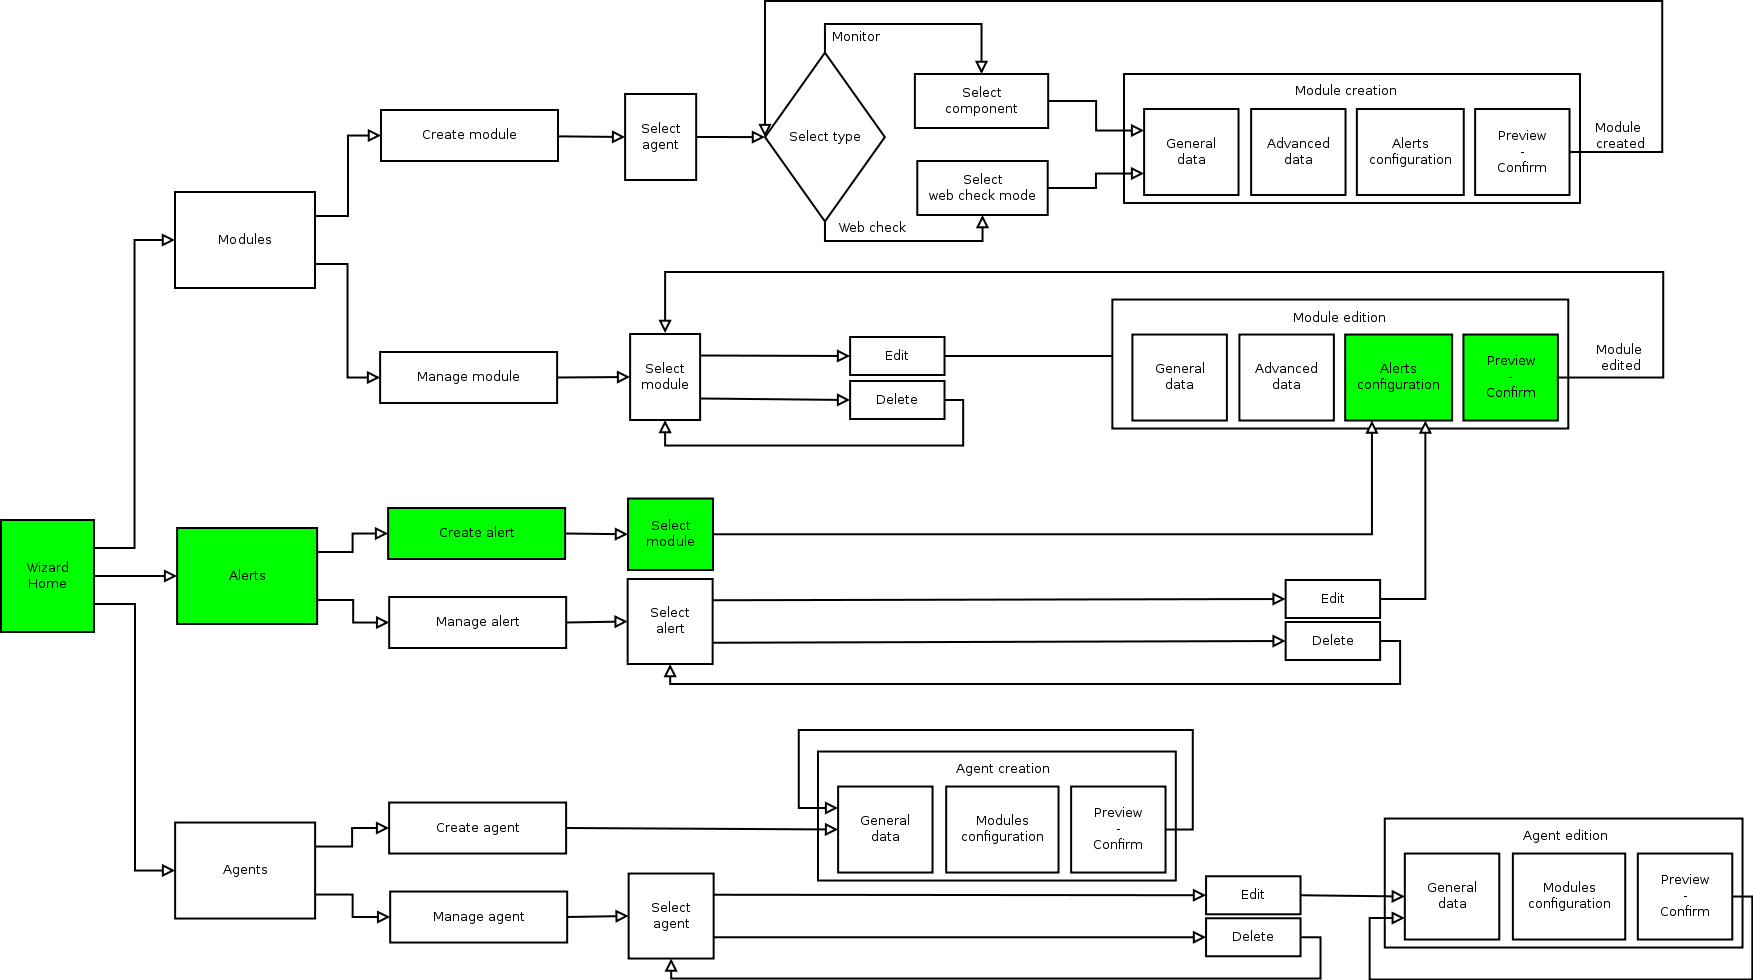
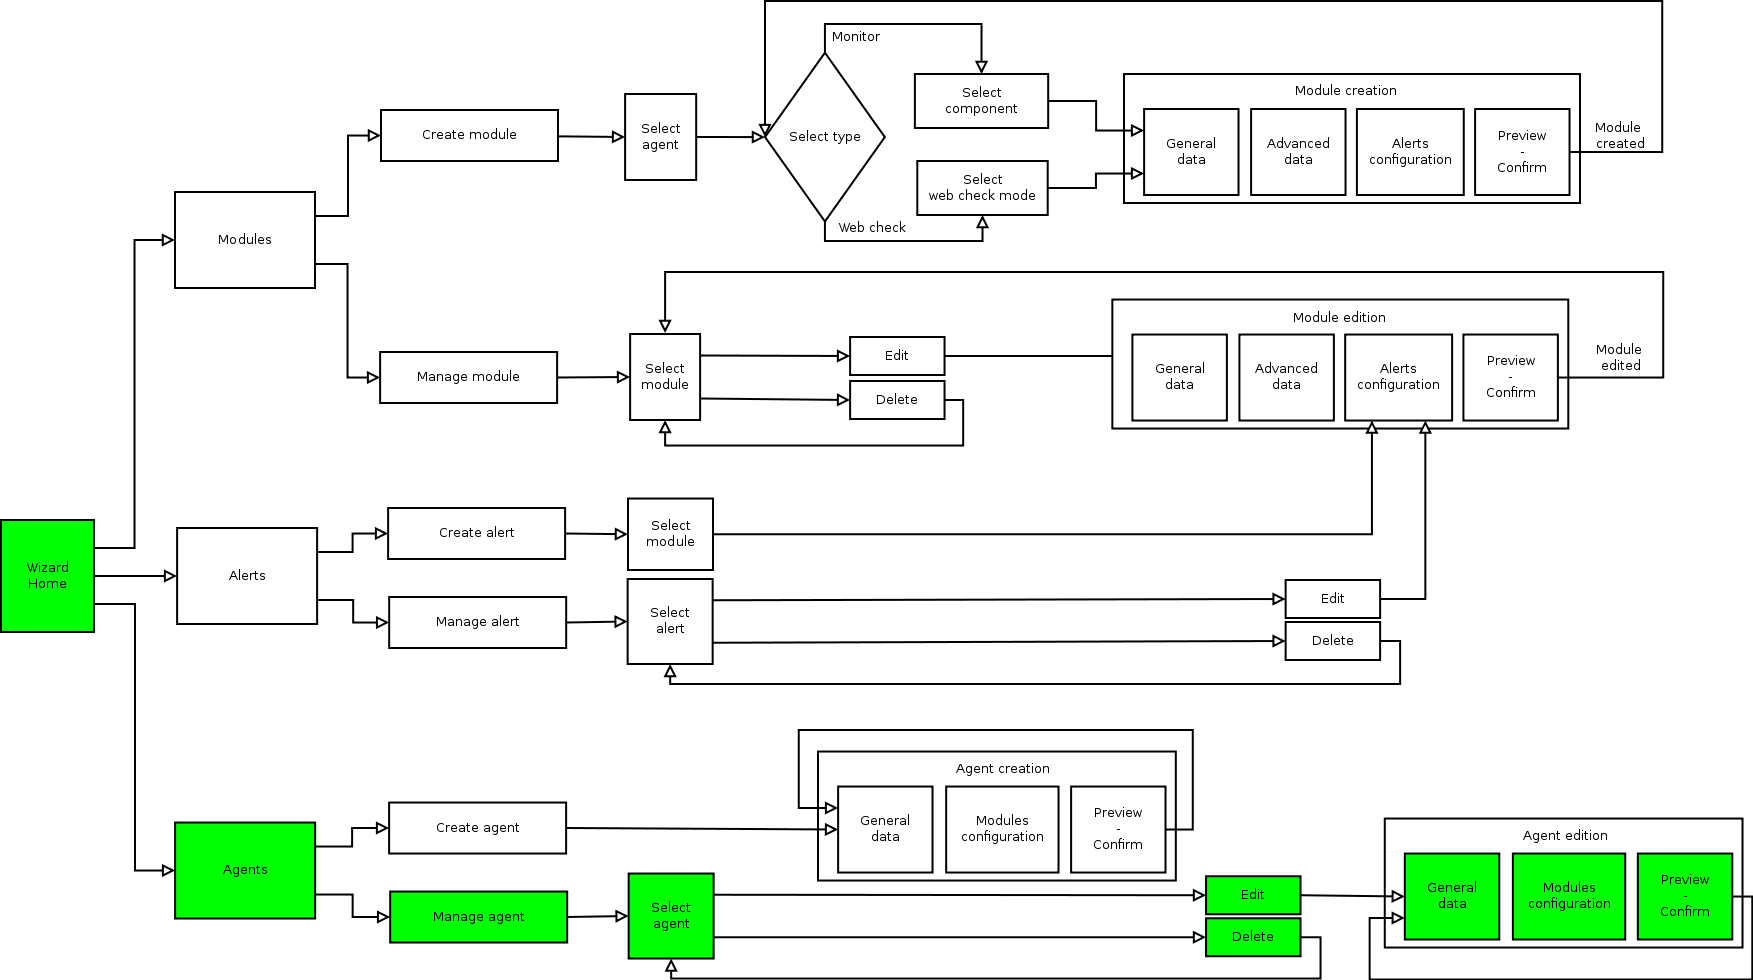
The following graph shows the complete flow of actions that are possible to be carried out in the Metaconsole Wizard:
Modules
Creation
In module creation the first step will be selecting one agent where to create it. It could be filtered by group or searched by name between the available agents.
The available agents will be those of each Instance where the new user has creation permissions (AW).
After selecting the agent, click on Create module. Now select the type of module to create:
- Monitor
- Web Check
Monitor Creation
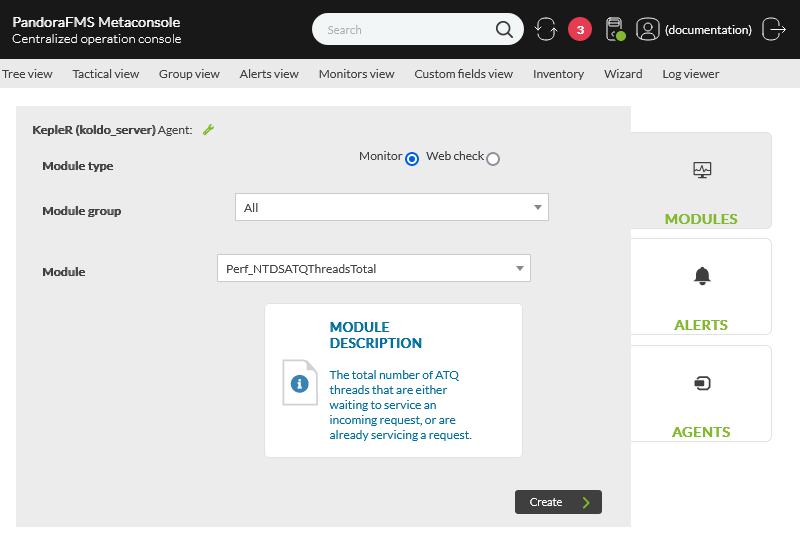
Monitor creation is done using module templates/components.These components are classified by groups:
The nature of the module (local or remote) will be visible for the user, and in the selection combos, the components of both types will be mixed.
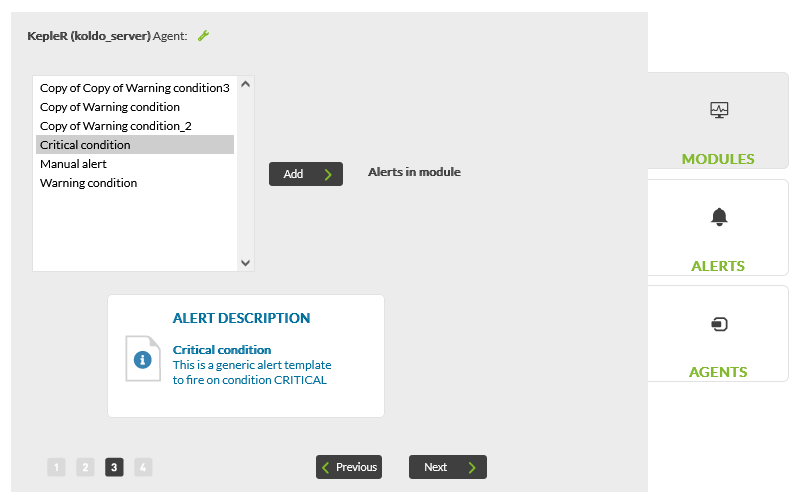
When selecting the component, its description will be shown.
To configure the monitor, click on Create.
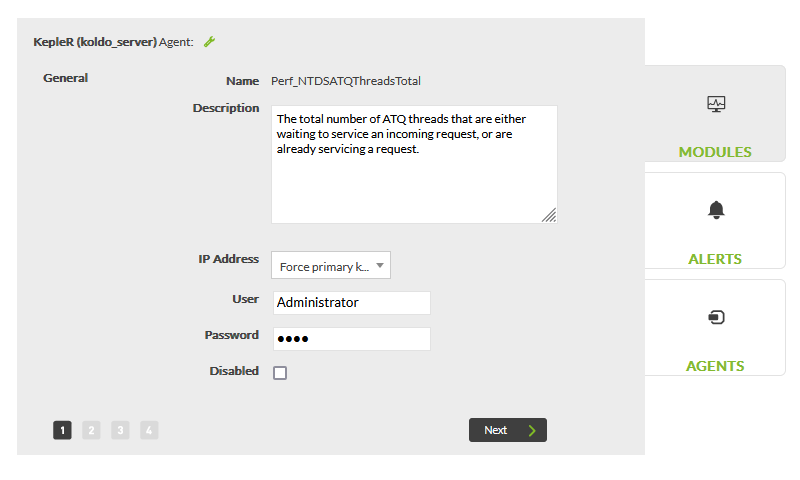
The monitor configuration consists of in 4 steps:
- General Configuration: Monitor general data (name,description,Ip,etc.).
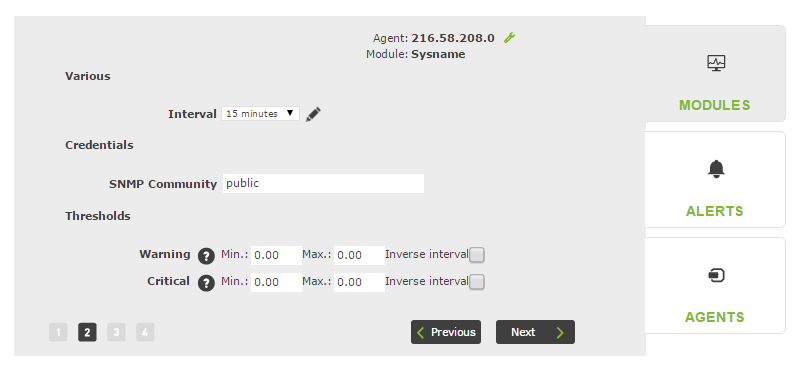
- Advanced Configuration: Monitor advanced data (thresholds, interval, etc).
- Alerts: An alert editor where to configure in the module alert template alerts you have permissions for.
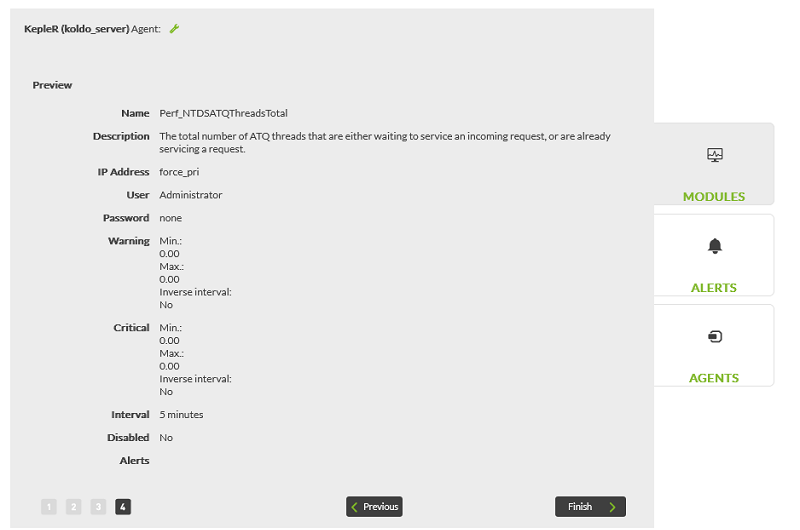
- Preview:' Data displayed in only one scree before finishing the process.
Creating web checks
For web check creation, the web check option must be enabled in “customize sections” from Metaconsole's Metasetup.
There are two different types of web checks:
- Step by step: Web checks are configured with a wizard without the need to know its syntax.
- Advanced: Web checks are raw configured in a box text. It is only available for users with advanced permissions.
If the user does not have advanced permissions, the advanced check option will not be available. It will lead you directly to configure a step by step check.
The web check configuration will be done, same as with monitors in 4 steps:
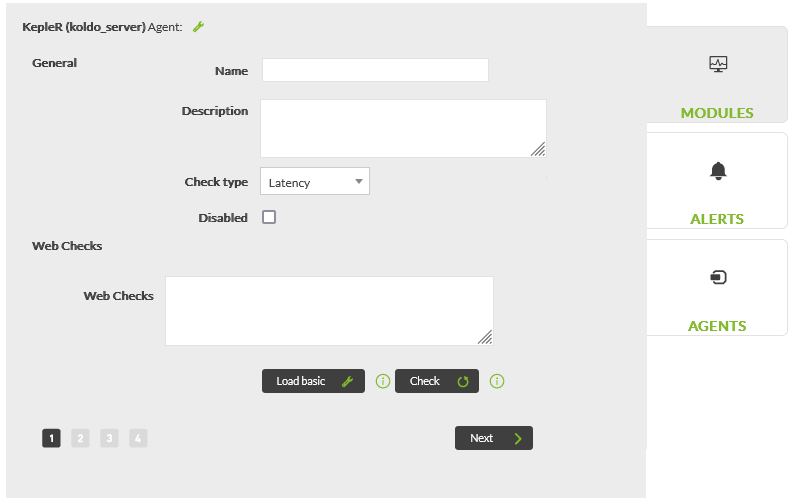
- General Configuration: Monitor general data (name, description, type, etc. As well as the check according to its modality).
- Step by Step Modality:
- Advanced Modality:
This kind of check can be:
- Latency: This check obtains the total time that went by from the first petition until that the last one is checked. If there are several checks the average will be shown.
- Response: This check obtains 1 (OK) or 0 (failed) as result when checking the whole transaction. If there are several attempts and some of them fail, then it is considered that the whole test also fails.
- Advanced Configuration:Monitor advanced data (thresholds, interval, proxy configuration, etc.).
- Modality Step by Step:
- Advanced Modality:
- Alerts: An alert editor where to configure in the module alerts of the alert templates you have permissions on. Same as in monitor creation.
- Preview:' Data shown on a single screen before finishing the process. Same as with monitor creation.
Module Creation Flow
Administration
The modules created from the Metaconsole Wizard can be managed (edited and deleted).
The modules created in the Instance will not be visible in the Wizard.
The first step is to select the module to manage. You may filter by group and search by agent to find it quickly.
Once it has been selected, click on Delete to delete it or on Edit to edit it.
When editing you will have access to a screen very similar to the creation one with the same 4 steps:
- General Configuration: Monitor general data.
- Advanced Configuration: Monitor advanced data.
- Alerts: Monitor alert edition.
- Preview:' The data modified in a single screen before finishing the process.
Local and remote module and web check management is visible for the user.The fields to edit change but the editing/deleting process is the same.
Module administration flow
Alerts
The alert editor is a direct link to the alert step in module edition. This is done to make its access and management easier.
In the alert options you may create an alert or edit one that is already created. Alerts could be only added or created in modules to which you have access from the Wizard. Or those modules created from the Wizard and you have ACL permissions on.
Creation
In alert creation, select a module where you wish to create the alert.
After selecting the alert, click on Create alert.
The following screen will be the edition of the module linked to the alert in the alert edition step.
Alert Creation Flow
Administration
The alerts created from the Metaconsole Wizard can be managed (edited and deleted).
Alerts created in the Instance will not be visible in the Wizard.
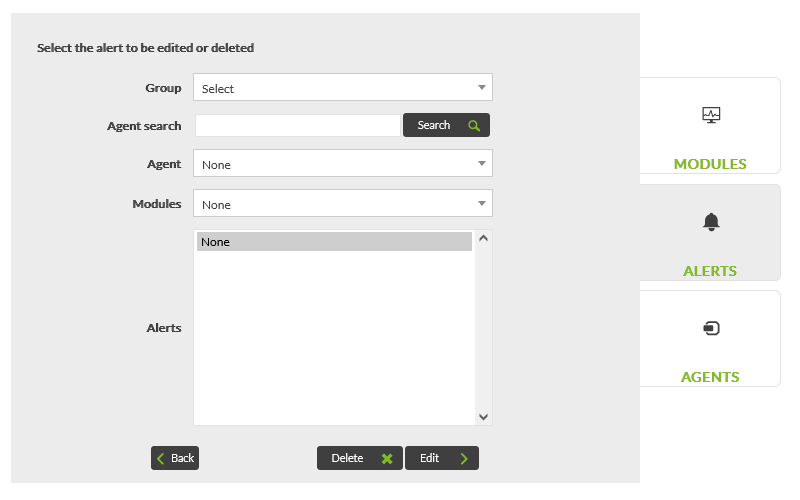
The first step is to select the alert to manage. Filter by group and search by agent to find it faster.
Once selected, click on Delete to delete it or on Edit to edit it.
If you click on Edit you will be redirected, same as when creating an alert, to the edition of the associated module in the alert edition step.
Alert management flow
Agents
Creation
Agent creation is done in one of the configured Instances.
Administrator users can select in which one to create it. However, the standard users will have an Instance assigned where they will create the agents in a transparent way.
This assignment is done at User management
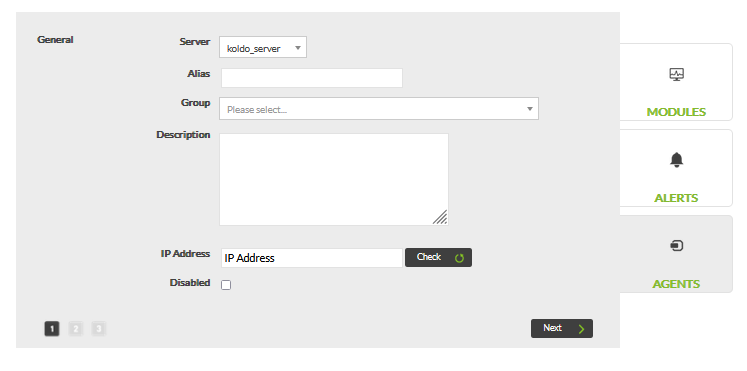
Agent configuration will be done in three steps:
- General Configuration: Monitor general data (name, description, IP, etc). And in case of being administrator, also the Instance where it will be created.
- Modules: A module editor, where to select from a combo the available network components and add them to the agent.
- Preview: Data displayed in a single screen before finishing the process.
Agent Creation Workflow
Administration
Those agents the user has access to through ACL configuration can be managed (edited and deleted).
The first step is selecting the agent to manage. Filter by group and/or search for a text substring, to find it easily.
Once the agent is selected, click on Delete to remove it, or on Edit to edit it. The edition screen is similar to the creation screen, with the same three steps:
- General configuration: General information about the agent.
- Modules: Edit the agent modules
- Previsualization:' Preview to make sure everything is ok.
Unlike module management, agent edition also shows the modules that have not been created with the Wizard
Agent administration workflow
Differences depending on access level
The modules and alerts have configuration differences depending on the access level to the Wizard that the templates and components they were created with have and the access level of the user that configures them. Agent settings have fewer restrictions but also depends on the access level.
Monitors
Monitor configuration will change depending of the access level on the component used: basic or advanced.
When the access level is “Advanced”, there will be some additional fields:
- The name (at the “basic” level, it takes the name of the component).
- Monitor units.
- Macros (in local modules or remote plugin modules' cases). At the basic level, it will be crated with the default values.
WEB Checks
When setting up a “webcheck”, user with “advanced” access can choose between the “step by step” or “advanced” configurations.
Advanced checks are manually configured and write the ceck with their syntax in a text box. In addition, created module units can be defined.
Alerts
In the alerts, the Basic or advanced levels of the associated template only affect its visibility. Basic level alerts can be seen by user that accesses the wizard, and the advanced level ones only by users whth advanced level access.
It is the component level the one that defines the alert settings in their module. A module can be associated with any of the alerts visible for the user.
If it is a basic component or a styep-by-step web check, the alerts will be created with a default action assigned, which cannot be changed.
If it is an advanced component or a complex/advanced WEB Check, when assigning an alert the default action will appear but any desired action can be assigned.
Agents
Agent management will give access to all agents accessible to the user, depending on its ACL configuration. Regardless of the user access level (advanced, basic), or whether the modules were created with the wizard or in the instance.
The only restriction about this, comes when adding modules in the edit/create view. This setup is done only by using only network components and with basic level. The reason for this behaviour is because this kind of modules do not have any configuration, and the advanced wizard level modules usually need extra configuration.
Centralised managment
Agent management
Agent movement
allows you to relocate from one node to another. Use the group and/or name filters to locate and select the agents you need to move to another node. Click on the Move button to save the changes.
Provisioning management
- ROUND ROBIN: It uses the Round-robin planning method to distribute, in an equitable way and in a rational order, all the new Pandora software agents that reach the Metaconsole. The distribution of the agents will be done in a circular way, assigning the corresponding server to each new agent.
- LESS LOADED: The new agents will be dynamically assigned to those servers with less load.
- CUSTOM: In the customized classification, we will be able to define our own classification rules, based on certain parameters retrieved from the information reported by the agent (name of the agent and its IP address).
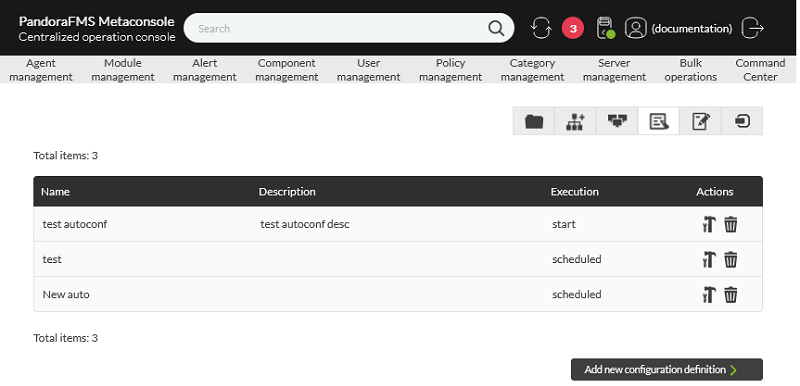
Agent autoconfiguration
It allows you to add and/or edit new automatic configuration rules for agents, such as group membership, alerts, etc. See the section “Automatic configuration of agents” to find out how it works together with each of the nodes.
Group management
Allows you to edit or delete agent groups on all nodes.
Editing or deleting groups can cause problems with synchronization.
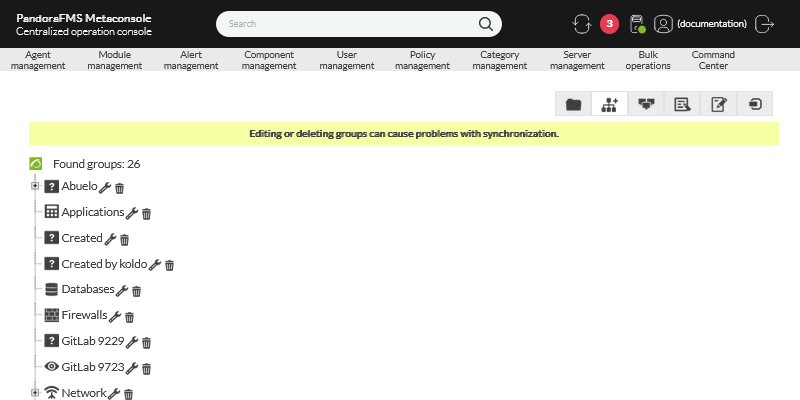
Tree group
Like Group management, this option allows you to edit or delete groups of agents in all nodes but the graphical interface is in a tree form.
Editing or deleting groups can cause problems with synchronization.
Collections
File collections are containers of remote and local files that are in constant synchronization. Generally they are used in agents or to deploy in a massive way the scripts or plugins that later will be executed by the software agents. See the “Collections” section.
Module management
Component groups
Allows you to create, edit and delete groups of components in the nodes.
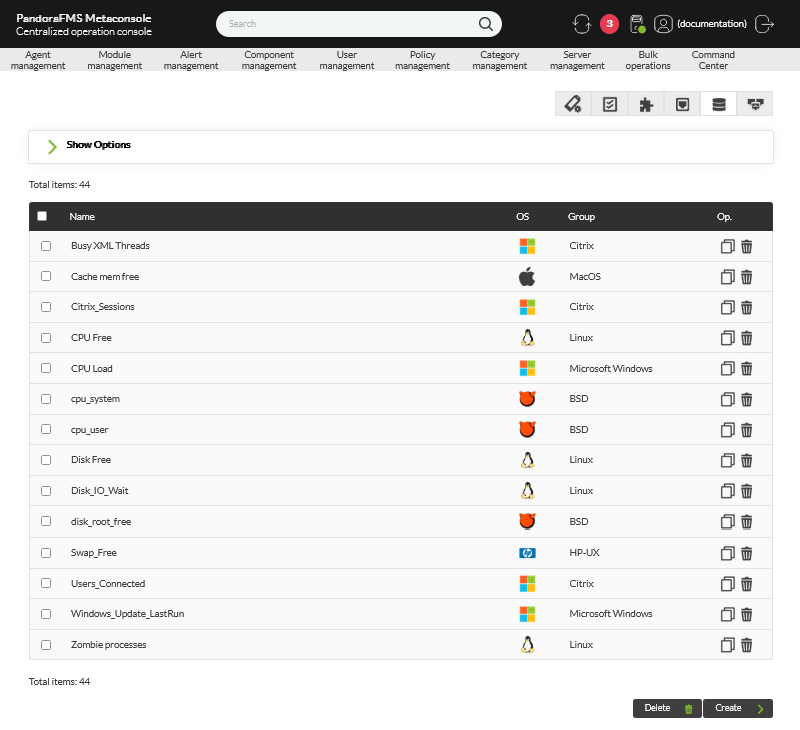
Local components
Allows you to create, edit and delete local components on nodes.
Network components
Allows you to add, modify, or delete network components.
Plugin management
In the plugin administration you can create, edit and delete these resources for the nodes centrally.
Inventory modules
Use the centralized option of inventory modules to create, change, or delete this component on the nodes.
Plugin registration
It allows to add server plugins. See the Pandora FMS component library or the creation of these components.
Alert management
Templates
Allows the creation, copying and deletion of alert templates. By expanding the Show options option you will be able to filter the alert templates by type (Type) or template name (Search).
Actions
To create, copy, edit and delete the alert actions for the nodes. By expanding by clicking on Show Options you can search, by key text, the name of the action (Search) and/or by groups of agents (Group) and/or alert command (Command).
Commands
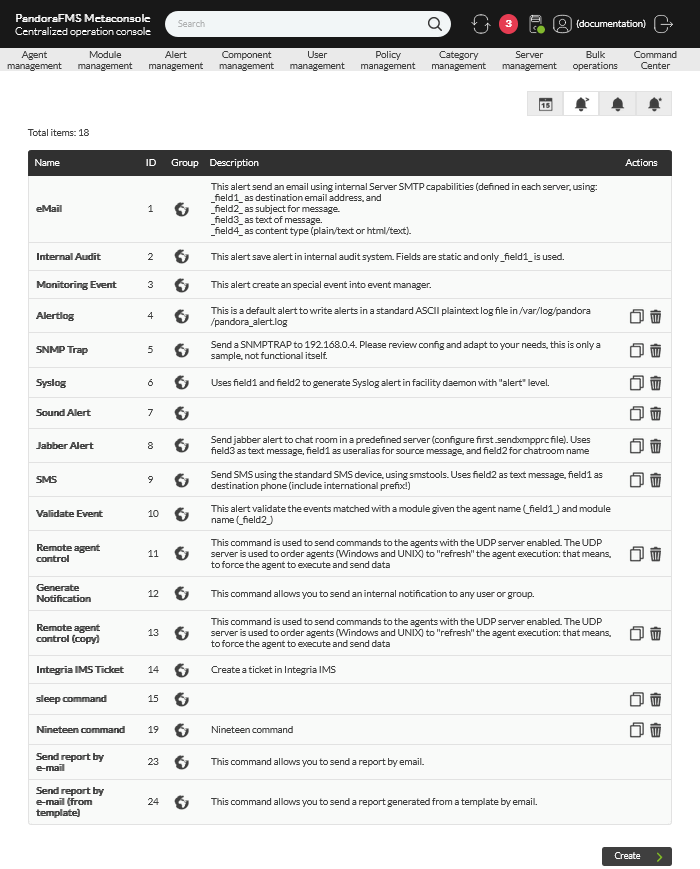
This section allows you to add, copy and delete alert commands. Note that there are system alert commands that cannot be copied or deleted.
Calendar
To edit the default calendar click the icon ![]() . To add special days click on the icon
. To add special days click on the icon ![]() . You can also create your own calendars with the Create button.
. You can also create your own calendars with the Create button.
Component management
Tags management
Shows a list of tags used in the modules and their count. In the Actions column you can modify or delete tags. In Show options you can filter the list by name or description.
To add new tags click the button Create tag.
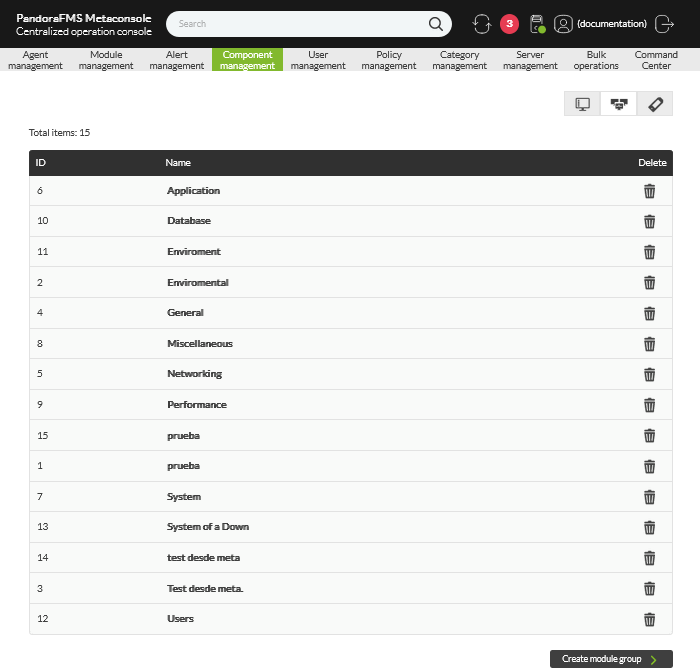
Module groups management
To manage module groups. Delete a module group with the ![]() corresponding icon, to edit click on the name (under the Name column). With the Create module group button you can add a new module group.
corresponding icon, to edit click on the name (under the Name column). With the Create module group button you can add a new module group.
OS Management
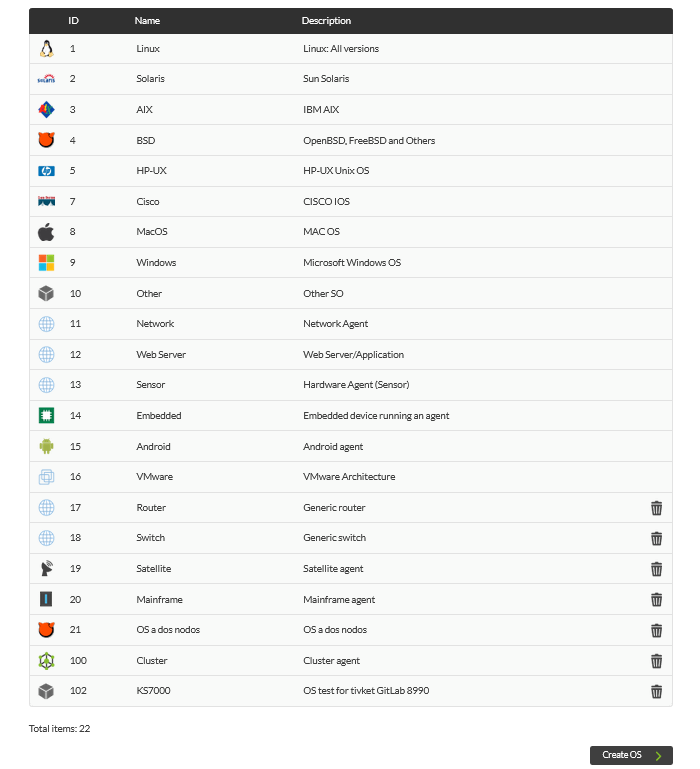
Pandora FMS manages a basic list of operating systems to be assigned to the agents. Some of them are system operating systems and can't be deleted, but you could, in any case, edit them by clicking on their name (Name column). Add the operating systems that you use through the Create OS button.
User management
User management
For the nodes and their users a complete list is available. You can filter by the group to which the users belong or enter a keyword in the text box to search by user name, full user name or by email address registered in PFMS.
For each user listed, in the options column (Op.):
- Click the icon
 to disable a user.
 - Click the icon
 to edit a user's details.
 - Click the icon
 to delete a user.
 - To create a new user click the Create user button.
Profile management
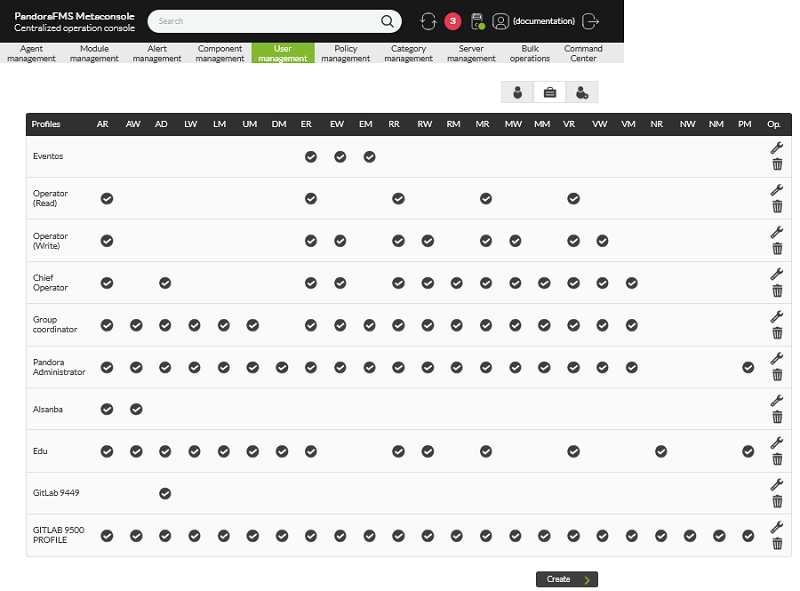
For the complete administration of user profiles. See the section “Profiles in Pandora FMS”.
Edit my user
Using this section you will be able to edit the user data with which you logged in the Metaconsole.
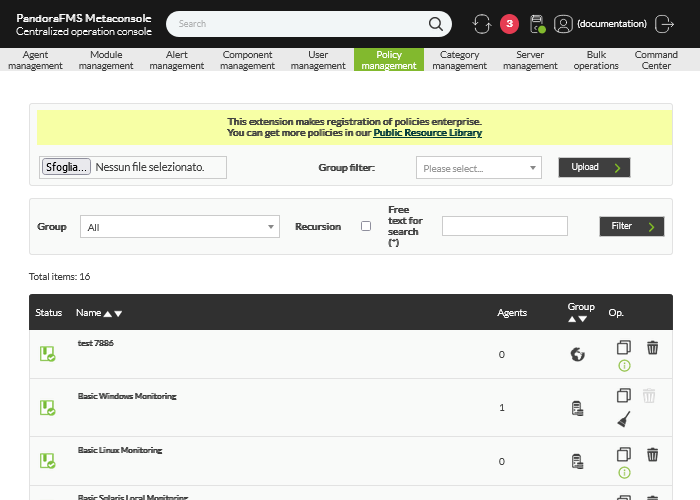
Policy management
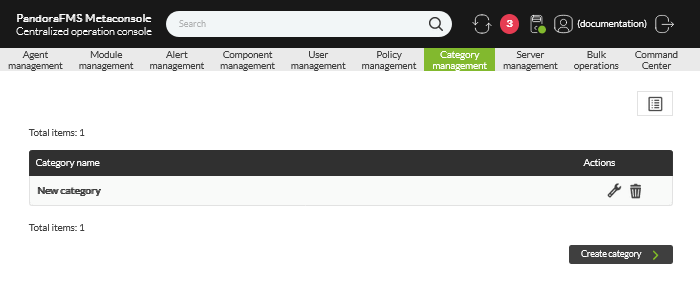
Category management
Allows you to manage module categories (advanced options) centrally for nodes.
- Click the icon
 to edit a module category.
 - Click on the icon
 to delete a module category.
 - To create a new module category click on the Create category button.
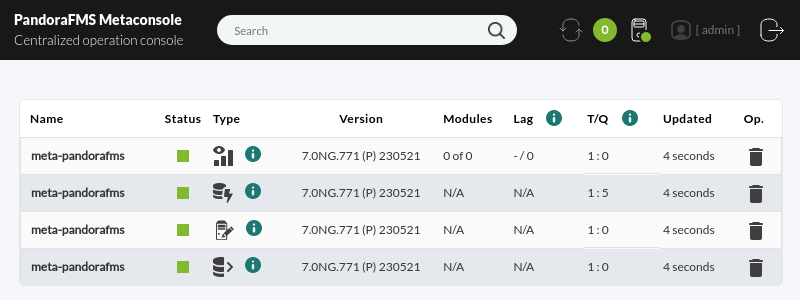
Server management
It provides information about the type, status, version, etc. of the servers in Metaconsole. To know the status of PFMS servers in the nodes use the Command Center.
Bulk operations
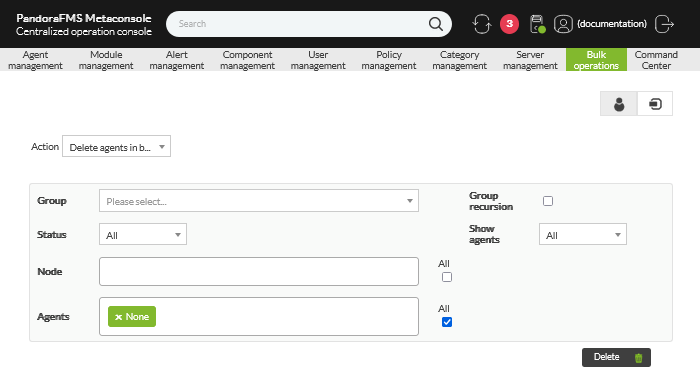
Bulk agent operations
To perform massive operations on agents. Using the list in Node you will be able to select the node to apply massive changes on its corresponding agents.
- By default in Action is selected to massively delete agents.
- You will also be able to edit agents in a massive way.
When editing agents in bulk, the fields that you leave blank (No change) will remain unchanged.
Bulk user operations
To perform bulk user modifications.
When editing users in bulk the fields left blank (No change) will remain unchanged.
Command Center
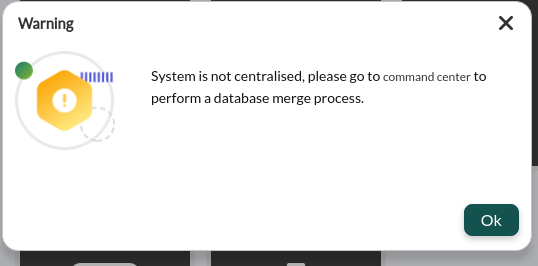
From Pandora FMS version 756, the synchronization system for environments with centralized mode has been redesigned from scratch, making it faster and more efficient, since the changes will be replicated to the nodes automatically without the need for manual synchronization, as it was the case up to now.
This change deems the previous system outdated, so in environments where it was active, it will have to go through the previous automatic merging system to use the new centralization system and be able to guarantee data integrity.
When updating, all already centralized Metaconsole environments will be forced to go through the new Merging tool section located in Centralised management to be able to be centralized again correctly.
For Command Center installation, and everything related to it, please visit the topic dedicated to it.
Extensions
Cron Jobs
To be able to access this Metaconsole action, go to Extensions → Cron Jobs. First, configure correctly the “crontab file” like this:
Once done, perform the desired execution tasks. There is more information in the following link.


 Home
Home

