
15. Visual Console Creation
Creating a Parent Visual Console
In this first map, we are going to add the status of several agents distributed across a world map. This can be done manually, one by one, or through the Wizard. To facilitate its creation, we are going to use the Wizard in this example.
The first thing we need to do is create a new map, which we will call World Map.


Once created, we click on the Element Wizard:
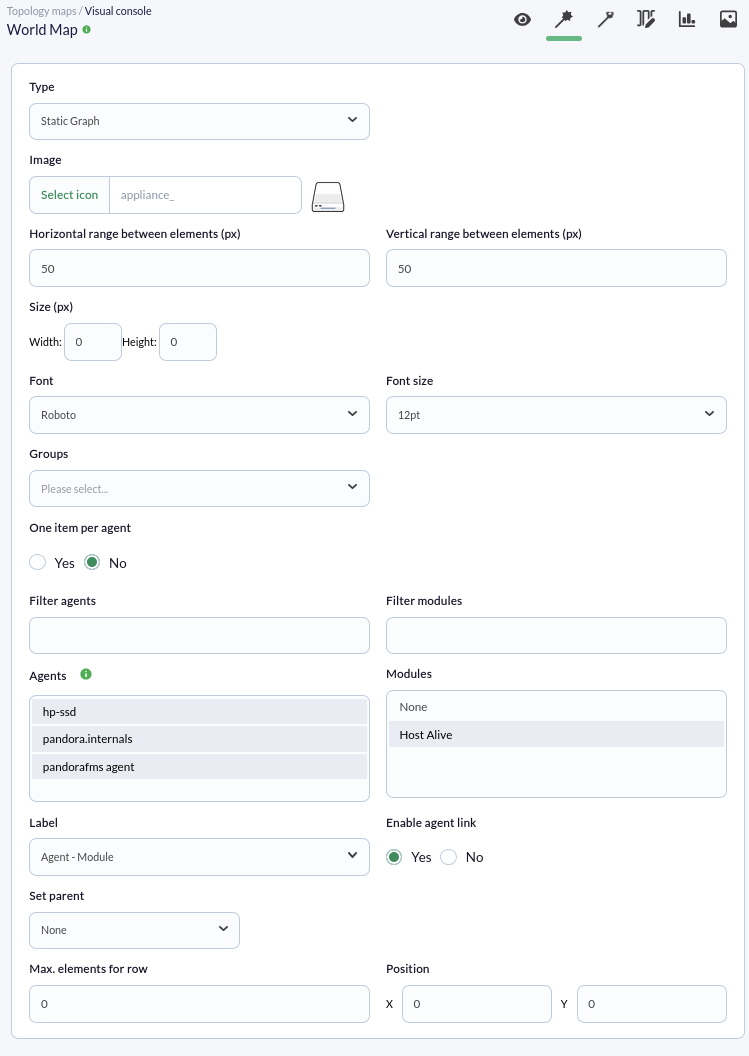
In the Wizard, we select the element type—in this example, Static Graph (previous screenshot)—the image we want to use, whether we want to use one item per agent or per module, and we select the agents along with the modules to be added from the list that appears.
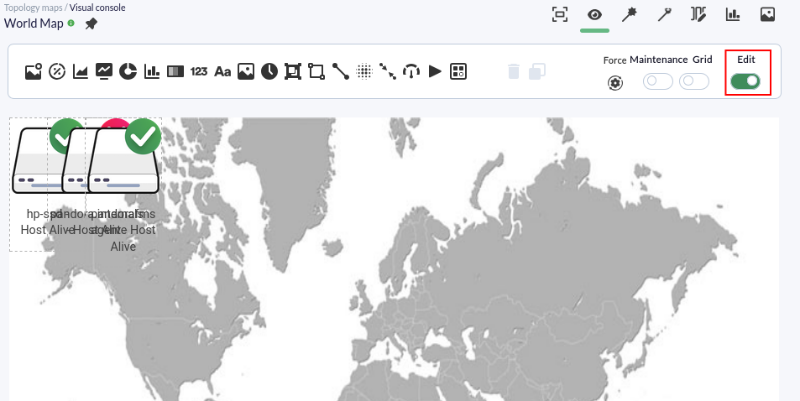
We click the add button, go to the "View" tab, and all the created elements will appear on the map, as shown in the following screenshot:

To be able to move or add elements, we must enable the Edit token.
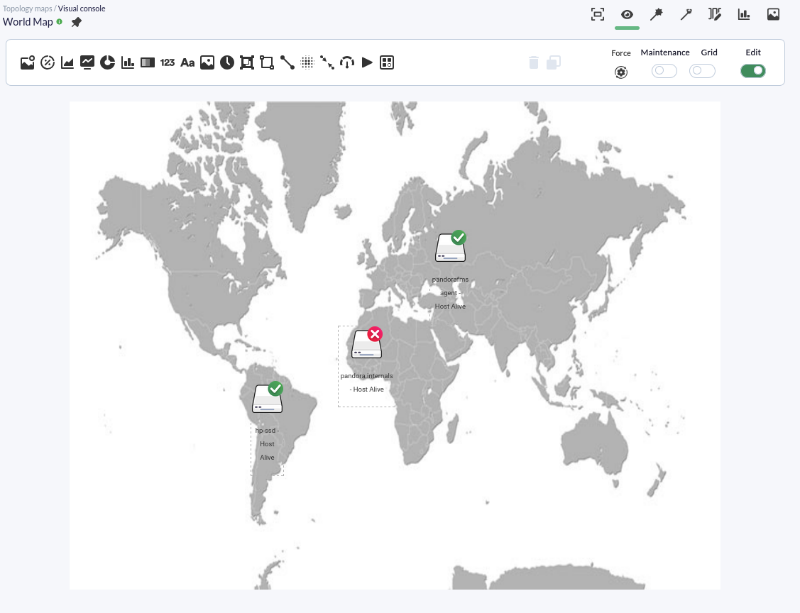
We move all elements to where we want them positioned on the map by clicking and dragging them across it.
Creating a Child Visual Console
In the second map, an element will be created to indicate the status of one of the main agents, with all its modules linked to it.
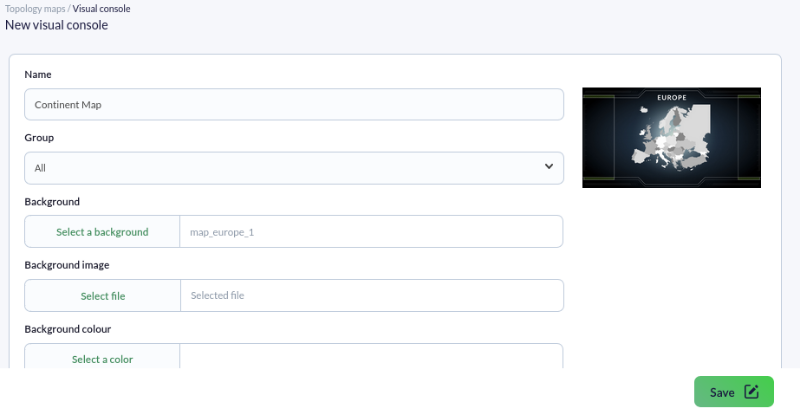
The first step is to create the new map just as we did last time:
Once created, we add the element that shows the agent status by selecting the Static image element type:
We also create a chart by choosing the Basic chart element, adding the agent and module whose graph we want reflected.
We have now created the main element of the map; now we are going to create a new element for each of the modules existing in the agent. To do this, we will use the Wizard for configuration. We select the agent's Static Graph and the indicated modules. We label it with the module name and assign it a previously created parent on the Visual Map—in this case, the previous element we added.
After creating all these elements, they will appear linked to the main element, and we can move them by dragging them directly with the mouse to the desired position.
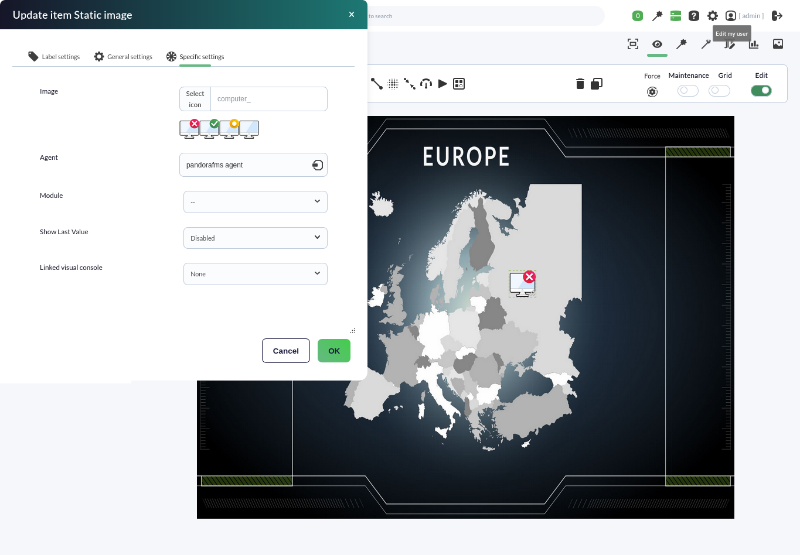
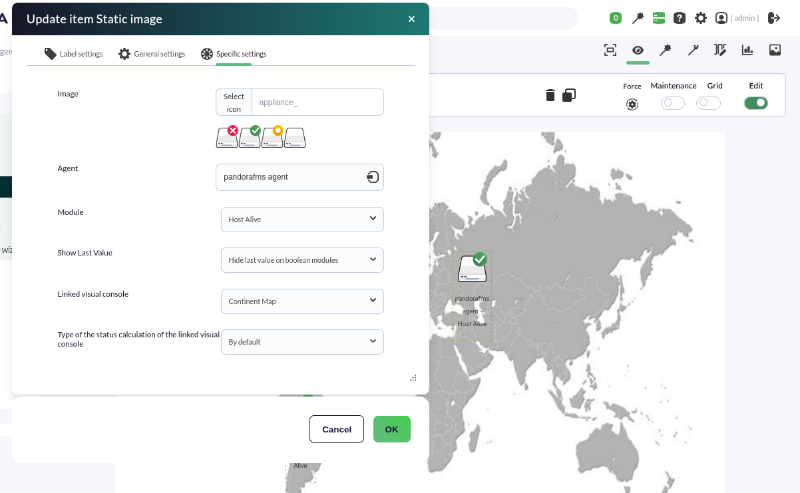
Linking Between Maps
In the previous steps, we created the two maps. In this step, we will show how clicking on the element located over Spain on the "World Map" directly opens the "Continent Map".
To do this, we open the World Map in edit mode by double-clicking on the element to open its editor. We click on advanced options and, in the Linked visual console option, we select Continent Map. We update the element by clicking the OK button.
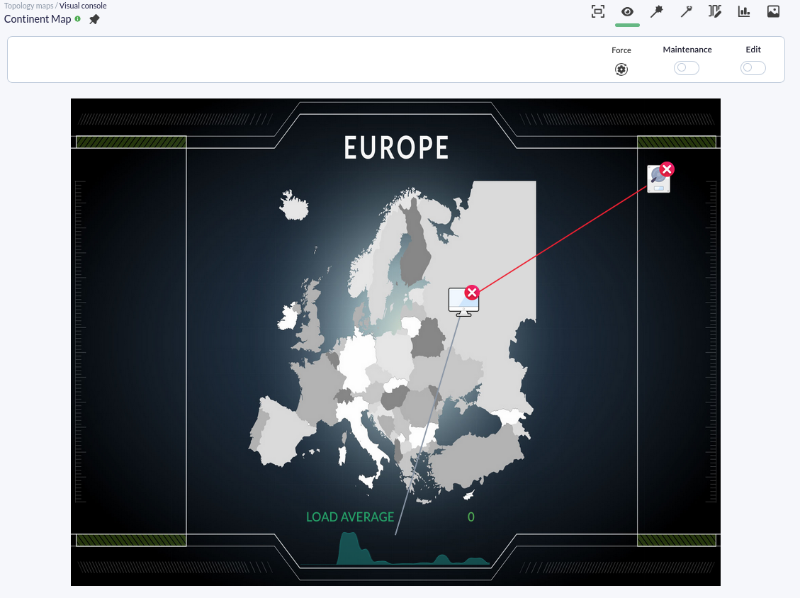
Returning to the World Map view, we click on the element located over "pandora fms agent" and the Continent map will open directly. Even if only one element in the map were red, the icon representing the Continent map on the parent map would also appear in red.
Are you not achieving the results explained in this chapter? Access the help or support section.