Plugin Configuration
Before running the plugin to export SIEM alerts to MISP, you need to locate the script, set permissions, and configure API credentials for both platforms.
1. Script Location and Permissions
It is recommended to place the script pandora_to_misp.py in the standard Pandora FMS server plugin directory.
Upload the file to the server and run the following command to make it executable:
chmod +x /usr/share/pandora_server/util/plugin/pandora_to_misp.py2. Script Parameters
The script works via command-line arguments. It includes an auto-classification engine (Triage) that reads alert content and automatically assigns threat level, MITRE ATT&CK tags, and category. You can override these values using optional parameters.
Mandatory Parameters:
-
-uor--url: URL of your MISP API instance. -
-kor--key: MISP API Key. -
-aor--agent: Name of the SIEM agent that generated the alert. -
-nor--alert-name: Descriptive name of the alert. -
-dor--alert-data: Raw alert data (raw log). The script will automatically extract the attacker IP from this.
Optional Parameters:
| Parameter | Description | Default Value |
|---|---|---|
-t, --tlp |
TLP (Traffic Light Protocol) level. Example: tlp:red, tlp:amber. |
tlp:green |
-s, --sharing |
Event sharing level in MISP (0=Your Org, 1=Community, 2=Connected, 3=All). | 0 |
-l, --threat-level |
Force the threat level, ignoring auto-triage (1=High, 2=Medium, 3=Low). | Auto-assigned |
-c, --category |
Force the IP attribute category in MISP. | Auto-assigned |
-g, --tags |
Add extra tags to the event (comma-separated). | Auto-assigned |
3. Configuring Triggers in Pandora FMS
To enable automatic export, you must configure Command, Action, and Template in Pandora FMS alerts to pass environment variables directly to the script using macros.
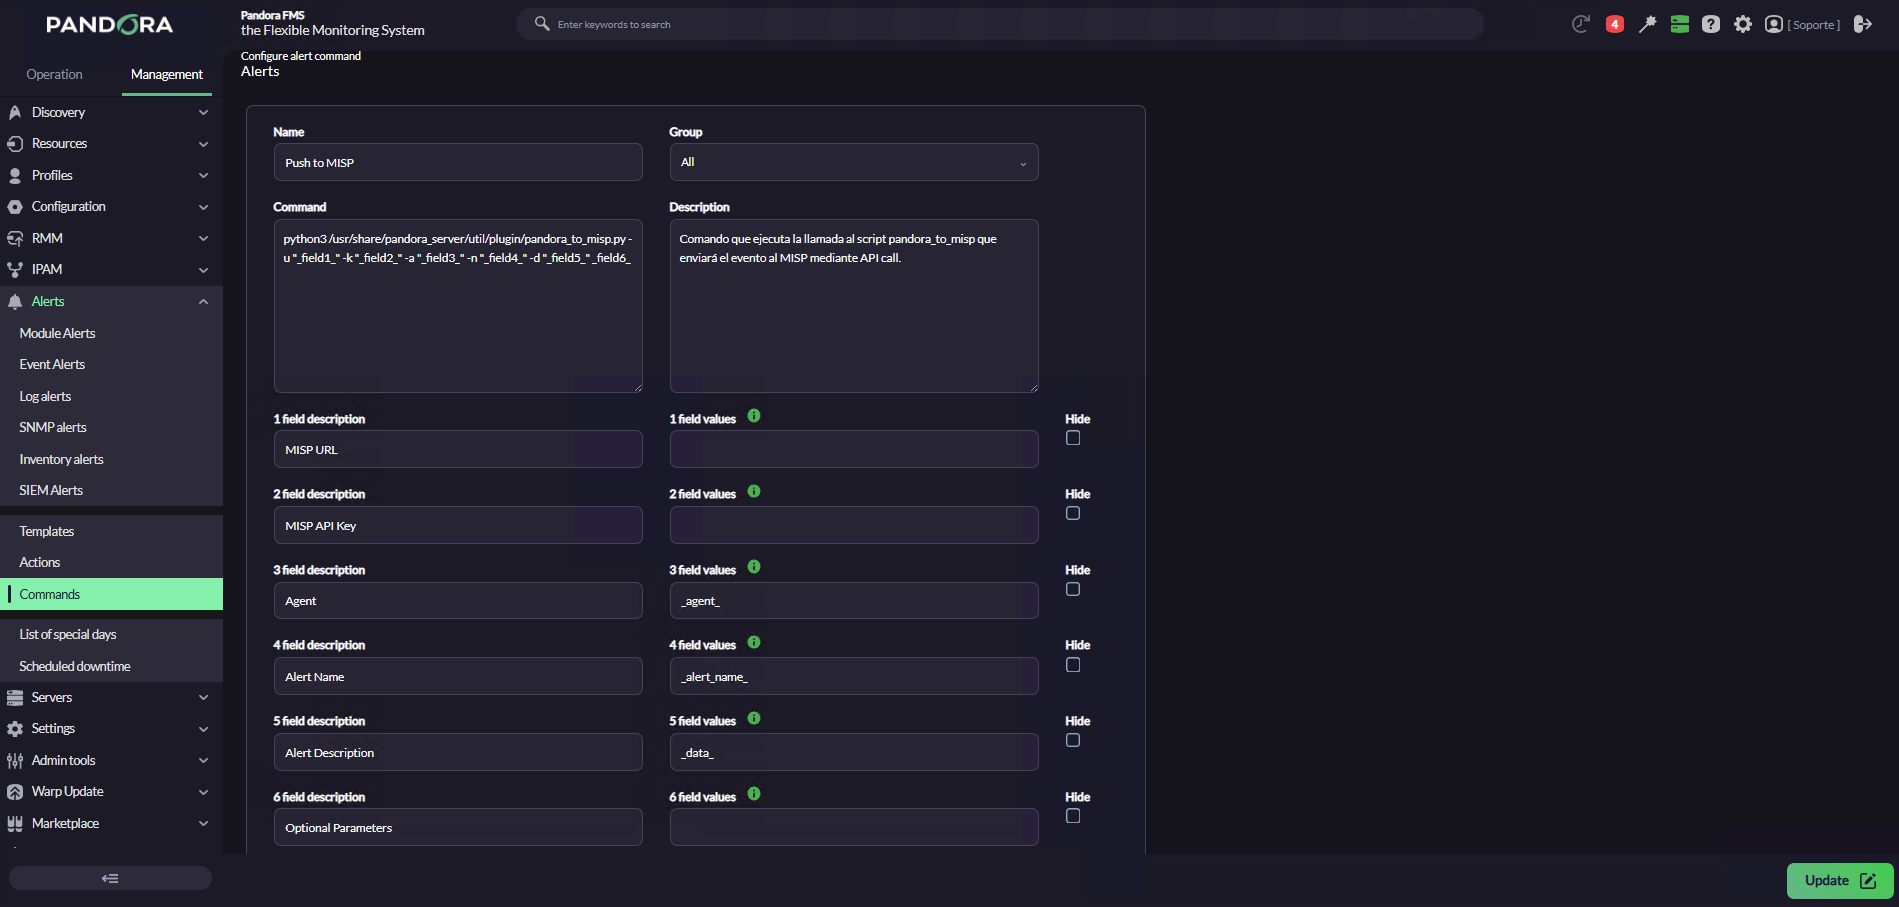
Step 1: Create the Alert Command
-
-
Name:
Export SIEM to MISP -
Command: Use Pandora macros to inject data. Replace the fixed values like URL and KEY in the Action later:
-
/usr/bin/python3 /usr/share/pandora_server/util/plugin/pandora_to_misp.py -u "_field1_" -k "_field2_" -a "_field3_" -n "_field4_" -d "_field5_" _field6_Note: Macros must be in double quotes to correctly handle spaces, except the field6 which -if needed- will include all the optional parameters.
-
-
Description: Executes
pandora_to_misp.pyto send the event to MISP via API call. - Field Description / Values:
-
| Field Description | Field Value |
|---|---|
| MISP URL | |
| MISP API Key | |
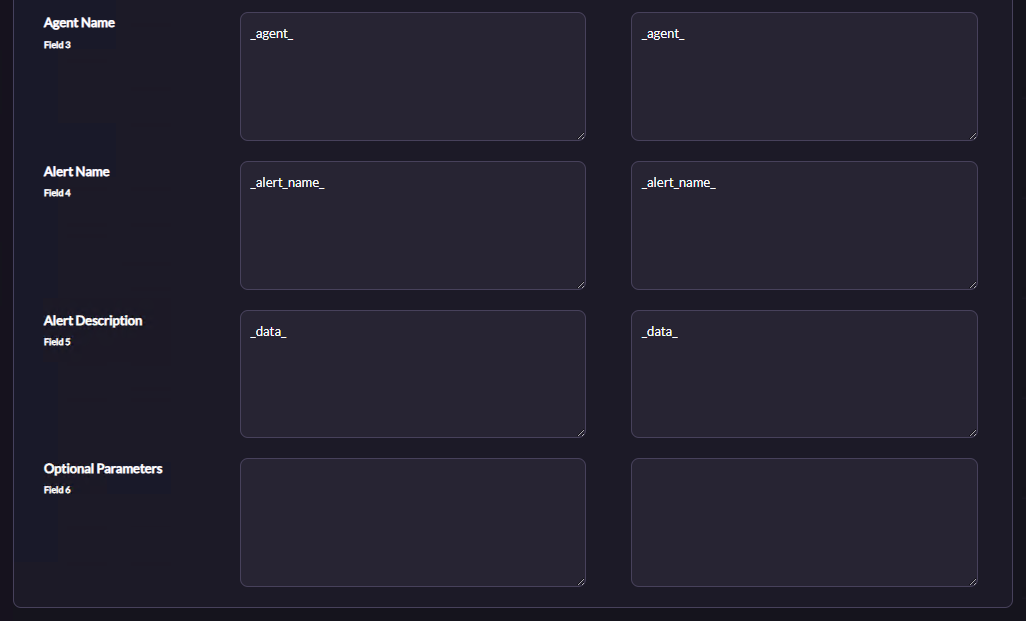
| Agent Name | _agent_ |
| Alert Name | _alert_name_ |
| Alert Description | _data_ |
| Optional Parameters |
Example:
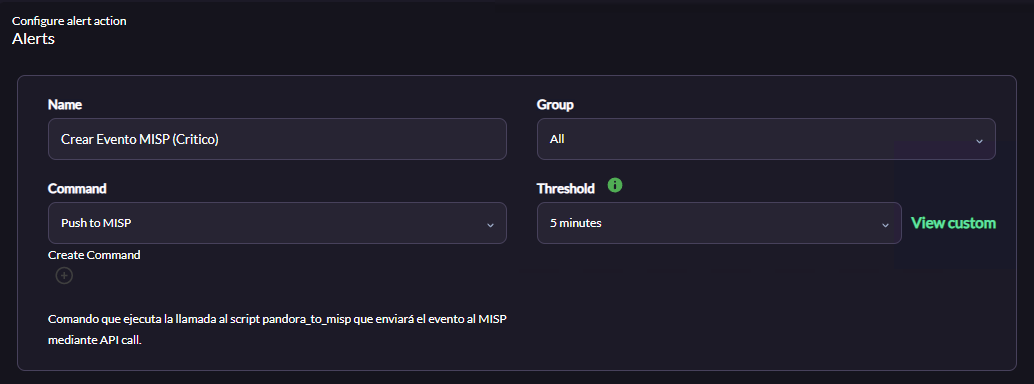
Step 2: Create the Alert Action
-
-
Name:
Create MISP Event -
Command: Select
Export SIEM to MISP -
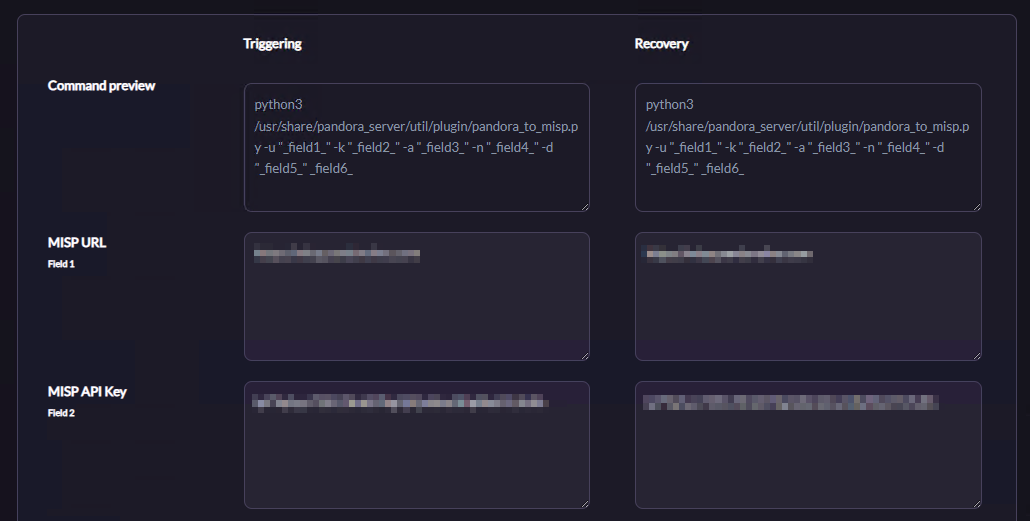
Enter your actual credentials in the fields:
-
Field 1: URL of your MISP (e.g.,
https://misp.yourdomain.com) -
Field 2: Your MISP API Key
-
Fields 3-5: Keep as they are from the command
-
Field 6 (Optional): Add extra flags if you want all alerts triggering this action to use the same advanced configuration. For different alert types, create separate templates and customize Field 6 in each template instead of the action.
-
-
Example:
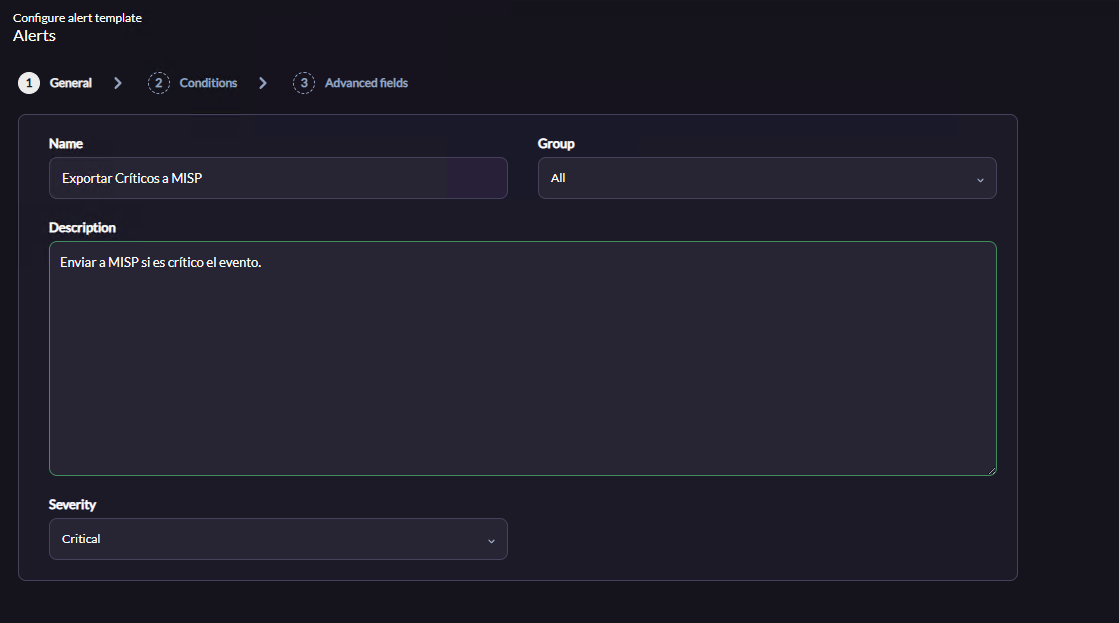
Step 3: Create the Alert Template
-
-
General Tab: Assign a descriptive name (e.g.,
Export Critical Alerts to MISP) -
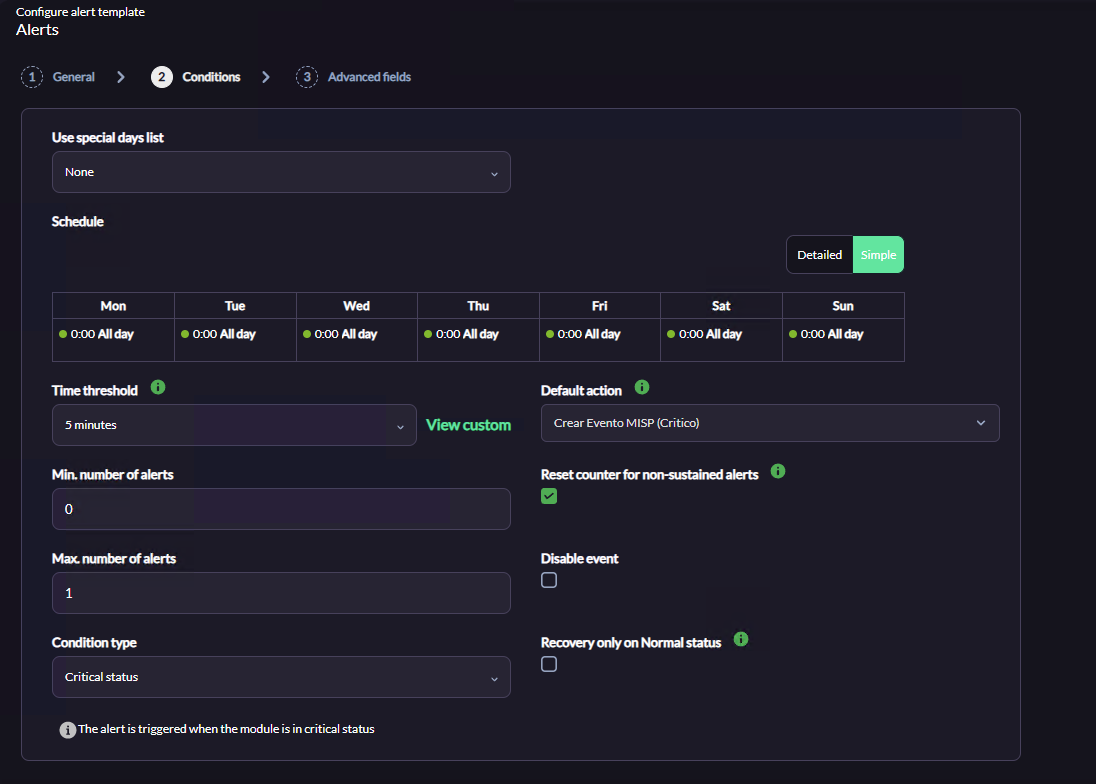
Conditions Tab: Set parameters to avoid false positives and control event flow to MISP:
-
Time threshold: 5 minutes
-
Min. number of alerts: 0
-
Max. number of alerts: 1 (prevents duplicate events in MISP)
-
Condition type:
Critical status -
Default action: Select the action created above (
Create MISP Event) -
Reset counter for non-sustained alerts: Enabled
-
-
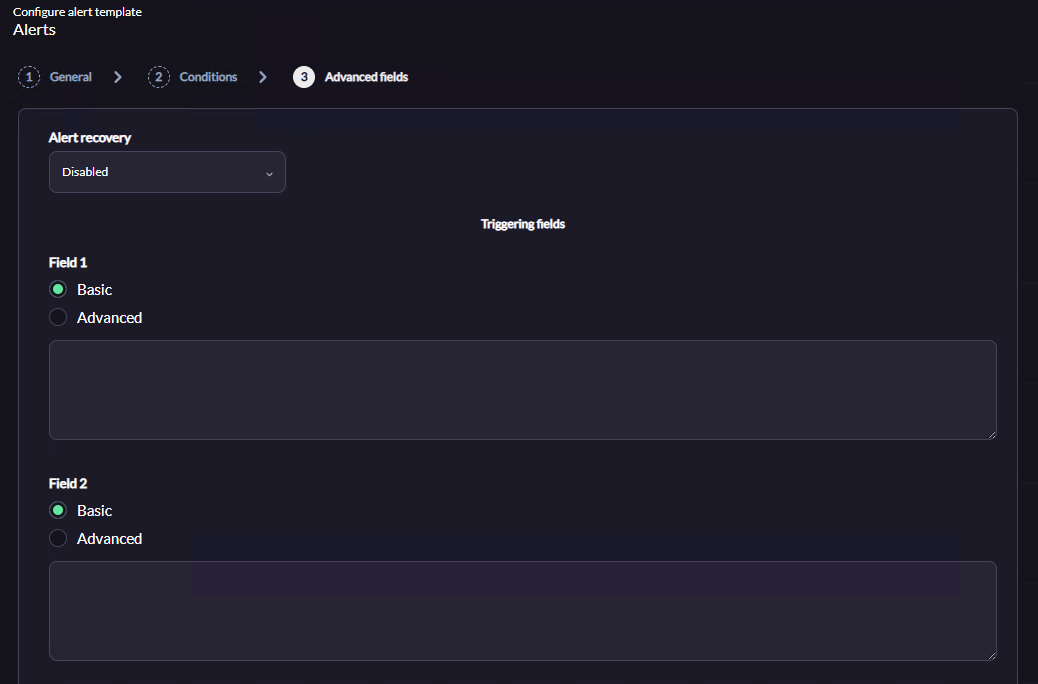
Advanced Fields Tab:
-
Alert Recovery: Disabled
-
Leave Fields 1-5 empty (values are inherited from the action/command)
-
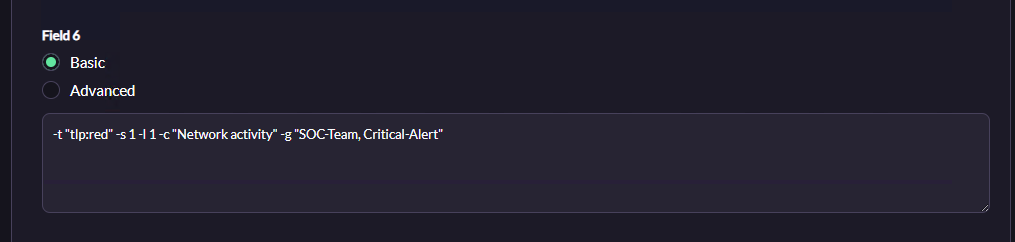
Field 6: Inject optional script flags to override default behavior (e.g., auto-triage)
-
-
Example of all optional parameters for field6:
-t "tlp:red" -s 1 -l 1 -c "Network activity" -g "SOC-Team, Critical-Alert"-
-t "tlp:red": Labels the event with TLP Red -
-s 1: Shares the event with MISP Community -
-l 1: Forces Threat Level to High -
-c "Network activity": Classifies the extracted IP in this category in MISP -
-g "SOC-Team, Critical-Alert": Adds these custom tags
Recommended: Create multiple templates with different optional parameters for different alert types.
Finalize the wizard, save changes, and ensure the template is enabled.
Example: