
Creating the SIEM Alert
Once the Command, Action, and Template are configured, the final step is to create the alert in the Pandora FMS SIEM engine. This alert “listens” for events occurring in the system and, if they match your filters, triggers the sending to MISP.
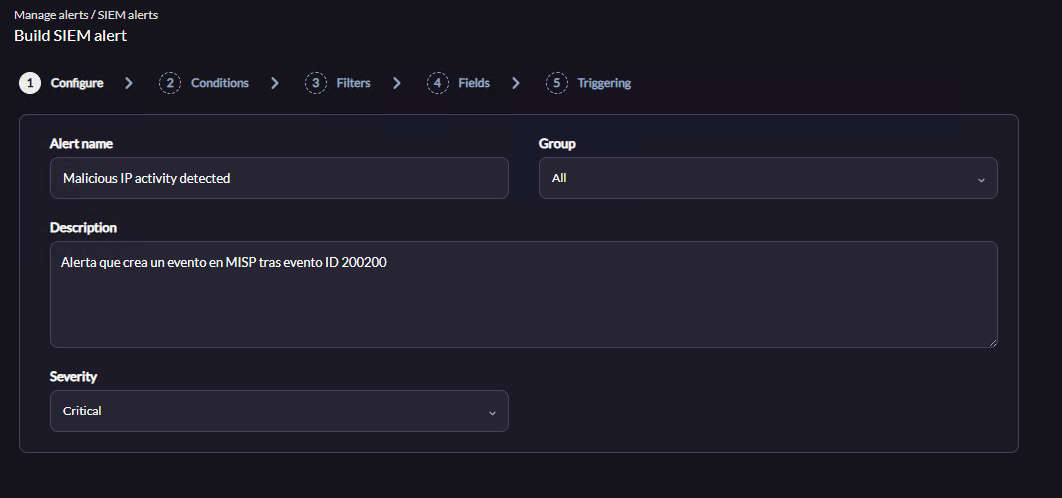
Step 1: Configure (Basic Settings)
Define the alert metadata:
-
Alert Name: Give a clear name, e.g.,
Malicious IP activity detected. -
Group: Select the corresponding group, or leave it as
All. -
Description: Add a useful description for your team, e.g.,
Alert that creates a MISP event after event ID 200200. -
Severity: Set the SIEM alert severity (e.g.,
Critical).
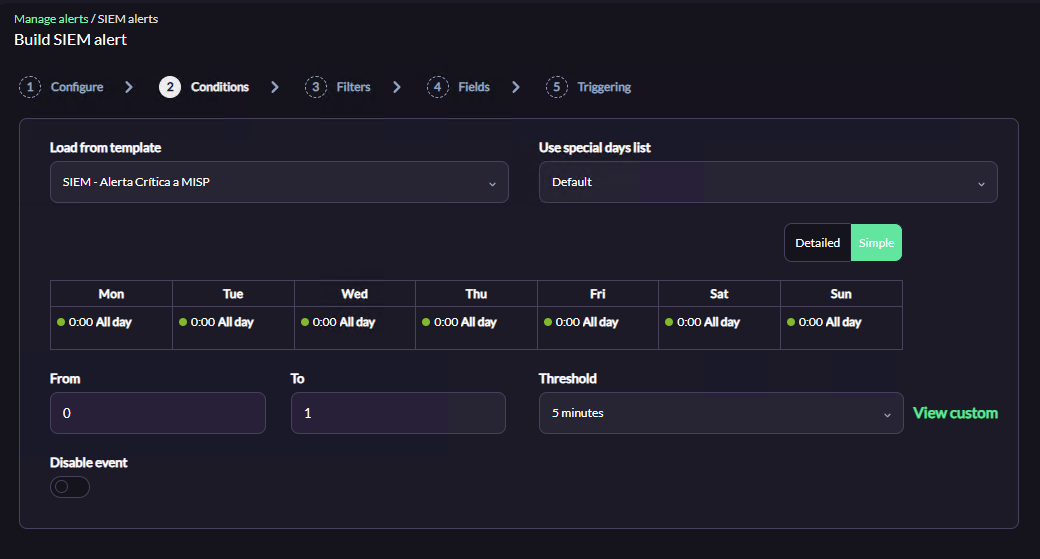
Step 2: Conditions
Link the alert with the logic created earlier:
-
Load from Template: Select the template created in the previous phase (e.g.,
Export Critical Alerts to MISP). Loading the template automatically fills in Schedule, Threshold (5 minutes), and alert counters (From 0, To 1), preventing event flooding.
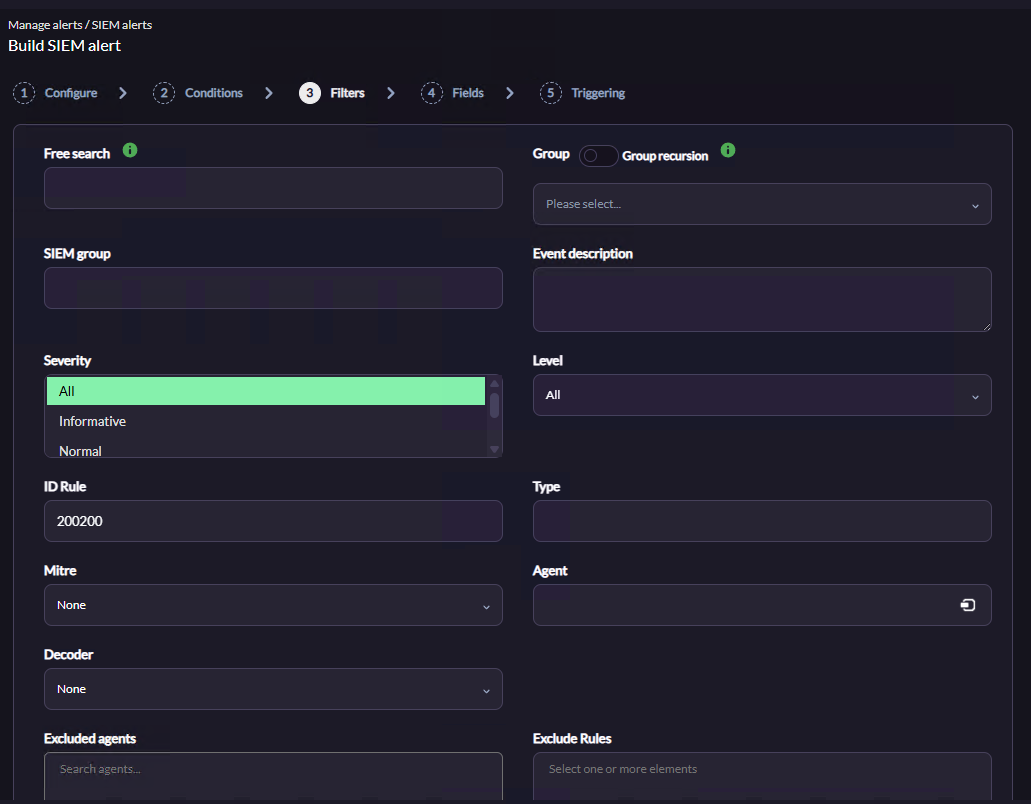
Step 3: Filters (Detection Filters)
This step defines which SIEM events will trigger the alert and be sent to MISP. You can combine multiple fields for precise filtering:
-
Free Search: Search for a specific string or keyword in all log/event data.
-
Group / Group Recursion: Filter alerts to apply only to agents in a specific Pandora FMS group (optionally including subgroups).
-
SIEM Group: Filter events based on the logical group defined in the SIEM engine.
-
Event Description: Search text specifically in the event description field.
-
Severity: Filter by the severity assigned by the SIEM engine (All, Informative, Normal, Warning, Critical, etc.). Example: select
Criticalto export only high-priority incidents. -
Level: Native event level in Pandora FMS.
-
ID Rule: Exact numeric ID of the SIEM rule to trigger the alert (e.g., 200200 ensures only this specific rule sends events to MISP).
-
Type: Filter by the event type.
-
Mitre: Filter only detections mapped to a specific MITRE ATT&CK tactic or technique.
-
Agent: Monitor a specific server or device.
-
Decoder: Filter based on the log decoder that processed the event (e.g., Windows or Apache decoder).
-
Excluded Agents: Whitelist specific agents so their events never trigger this alert.
-
Exclude Rules: If Severity is set to
All, exclude specific rule IDs (e.g., minor alerts or noise).
For a standard integration, defining Severity and/or ID Rule is usually sufficient; other fields can remain empty or set to None.
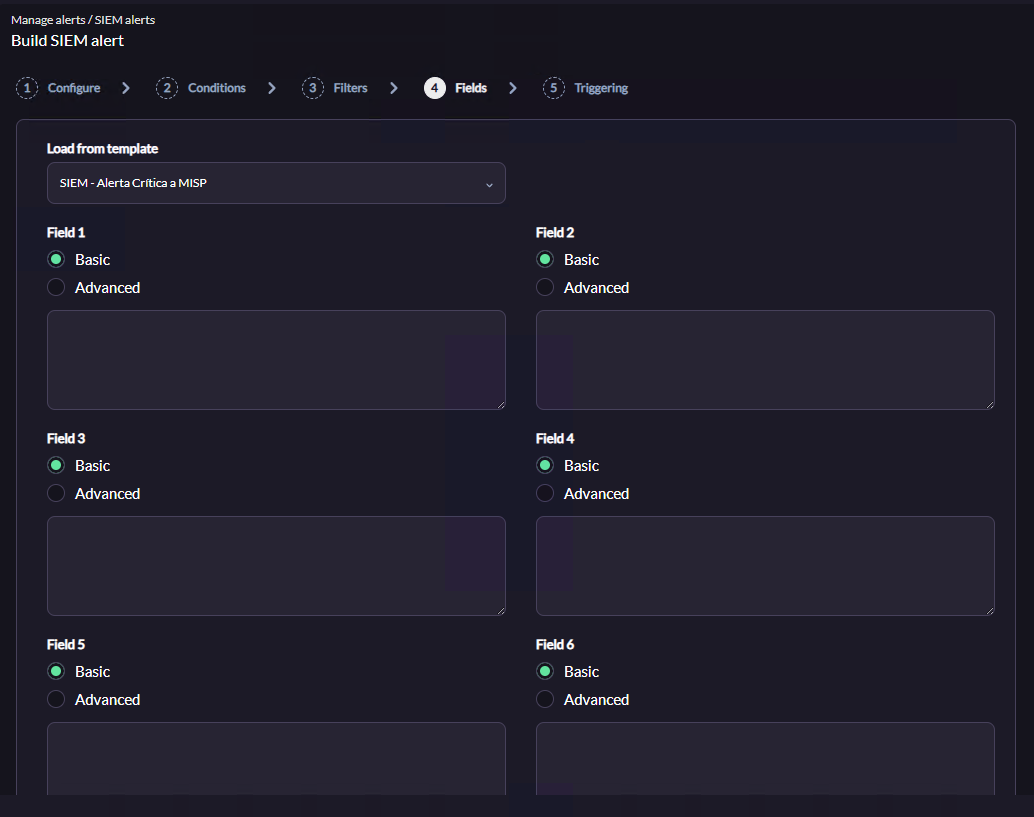
Step 4: Fields (Additional Fields)
Select the template to apply to this alert. If the template contains custom fields (Macros _field1_, _field2_, etc.), their values are taken from the template. Typically, these fields already inherit configuration from the Command, Action, and Template, so they can be left as default.
Step 5: Triggering
Review the trigger summary:
-
Triggering Condition Table: Verify schedule and thresholds.
-
Action Table: Ensure the desired action is listed (e.g.,
Create MISP Event).-
If not listed, select it in Actions, set From and To to 0, and click the green Add button. Ensure the threshold is correct.
-
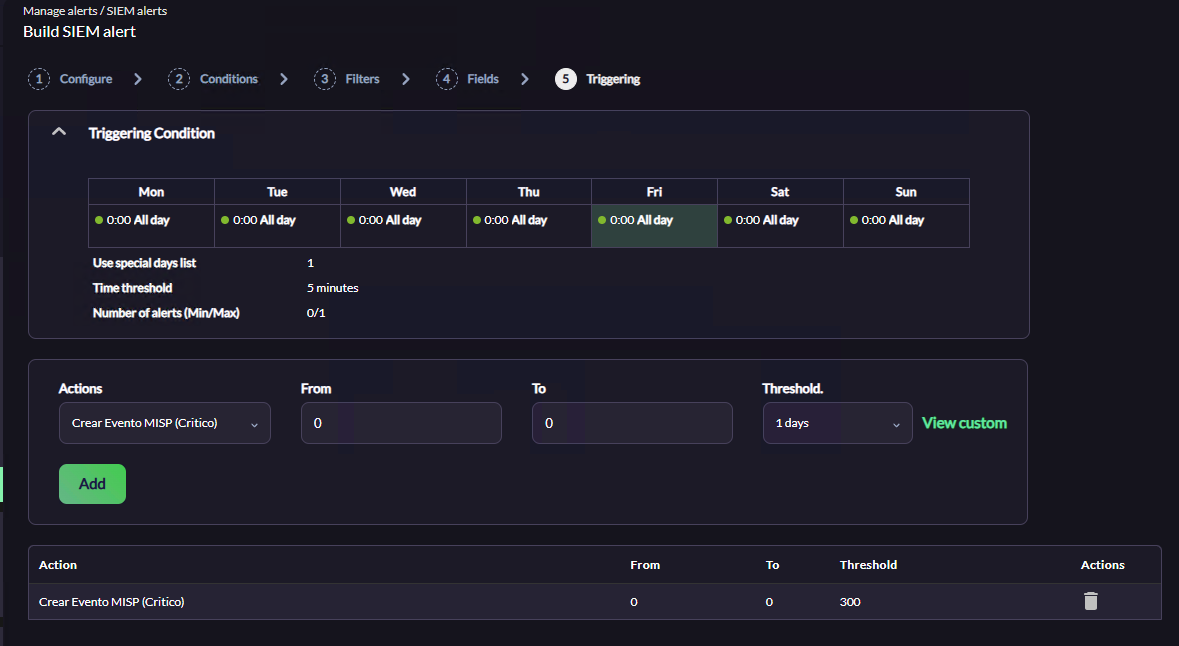
Finalize the wizard to save the alert. Your integration is now fully operational in real-time, sending SIEM events to MISP automatically.