Pre rrequisites
-
- The plugin is a compilation that contains all the dependencies necessary for its use, so it only requires having an application in Microsoft Entra ID configured with the necessary permissions to be able to authenticate through a clientID, tenandID, and a secret. The process of creating and granting permissions is explained below:
Registering an application in Microsoft Sign-in ID
Office 365 management APIs require authentication using Microsoft Entra ID, which ensures secure access to tenant data. To use these APIs, you must first register the application within Microsoft Entra ID and define the permissions that the application will need to interact with Office 365 resources.
Before you begin, ensure you have an Office 365 subscription and an Azure subscription linked together within the same tenant.
Registering the application in the Azure portal
Once you have configured the environment, you can proceed to register the application from the Azure portal by following these steps:
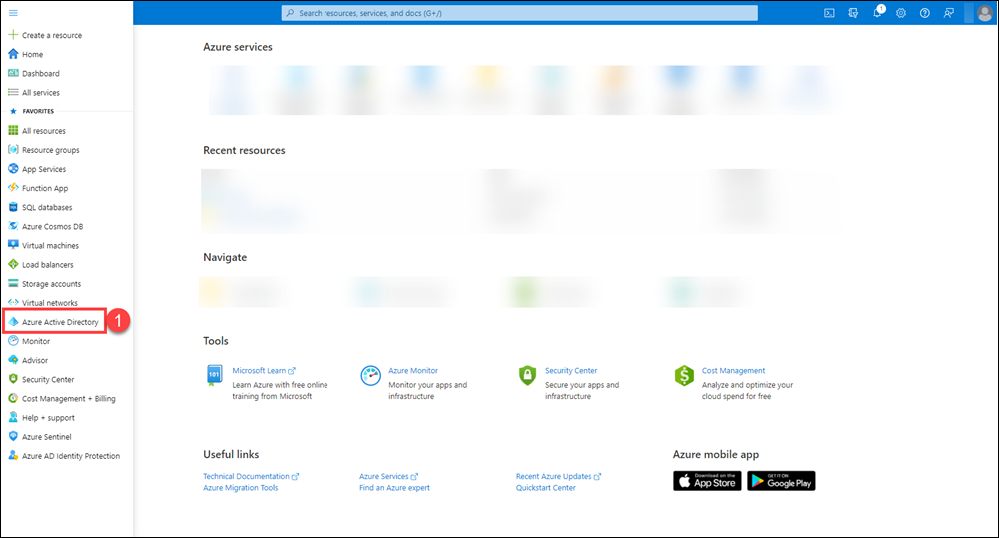
1. Access the Azure portal (https://portal.azure.com) by signing in with a Microsoft tenant account that has the Office 365 subscription you are going to use. You can also open the portal from the Microsoft 365 Admin Center, where there is usually a shortcut to the Azure dashboard.
2. In the left side menu of the portal, select Microsoft Sign-in ID.
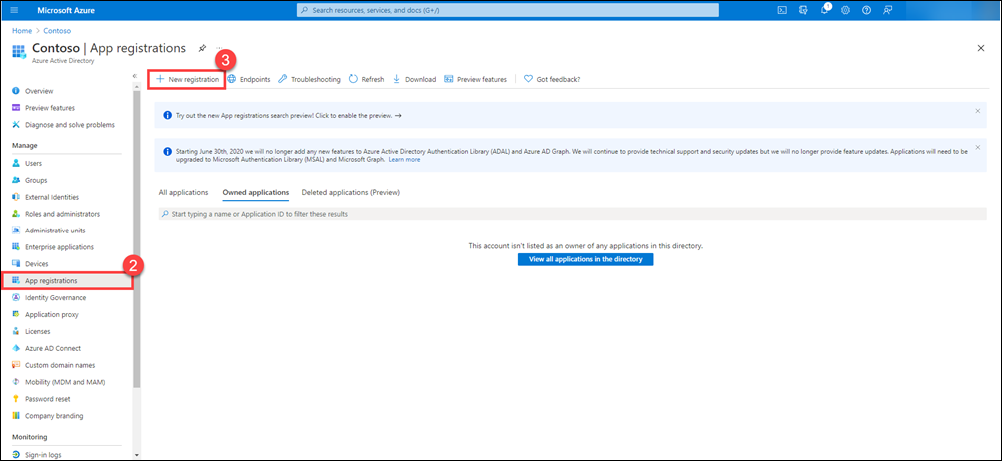
3. On the Microsoft Entra ID page, go to the Application registrations section and click New registration.

4. The wizard for creating a new application record will open. Complete the following fields:
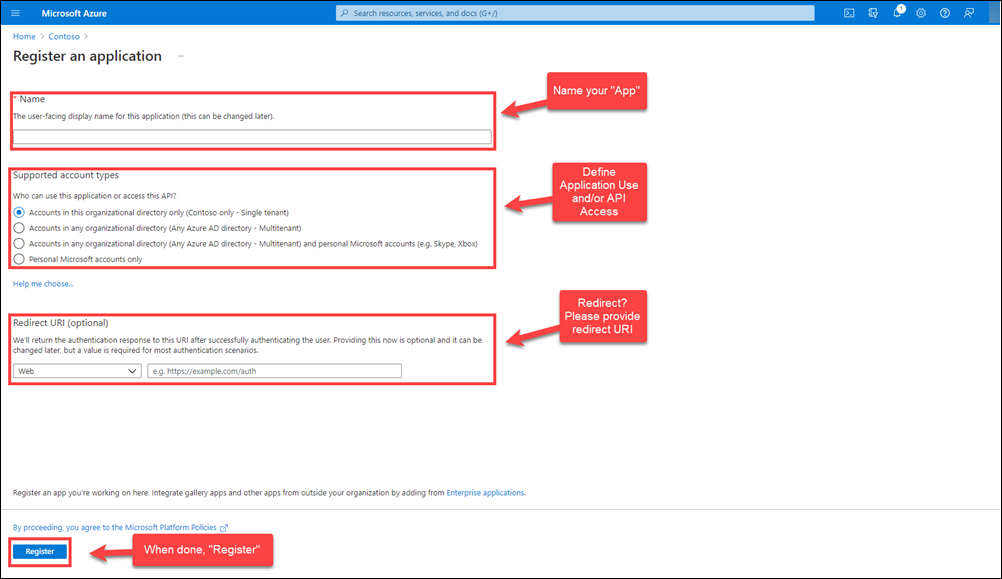
- Name: assign a descriptive name to your application.
- Access type: indicate who will be able to use the application (only accounts in your organization or also other tenants).
- Redirect URI: specify a URL to which the user will be redirected once authentication is complete (optional depending on the type of application).5. Finally, click Register to complete the process.
Configure application properties in Microsoft Entra ID
Once the application is registered, you need to define some key properties that determine how it will behave within Microsoft Entra ID and how tenant administrators will be able to grant the necessary permissions for the application to access data through the Office 365 management APIs.
Key properties to review:
- Client ID: This value is automatically generated in Microsoft Entra ID. The application will use it when requesting consent from tenant administrators and when requesting “application-only” access tokens.
- Multitenant application: This option must be set to “Yes” to allow administrators from other tenants to grant access to your application through the Office 365 administration APIs. If left set to “No,” the application will only be able to work with data from the tenant in which it was registered.
- Reply URL: This is the address to which a tenant administrator will be redirected after granting consent. You can define multiple reply URLs if needed. By default, Azure uses the same sign-in URL that was specified when creating the application, although this value can be changed at any time.
Remember to save your changes once you have adjusted any of these properties
Generate a new key for the application
Follow these steps to create a new client secret:
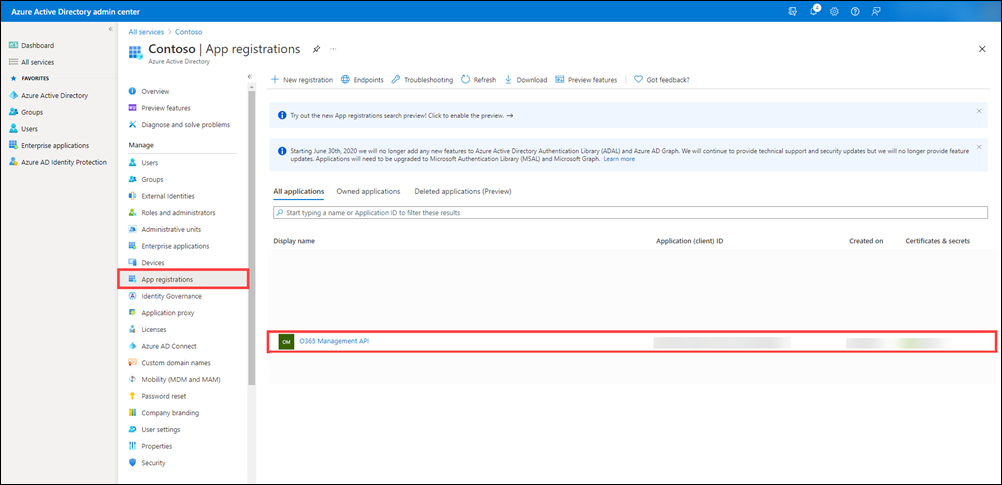
1. In the Azure portal, go to the Microsoft Sign-in ID section. Within it, select Application registrations and then choose the application you previously registered.
2. Once on the application page, click Certificates and Secrets in the left side menu. From there, you can upload certificates or create new client secrets.
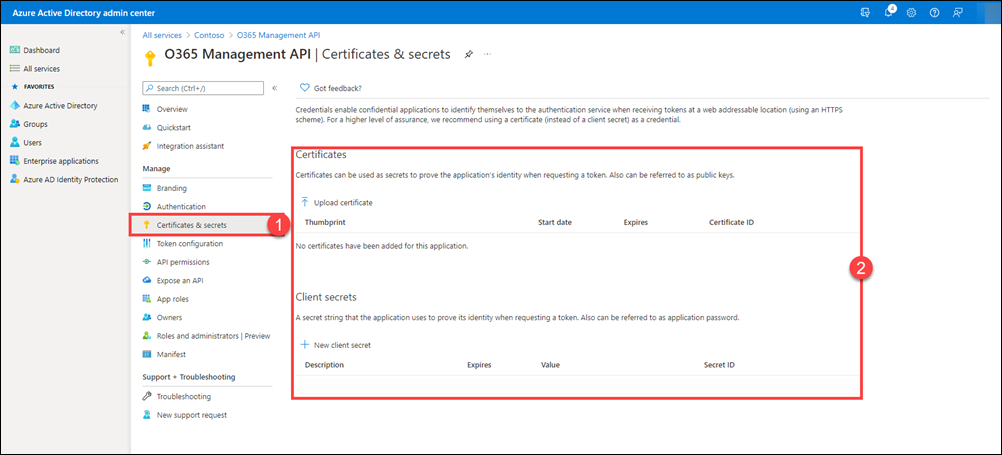
3. On the Certificates and Secrets tab, select the New Client Secret option. Enter a description to easily identify it, define its validity period, and then click Add.

4. Once the secret has been created, its value will appear in the Client Secrets section. Copy this value using the clipboard icon and store it in a safe place.
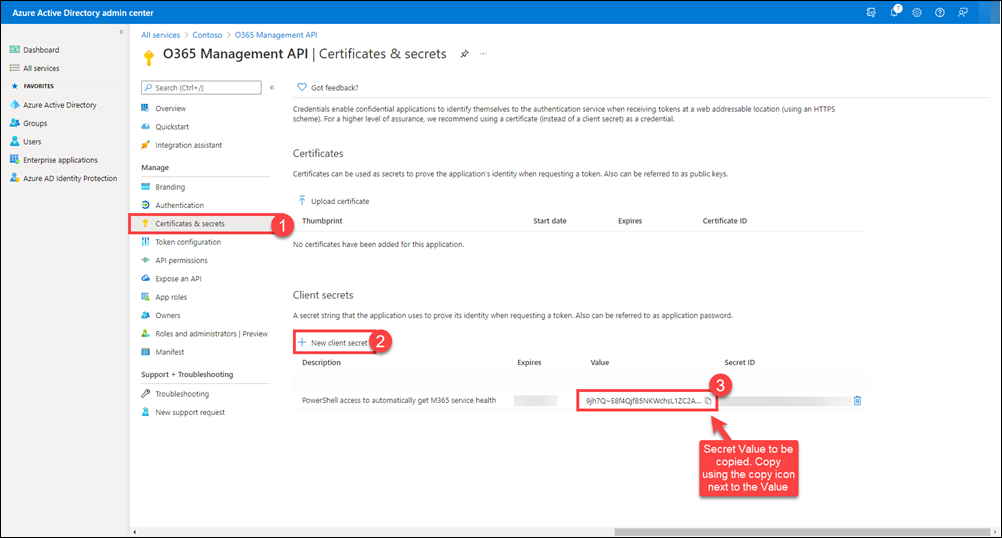
Azure only displays the client secret value when you initially generate it. You cannot return to this page and retrieve the client secret value later. Be sure to copy it and save it in a secure location so you can use it later.
Apart from the secret, we will need the tenant ID and client ID for authentication. These can be obtained from the application's general menu: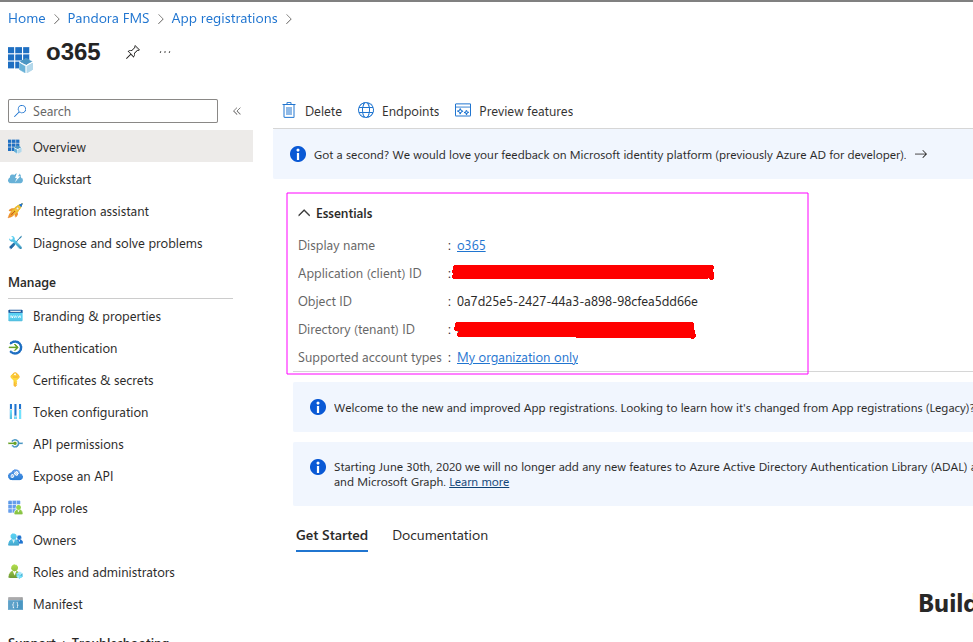
Define the permissions your application needs to access the Office 365 administration APIs.The last step is to specify exactly what permissions your application will require to use the Office 365 administration APIs. To do this, you must add access to these APIs and then set the necessary permissions.
1. In the Azure portal, go to Microsoft Sign-in > Application registrations > All applications.
Select the relevant application and, in the left side menu, click API permissions.
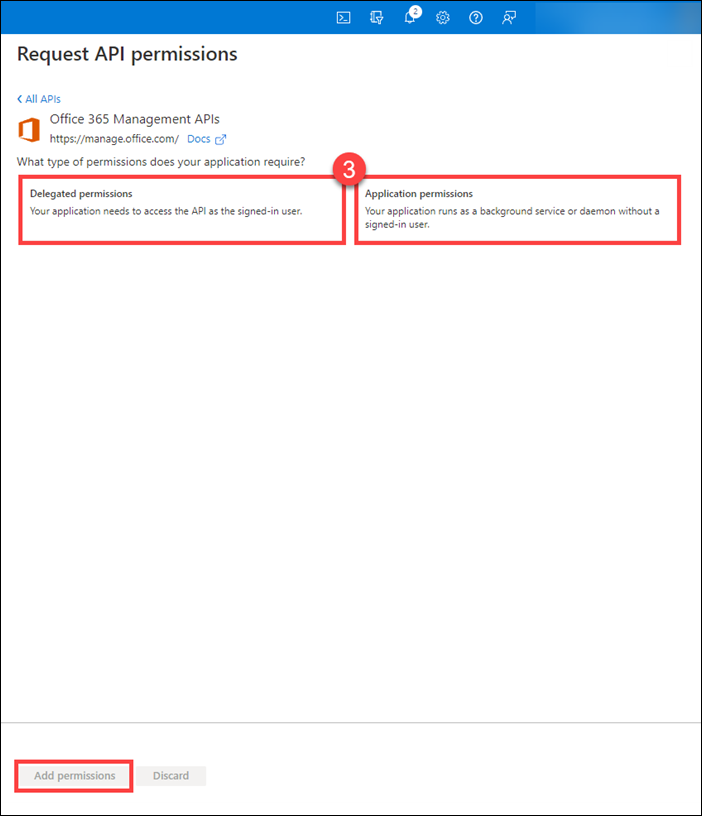
Then click Add a permission to open the window where permissions are configured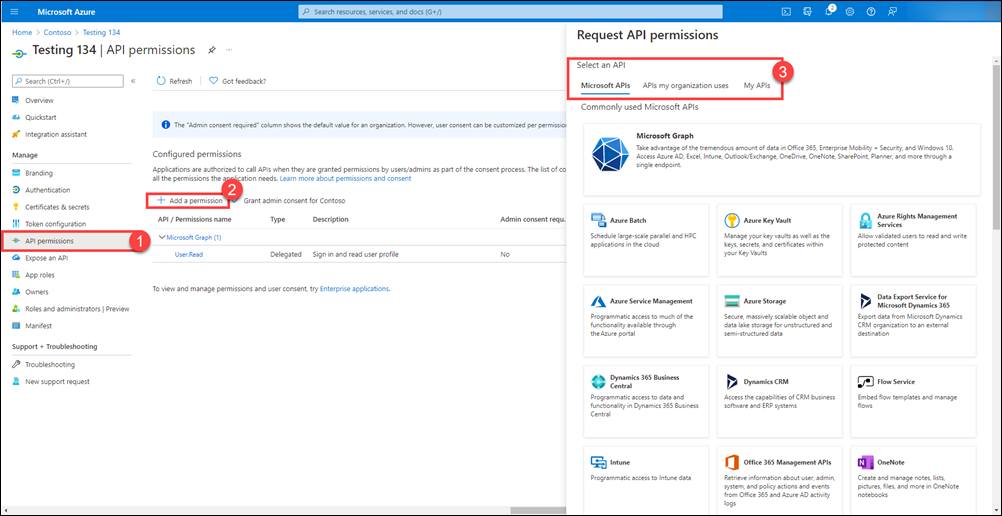
2. On the Microsoft API tab, select the Office 365 Admin API option.
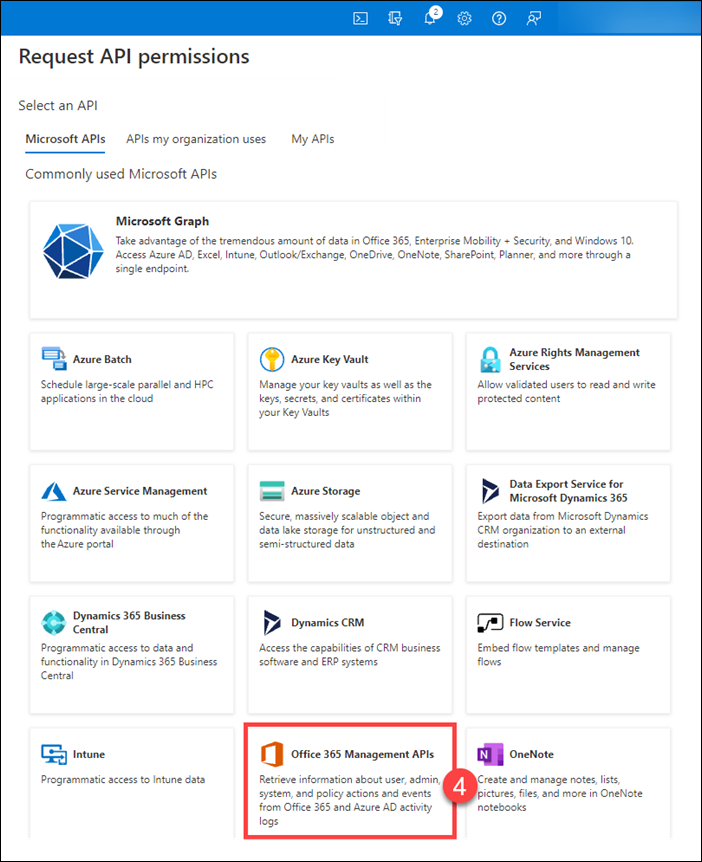
3. A side panel will appear where you can choose the types of permissions your app needs.
Once selected, click Add Permissions to confirm them.
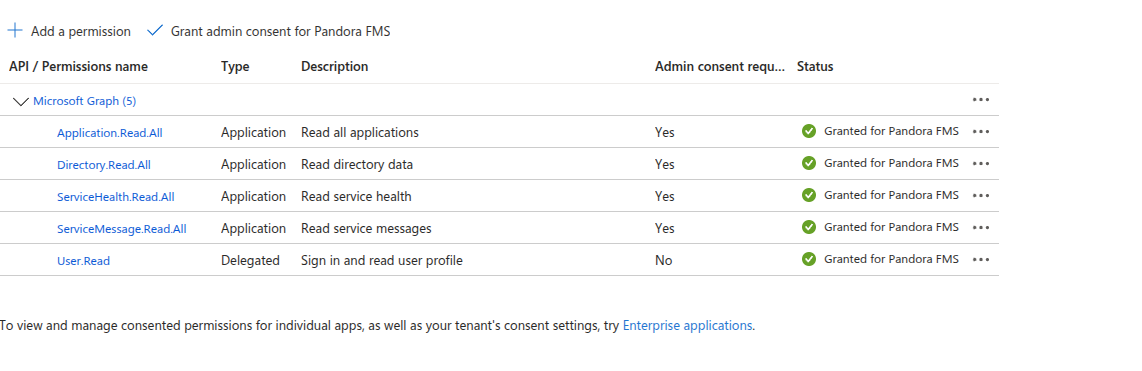
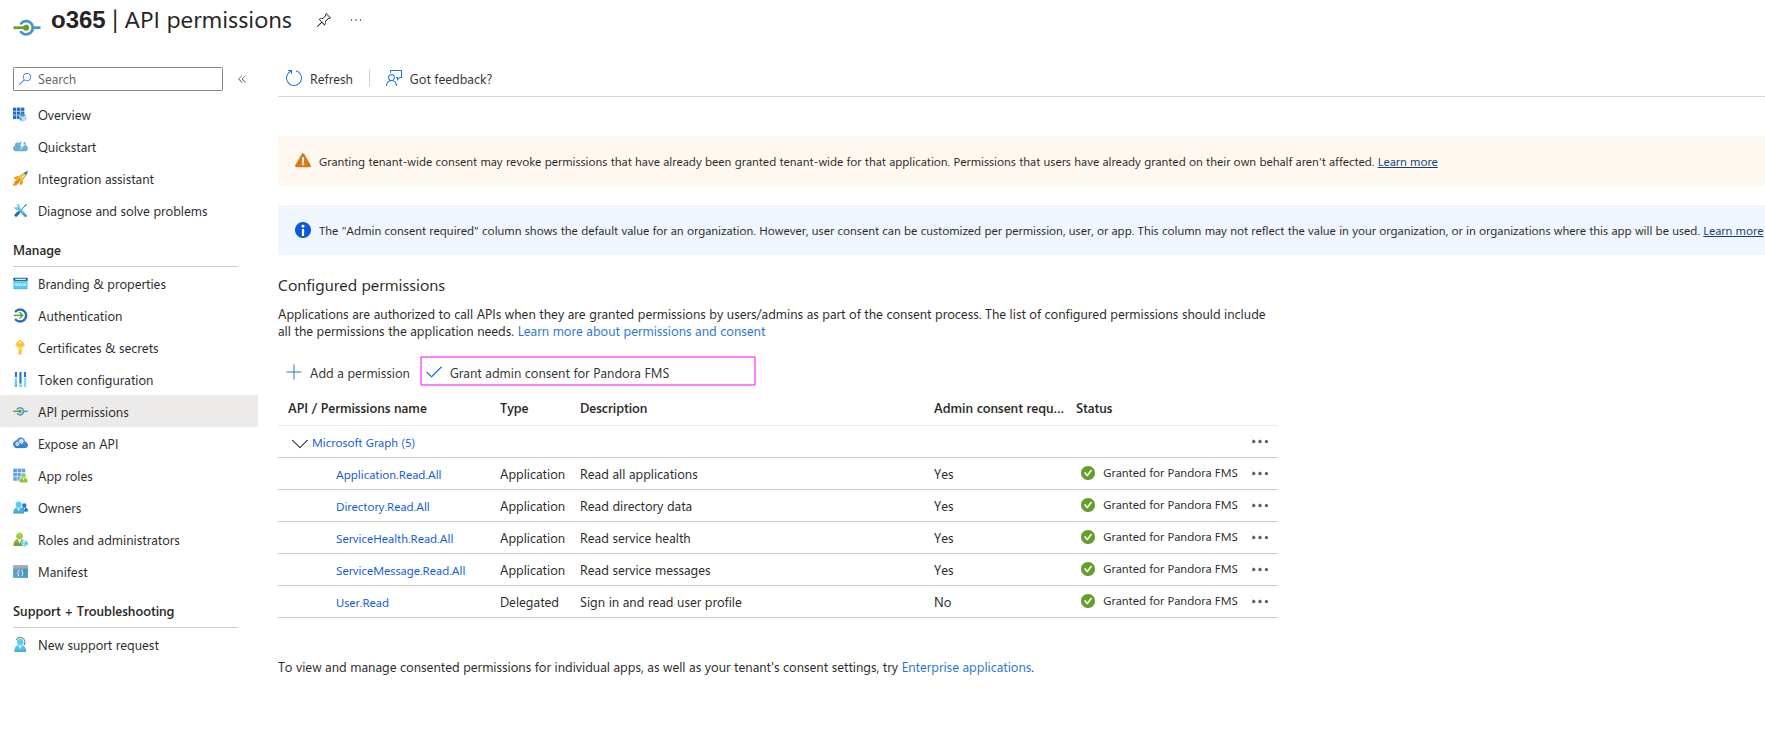
The permissions required by the plugin are as follows:

Finally, select “Grant administrator consent for <tenant name>” to approve the permissions you have assigned to the application.
- The plugin is a compilation that contains all the dependencies necessary for its use, so it only requires having an application in Microsoft Entra ID configured with the necessary permissions to be able to authenticate through a clientID, tenandID, and a secret. The process of creating and granting permissions is explained below: