
Configuration in PandoraFMS
As a server plugin
Installation from console
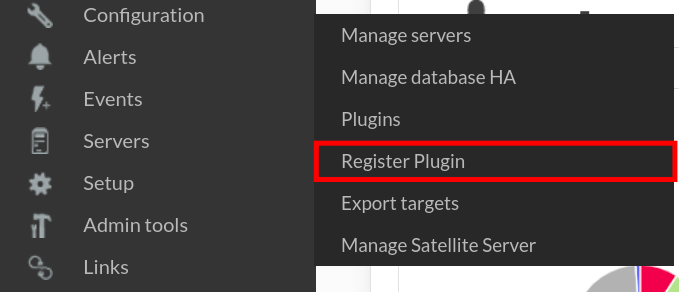
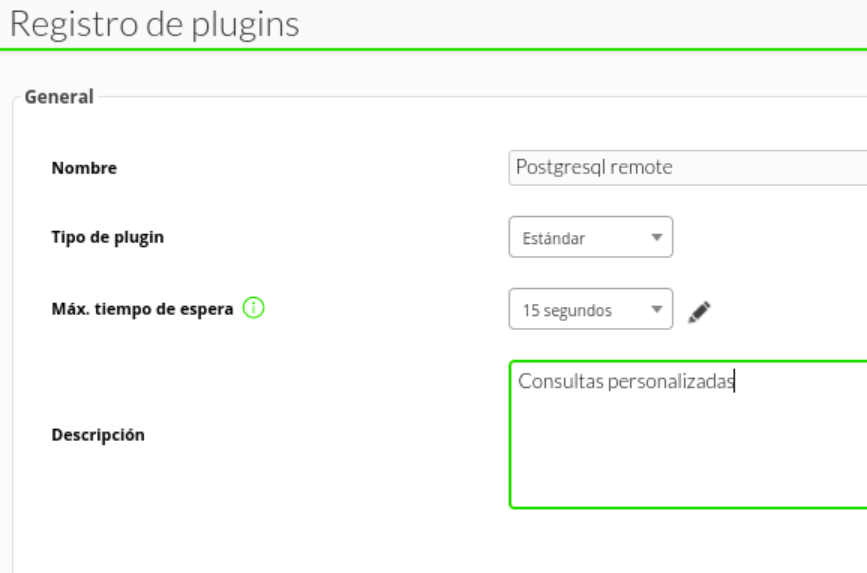
To register the plugin, from the console, go to the "register plugin" section.
Click on select file.

Select the pspz2 file that contains the plugin

A message will be displayed indicating that you have successfully registered.

Once the plugin is registered, we will see it in the plugins section.

Clicking on the plugin title will take you to the plugin menu.

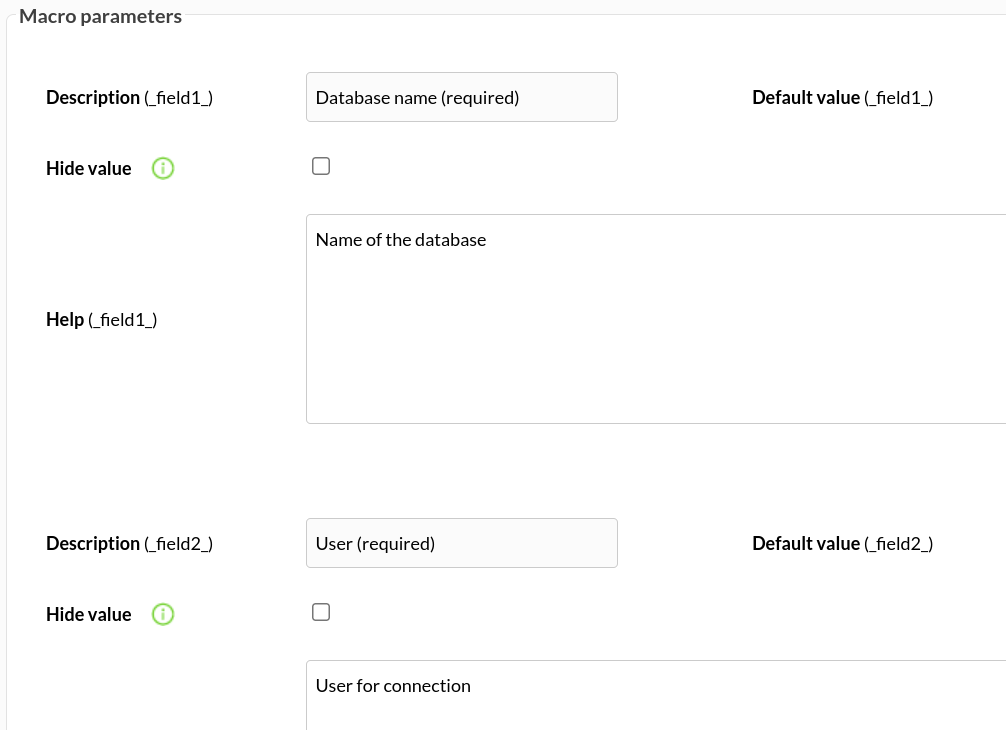
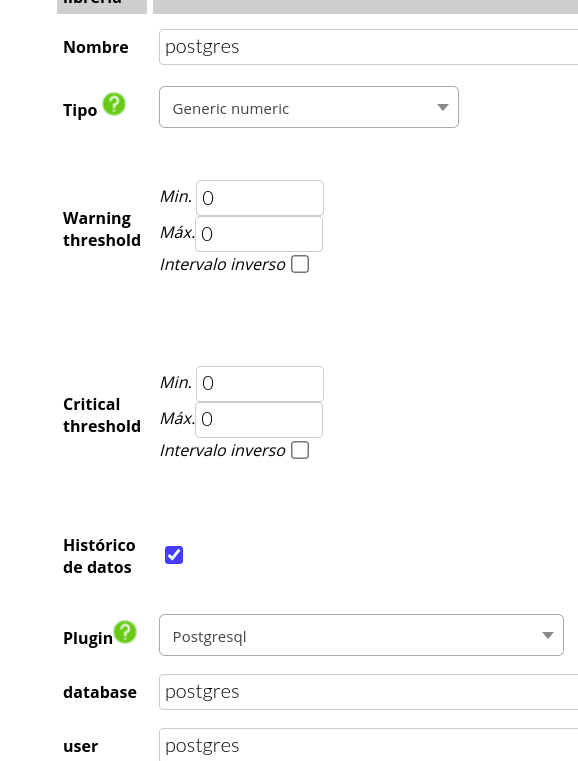
In macros will appear all those that have the plugin, remember that not all are obligatory, only those that are specified.
Below you can assign the required value to each variable.
Manual installation
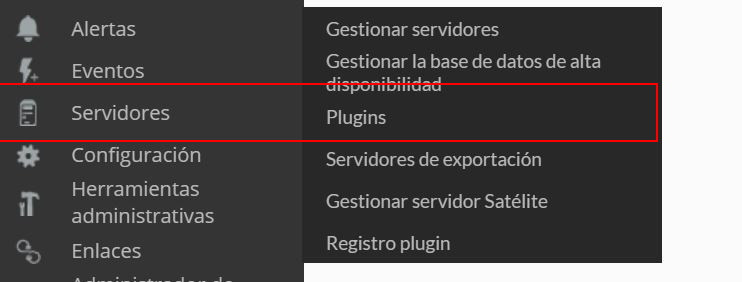
Go to servers > plugins:
Click on add:

We put the name and description of your choice:
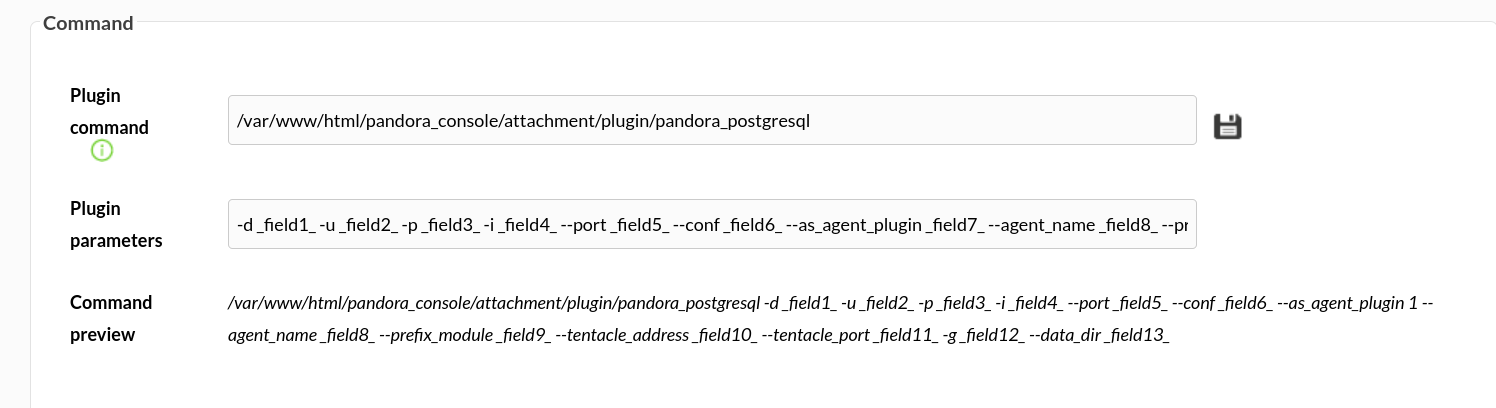
We enter as command the execution with the path of the plugin:
/path_pandora_postgresql
And in plugin parameters we will introduceenter these followed by the macro "_field_", the mandatory ones for the plugin to work are -d,-u,-p,-i,--portport, --transfer_mode and --conf.
We will define these with the macros below.
Database

user

password

ip

puerto

conf

transfer_mode

Once this is done, click on "create".
You can check that you have entered the values correctly by executing the terminal preview command


If it does not give errors it is that it has been introduced well.
Once this is done, the only thing left to do is to call it, so we will go to some agent's view and create a module of complements:

We will give it a name and in the section "plugin" we will put the one we have just configured.
Once this is done, click on create.
If the module is shown with 1, it means that it is running correctly.
