Configuration in Pandora
Without remote configuration enabled
We must pass the plugin to the virtual machine, this can be done through pscp. We run pscp and open the windows terminal, inside to pass it to us we will use this code:
pscp -P 22 <path-plugin> root@<ip-machine>:<path-target>Example:
The recommendation is to put the agent plugins in the path /etc/pandora/plugins for a more comfortable use.
To use it, we will open pandora_agent.conf
vim /etc/pandora/pandora_agent.confAnd at the bottom of the file, we will load the plugin that we have passed to the machine by adding :
module_plugin <plugin path> <ip to monitor with nginx port> <url for status>.With remote configuration enabled
To enable the remote configuration we have to open the pandora_agent.conf file:
vim /etc/pandora/pandora_agent.confInside we look for the remote_config line, to enable it we set it to 1.
That done, to install the plugin with remote configuration enabled there are two options, the first is :
Perform the process of sending the plugin to the virtual machine as it is defined in the way to install the plugin without remote configuration enabled described above, only instead of entering the line :
module_plugin <plugin path> <ip to monitor with nginx port> <url for status>.in pandora_agent.conf from the machine, we will do it from the console, in the agents menu, click on remote configuration:
And enter the line, then click on update:
The second option is through collections.
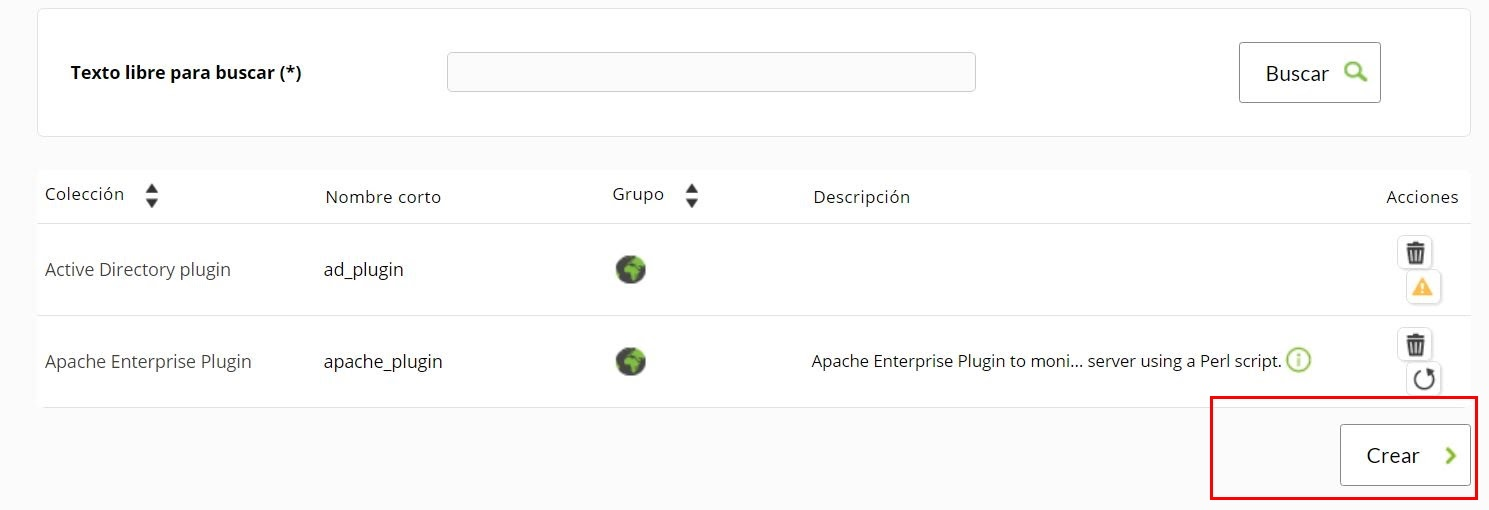
Go to configuration > collections:
Click on create :
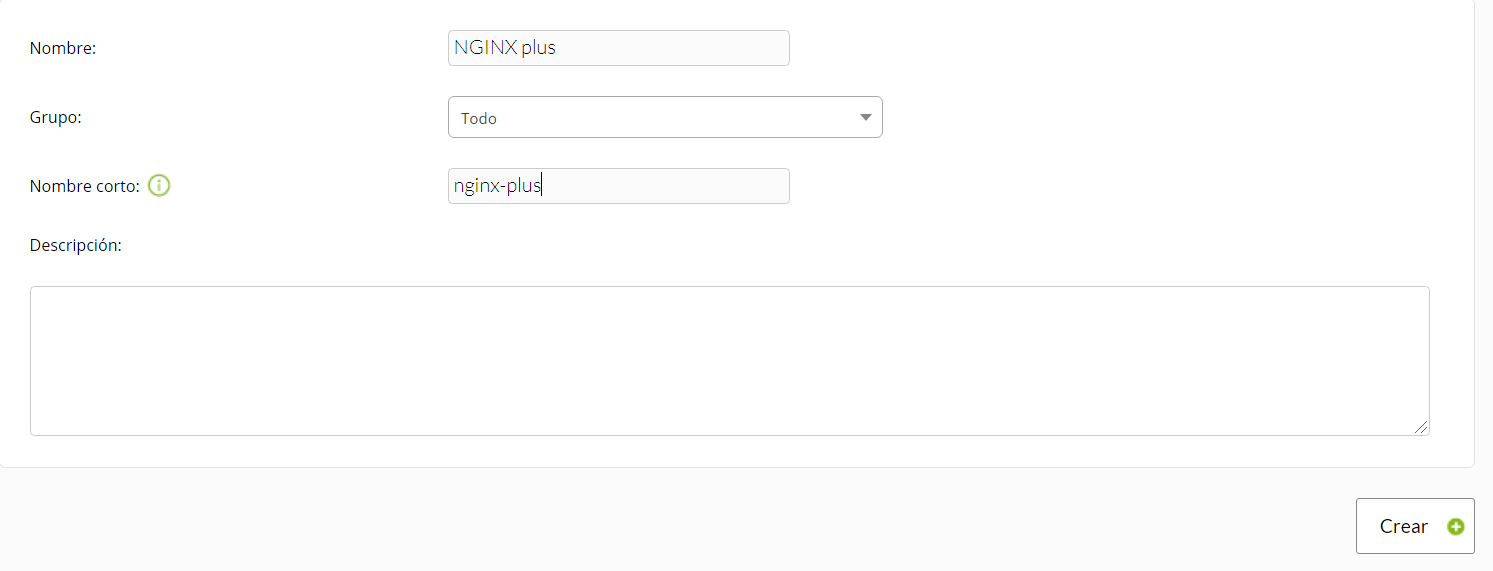
Enter name and short name and click on create again:
When it is created, go to :
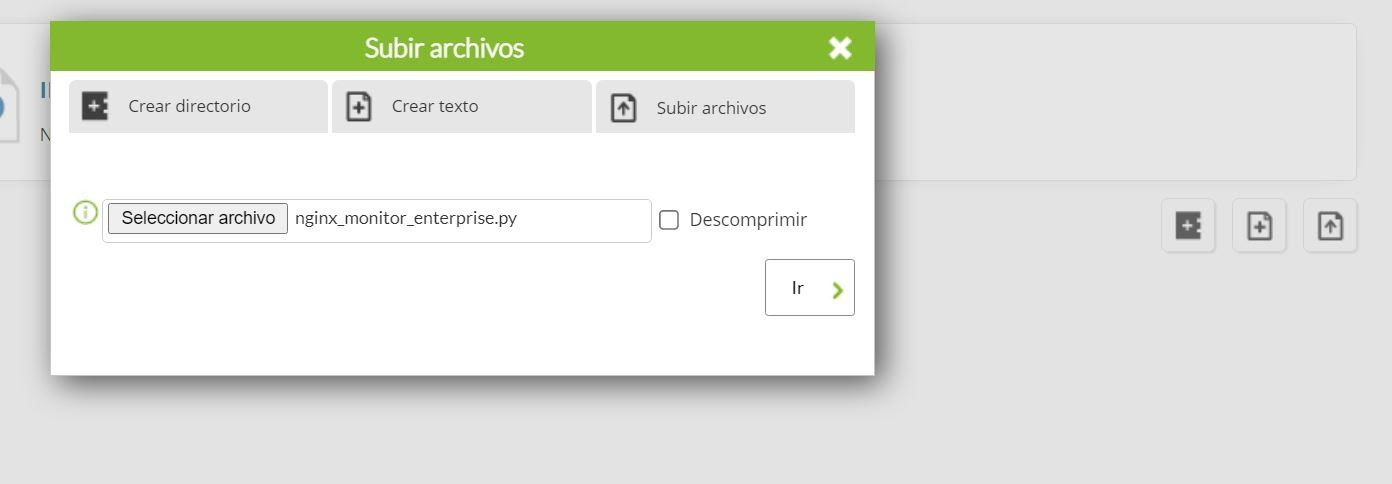
Click on "Upload":
Upload the plugin and click "go":
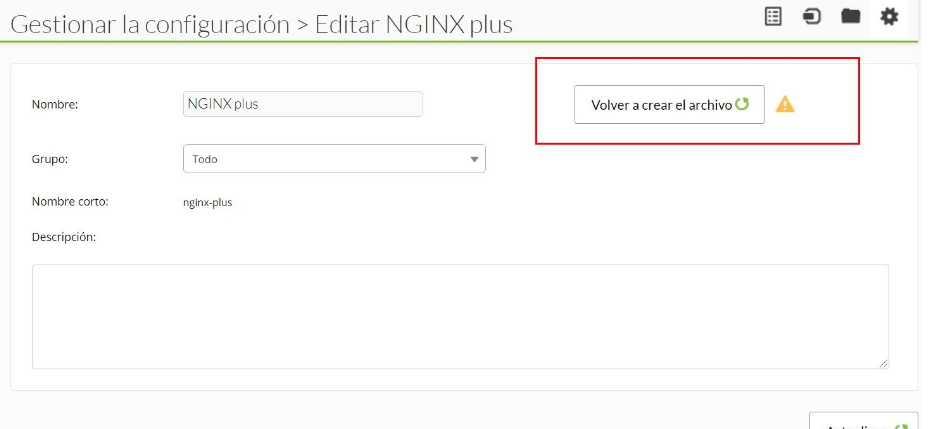
Click on "recreate file" :
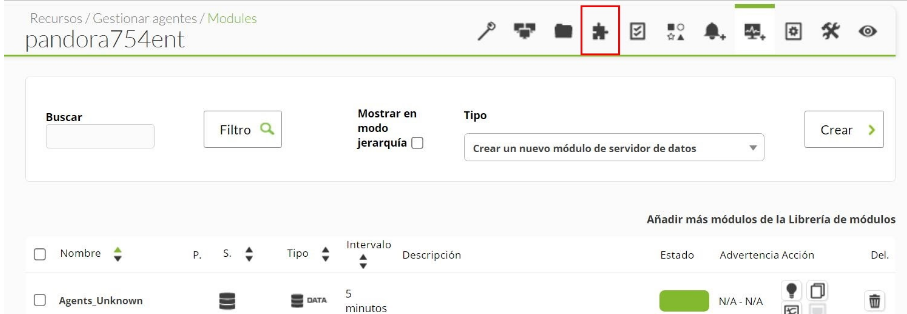
Go to the agent plugins menu:
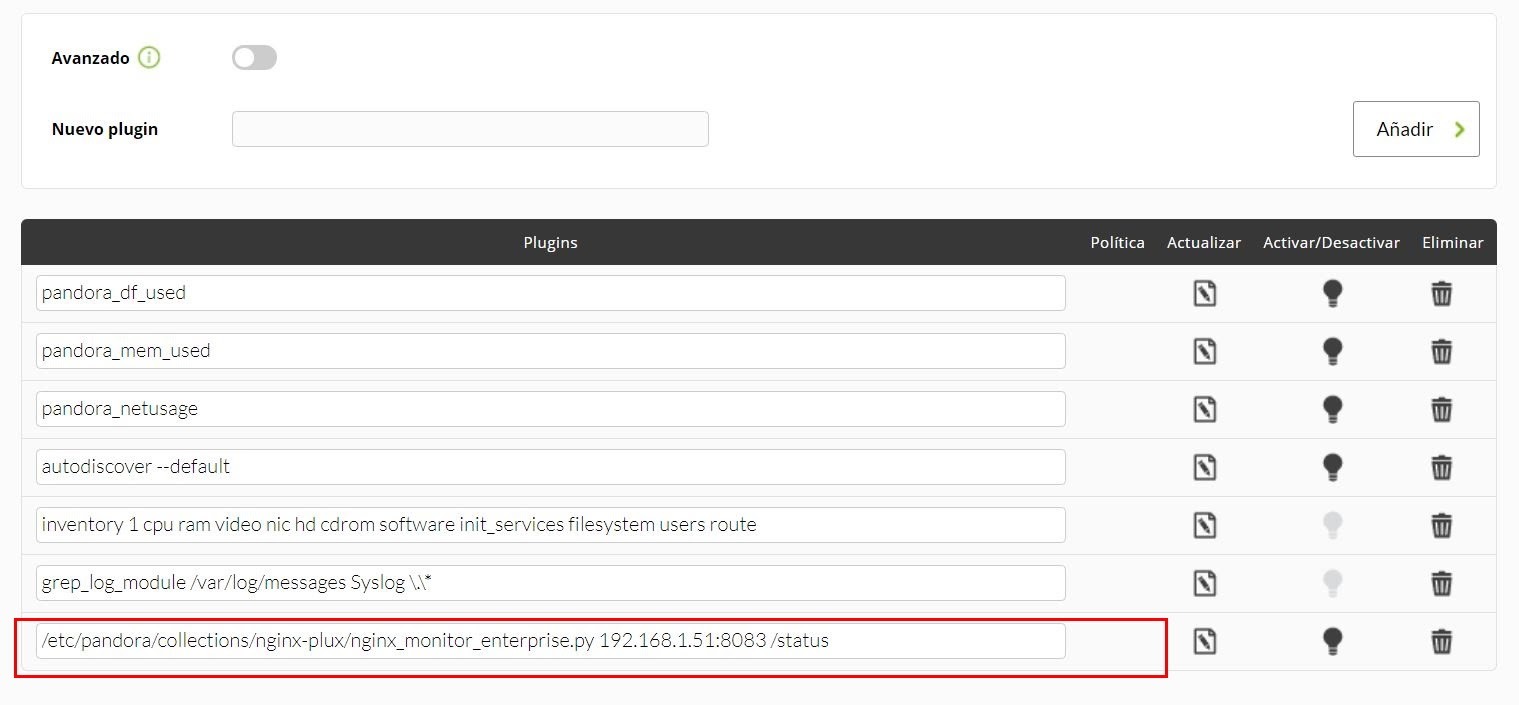
Enter the path to the plugin with the ip address to monitor, followed by /status:
You will see below that the plugin has been loaded (in this image you can see how to enter the IP, remember that there is a space between the IP and /status.
Then, we restart the agent with :
/etc/init.d/pandora_agent_daemon restartAnd if everything went well, the modules should appear in the agent.
Install plugin in zip version for windows devices
The first thing to do is to install the windows software agent, you can download it from https://sourceforge.net/projects/pandora/files/
we will look for the version of pandora we are using, and click on windows :
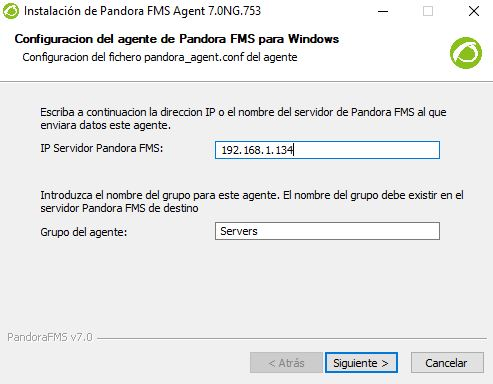
We will start the installation of the file, we put the path where we want it to be installed ("C:\Program Files" by default) and when the process is completed, we put the ip of the server where the agent is going to be installed.
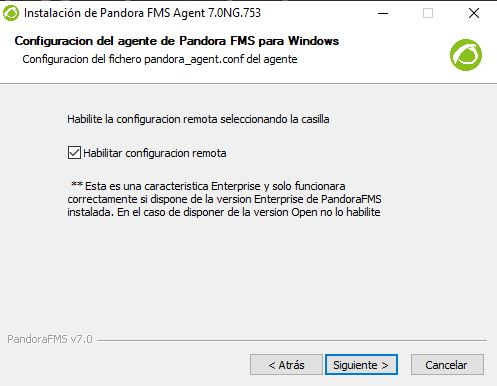
In the next window, check the remote configuration tab so that it is directly enabled.
When it is installed, we will create a collection in the console, go to configuration > collections :
Upload the .zip file and click on the tab that says "unzip":
Once this is done, click on "recreate file" to save it.
Then go to resources>manage agents>modules (of the windows software agent) and go to collections:
Click on the "add" icon in the previously created collection:
We will see that the collection has been created in "collections", in the folder where the agent was installed:
Then we go to "agent plugins" and make the call to the plugin of the collection we have created by putting "Program Files "agent plugins" <ip ngins with the port> :
We will see what has appeared below:
Go to agents, click on windows agent remote configuration:
And below we will see how this line has been created for us:
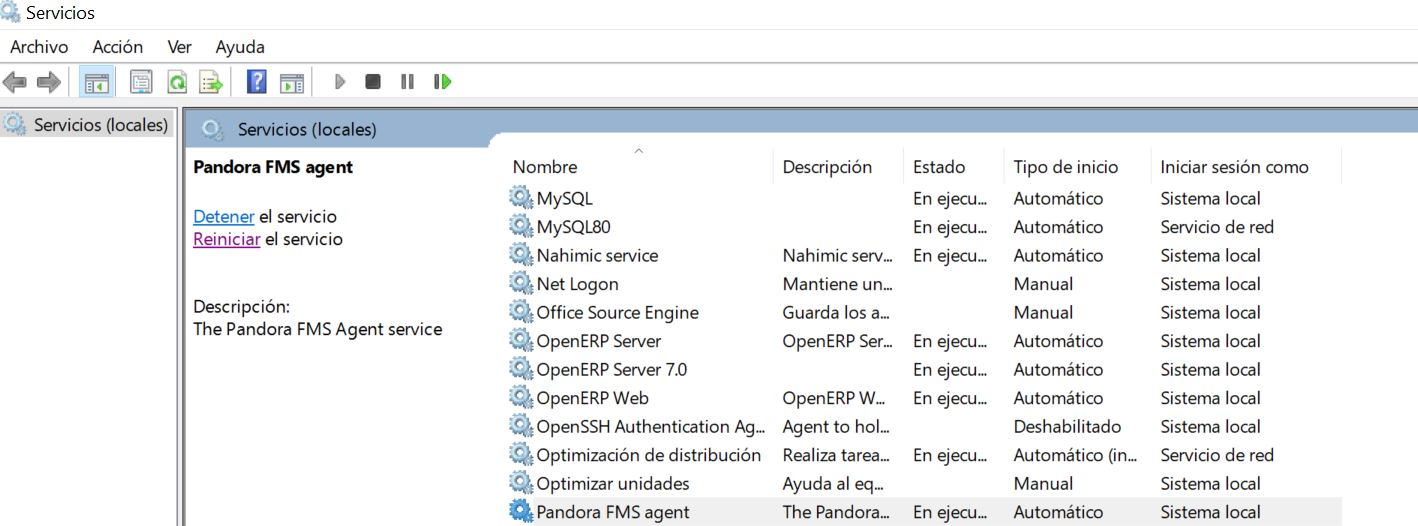
Once this is done, we restart the software agent again from services, and the modules will have been created.


