Configuration in Pandora
Ideally, to run any server plug-in, the plug-in should be located in the following path /usr/share/pandora_server/util/plugin/
Once this is done, we must change the owner and permissions of the plug-in so that they can be executed by the server. To do this we use the following commands:
chown pandora:root pandora_linode
chmod 755 pandora_linode
It should look like this.
Next we will proceed to register the plug-in. In this case we will do the registration manually.
The first step is to access the console. In the Servers section we access the Plugins tab.
In this tab will appear all the server plug-ins that are installed by default with Pandora FMS.
Click on Add.
The following window will be used to configure the plug-in before registering it.
The first section is general options, where we can set the name we want to give to the plug-in, the type of plug-in, standard or Nagios, the maximum execution time of the plug-in and a brief description.
In the next section we define the path where the plug-in is located and a series of macros, which are equivalent to the parameters of which the plug-in is composed.
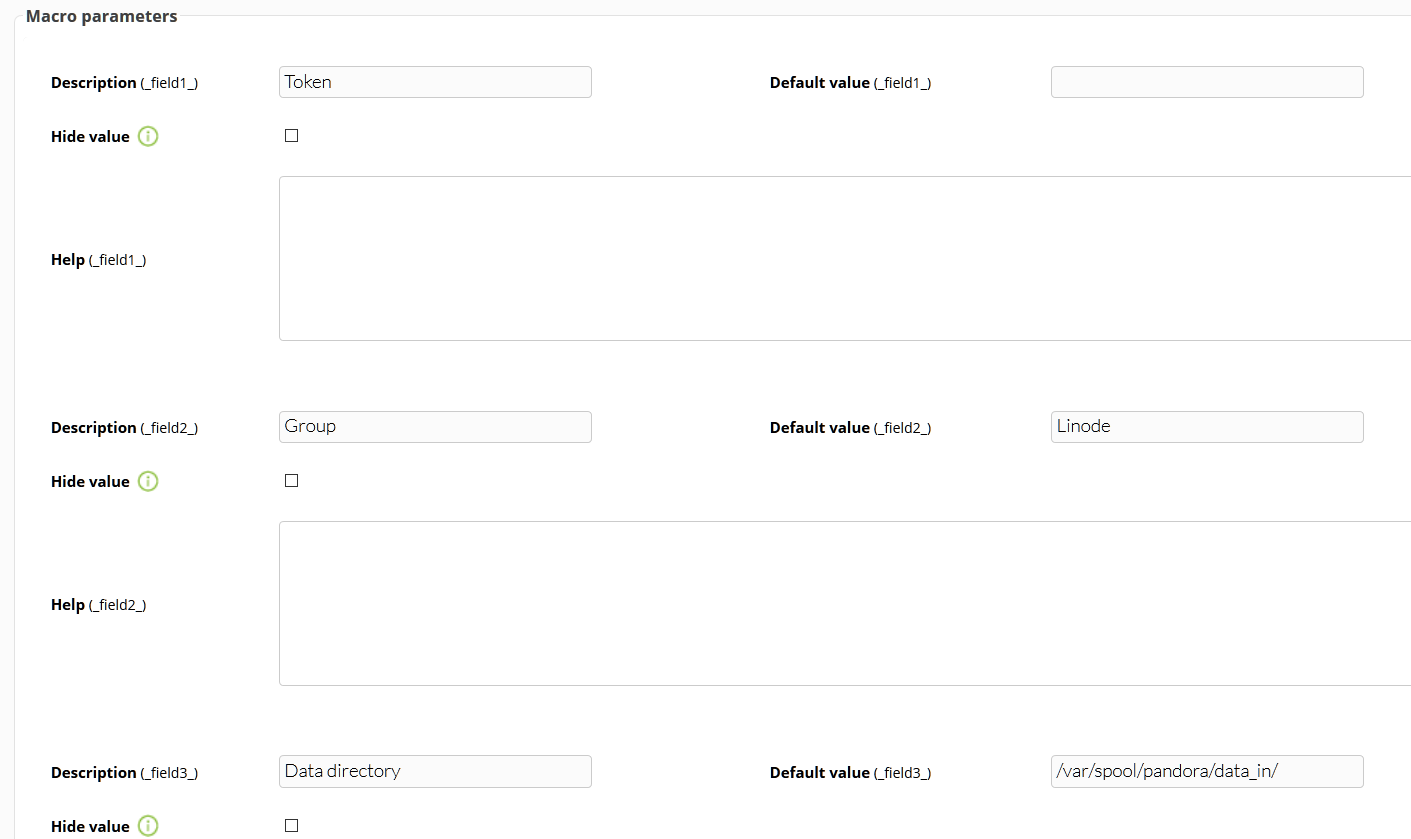
Finally, if we have added execution parameters, this section will be used to define these parameters by means of macros. We can also add default values to these macros, so that they will be used in case we do not provide a parameter.
In this case, since the only mandatory parameter is the token parameter, the other two will be configured with default values.
Once we have finished, click on Create.
Next we are going to create a server plug-in module.
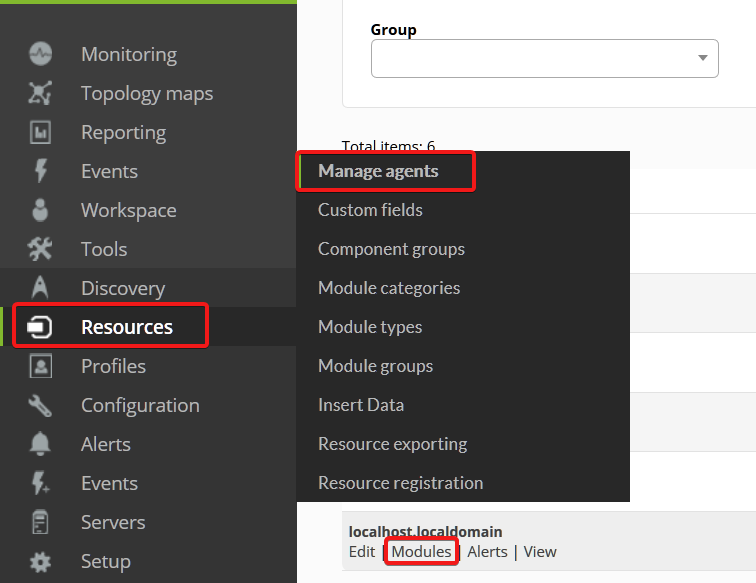
To do this we go to Resources > Manage Agents and click on 'Modules'.
Choose type 'Plugin server module' and click on Create.
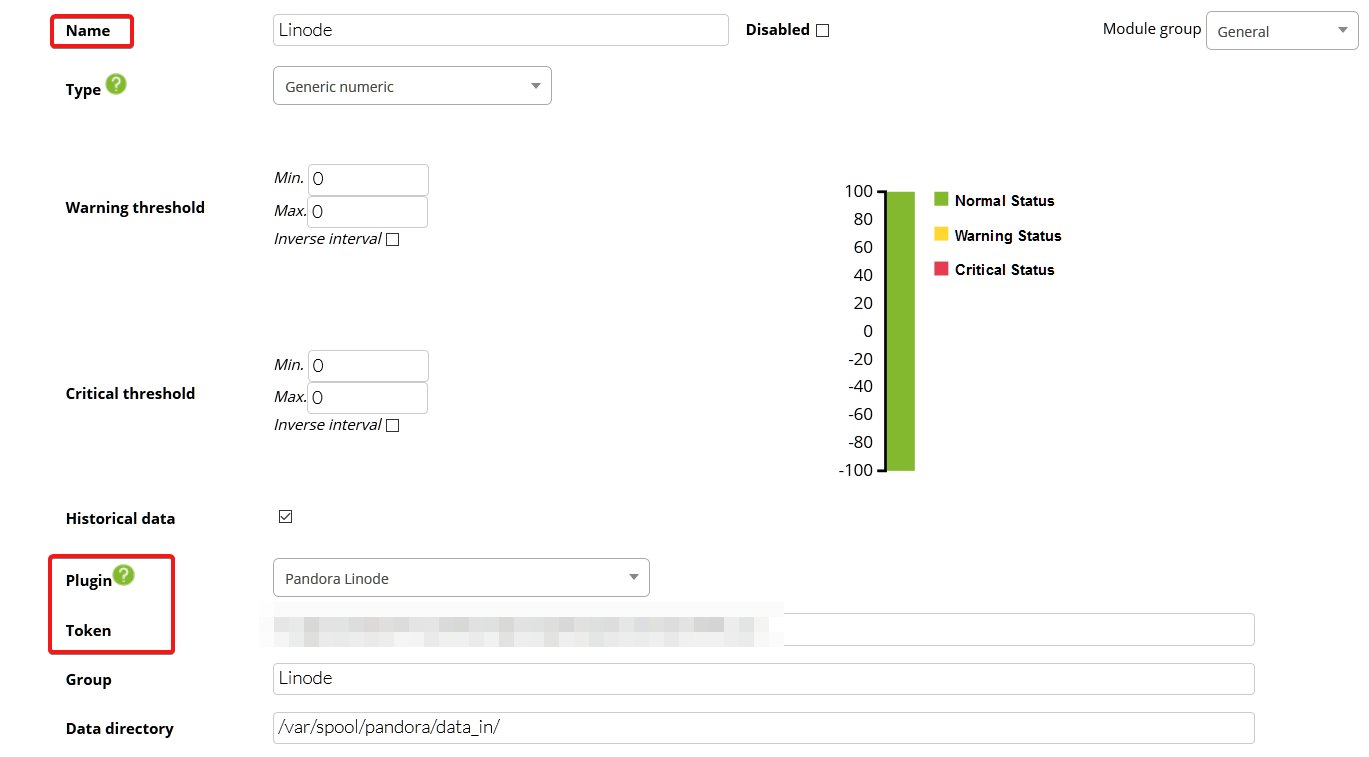
In the plug-in configuration section we can fill in several fields. Select the plug-in and add the token. As the fields group and data directory are defined by default, there is no need to modify them.
Once finished we click on Create.
If we have configured it well, the result will be as follows:


