3. Installation
Online installation
The term "Cloud provider" (or simply "Cloud") is used to describe virtual machine hosting, either exclusively or shared, in specialized providers with hardware, hypervisors and customer support web systems for configuration and administration.
For any of them you may install Pandora FMS Community version. CentOS 7.x is recommended as operating system, 4 gigabytes in RAM memory and 20 gigabytes in free disk space, preferably Solid State Drive (SSD).
For the case of CentOS 7.x:
curl -sSL https://pfms.me/deploy-pandora | bashIn the case of using RHEL 8.x or Rocky Linux 8.x:
curl -sSL https://pfms.me/deploy-pandora-el8 | bashIf you are using Ubuntu Server 22.04 to install the version:
curl -SsL https://pfms.me/deploy-pandora-ubuntu | bashWhen you finish executing the script, it will leave you installed and ready to use Pandora FMS in its latest version.
Offline installation (ISO Image)
Pandora FMS ISO Appliance will be used, since it is the fastest and easiest method. For more information on alternative installation methods, check Pandora FMS Installation from our official documentation.
Pandora FMS uses Linux as a base, but Pandora FMS is designed so that as an administrator user, you do not need knowledge about Linux or interact with it.
99% of the configuration and operation is done from Pandora FMS graphic console and it is not necessary to access the shell (the command black screen) of Linux system.
The installation image is based on Linux CentOS 7, and contains all the components and dependencies needed for Pandora FMS to work pre-installed. You must have a machine with minimum hardware requirements, a minimum of 4 GB of RAM and 20 GB of disk.
If you are pondering over Pandora FMS Enterprise version, the license comes pre-installed, and once it is activated and running, you will have 30 days to try the product.
After this time, your Pandora FMS will automatically become the Community version and you will be able to continue using it indefinitely. No data is lost and the system will continue working, but without Enterprise version features.
Installation from ISO Appliance
The ISO image must be downloaded from the download section and burned to a DVD, or you may also boot the system from this ISO file if you are using a virtualization system (VMWare, VirtualBox, etc).
The graphical installer will guide you step by step through the whole installation process. This installer is available in several languages and follows a standard installation process. The two sections where you should pay special attention are when asking for the root password and when asking about partitioning. Once installed, you will not have to access the Linux base system again. You may also do a manual network configuration at this point. Otherwise, the system will try to activate the network interface and assign an IP through DHCP.
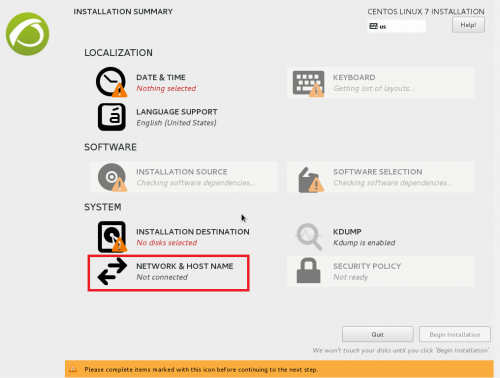
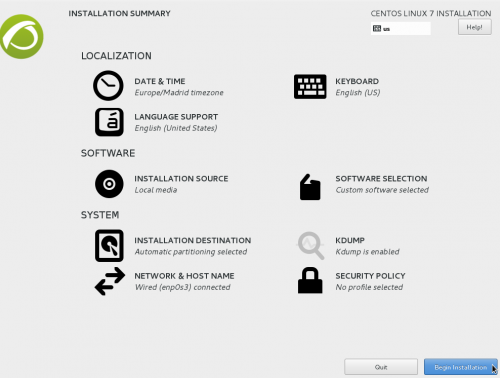
The requested options, "Date and Time", "Keyboard" and "Installation Destination" must be selected and configured. The network device must be activated.
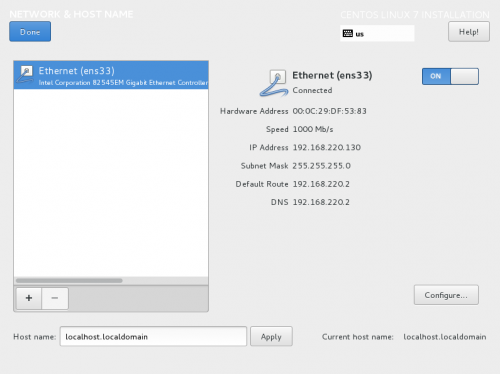
The network interface is activated and the host name may optionally be changed.
If you are going to set a fixed IP, this is the time to configure it, otherwise you will get it by DHCP.
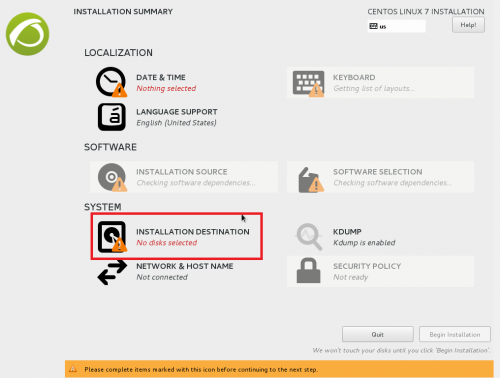
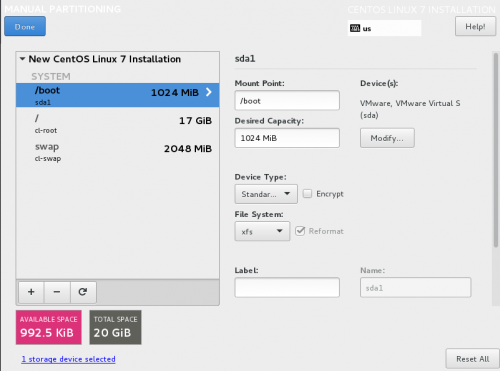
Clicking on the installation destination will start disk partitioning.
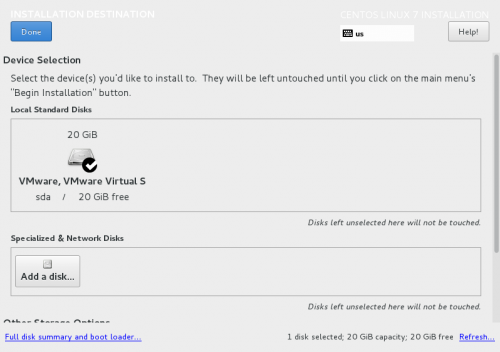
Select the disk where you are going to install it and the partitioning is chosen. The "Click to create them automatically" option will be used.
The created partitions will be checked and click Done. Click Accept changes.
Click on Start installation, at the bottom and the process will start installing.
Do not forget the root password or you will have to reinstall everything again.
Now wait until the installation is complete and the system is rebooted. If you are using virtualization, make sure the system boots from the disk first, or unmount the CD drive with Pandora FMS installation image. If you install it from the USB or CD, when the system will restart.
First steps
Once installed, the system should boot from the hard disk and after a few seconds, display a terminal screen:
In this same screen, you should find the IP that the system has assigned to be able to connect to Pandora FMS console.
Once you know the IP of Pandora FMS system, you may access it from a browser. Type in the following address, made up by the IP obtained:
http://x.x.x.x/pandora_consoleIn the example above, it would be http://192.168.126.129/pandora_console, but you have to get the system IP address correctly in order to continue. If everything is correct, you will access Pandora FMS console welcome screen, similar to this one:
Did you not get the expected results? Go to help or support sections.

