**Version** 080621.
**Telegram®** bots CLI connector for use in [Pandora FMS alerts](https://pandorafms.com/manual/en/documentation/pandorafms/management_and_operation/01_alerts "PFMS: Alerts system"). # Compatibility matrix - Python 3 for source code. - Linux® x64 for compiled code. - **Incompatible with MS Windows® systems.** # Requirements The requirements are as follows: - A Telegram® account to create the bot. - Add the bot to the notification group. - Get the group **id**. - Python version 3 installed on the PFMS server with the module: `request` (only for source code). # Configuration #### Creation of the BOT on Telegram From a Telegram® account, you must type `/start` to the user [**BotFather**](https://telegram.me/botfather "BotFather is the one bot to rule them all. Use it to create new bot accounts and manage your existing bots.") to create a *bot*. It will return a series of parameters and instructions available for the creation and manipulation of *bots*: [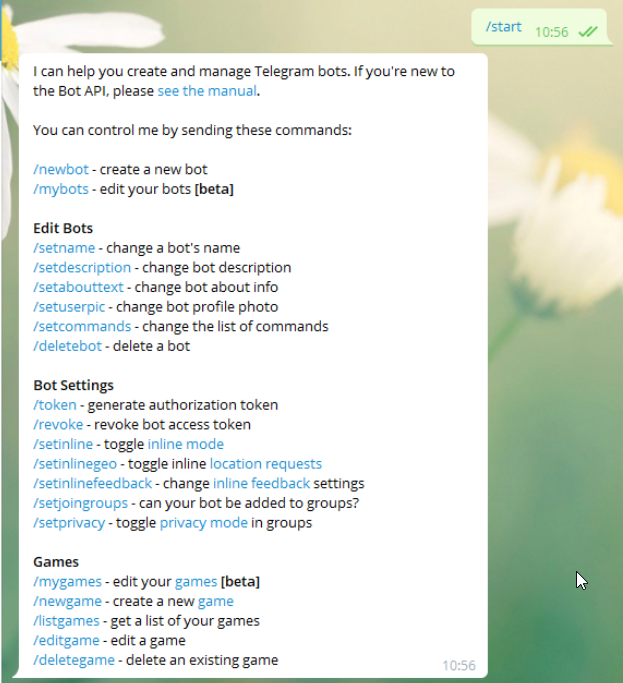](https://pandorafms.com/guides/public/uploads/images/gallery/2021-07/image-1626693442412.png) Use the `/newbot` option to create a new *bot*. It will ask for the name, in this case `Pandora_FMS_Test_bot` , you can use any name you prefer. Now you will be asked for a user ID for the bot, which must end in `_bot`. In this case, use the same one as before: `Pandora_FMS_Test_bot`. It will now return information about our bot and some instructions for its administration. You must copy and save the API token, which is what we will use to authenticate ourselves as that bot. [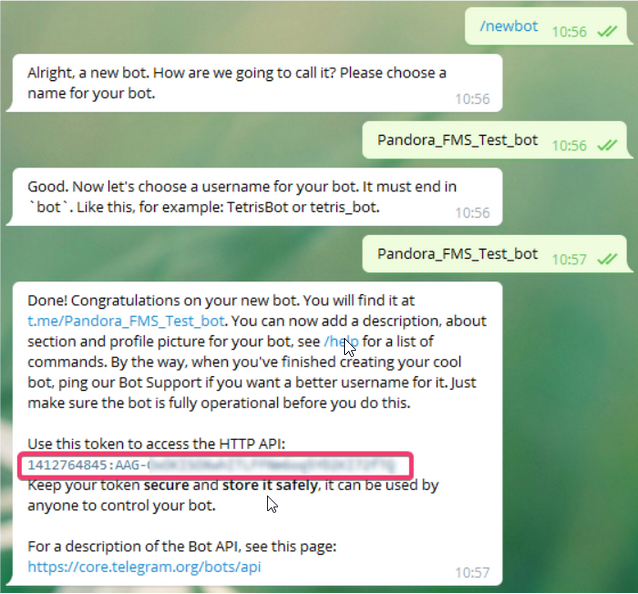](https://pandorafms.com/guides/public/uploads/images/gallery/2021-08/image-1629719317095.png) #### Create a group and add the bot To create a group from Telegram, you must click on create group and select the users who will be in that group. **It is important that one of those users** **is our bot in order to send messages to that group specifically**.You can also simply add the *bot* to an existing group.
#### [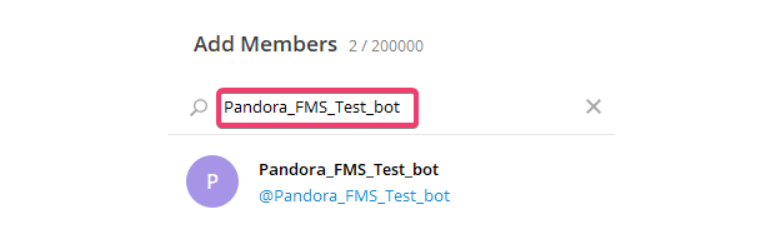](https://pandorafms.com/guides/public/uploads/images/gallery/2021-07/image-1626695074691.png) #### Obtain the group ID to send messages from the CLI Now we need to obtain the **id** of the group where we added our *bot*. There are different ways to do this. One of the simplest is to add another bot that extracts this information very easily: [**GetIDs Bot**](https://t.me/getidsbot "This bot gives you telegram-internal information about messages"). We add it to the group we want to know the **id** of, and it will give a series of instructions for its use. Just by adding it, it provides the information we need (**id** of the group). [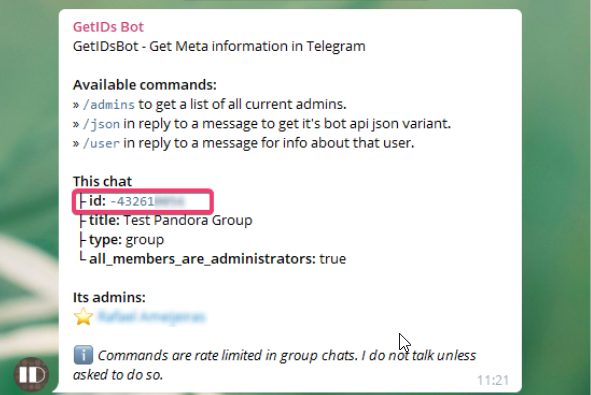](https://pandorafms.com/guides/public/uploads/images/gallery/2021-08/image-1629719396585.png) Once we have the group ID, we copy and save it.We can remove this [**GetIDs Bot**](https://t.me/getidsbot "This bot gives you telegram-internal information about messages") from the group because it has already fulfilled its purpose of giving us the ID.
#### Configure Pandora-Telegram CLI To use Pandora Telegram CLI (source code), you must have Python version 3 and Pip version 3 installed for dependencies. To install the dependencies, in the package to be downloaded, you will see the file `requirements.txt`. Go to its directory and run: ```bash pip3 install -r requirements.txt ``` This will download and install the necessary dependencies. Once the dependencies are installed, run the `pandora-telegram-cli.py -h` file with the Python interpreter to view its help: ```bash python3 pandora-telegram-cli.py -h usage: pandora-telegram-cli.py [-h] -m MESSAGE -t TOKEN -c CHAT_ID Bot telegram cli optional arguments: -h, --help show this help message and exit -m MESSAGE, --message MESSAGE Message to be send -t TOKEN, --token TOKEN Bot token -c CHAT_ID, --chat_id CHAT_ID chat id to send messages ```If we see the help without any errors, then we are ready to use it.
# General plugin parameters ``` # [Optional parameter] python pandora-telegram-cli.py \ -tThe Telegram® plugin is fully integrated into Pandora FMS version 800.
The default *script* is located at: `/usr/share/pandora_server/util/pandora-telegram-cli.py`. However, any location can be used as long as the PFMS Server has access to it. **You must ensure that all dependencies are installed**, check this, run: ``` python3 pandora-telegram-cli.py ``` You will get a response similar to this: [](https://pandorafms.com/guides/public/uploads/images/gallery/2021-08/image-1629719592284.png) If there is an error, the dependencies must be reinstalled: ```bash pip3 install -r requirements.txt ``` #### Telegram alert command To verify the installation of its command, use the **Management → Alerts→Commands** menu and enter the search key in **Filter**: [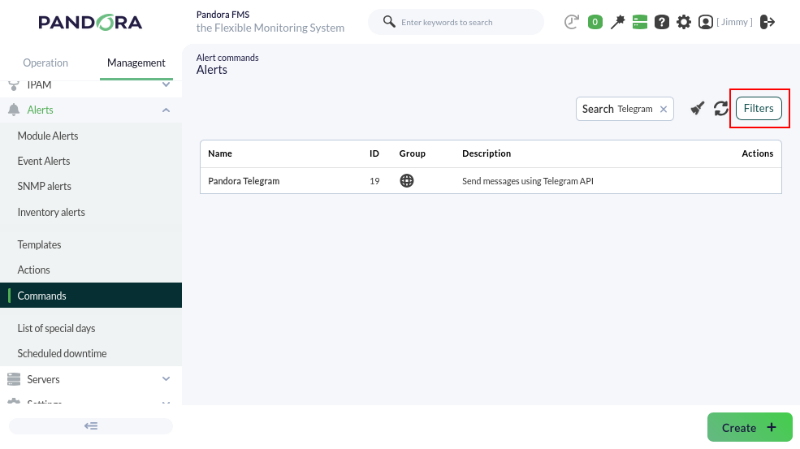](https://pandorafms.com/guides/public/uploads/images/gallery/2026-01/pfms-telegram-integration-140.png) This command does not allow editing or deletion, so it is considered read-only and is used by the system. Therefore, you must go to the general settings to save the token obtained in the previous topic. **Managements → Settings → System settings → General setup → Alerts configuration** menu: [](https://pandorafms.com/guides/public/uploads/images/gallery/2026-01/pfms-telegram-integration-142.png)The field displays the token in plain text. Take the necessary precautions to prevent third parties from viewing it.
When finished, click the **Update** button to save the Telegram token in the database. #### Telegram action command Go to the **Management→Alerts→ Actions** menu and in **Filter** select **Pandora Telegram** in the **Command** field. The alert actions that use the **Pandora Telegram** command will be displayed: [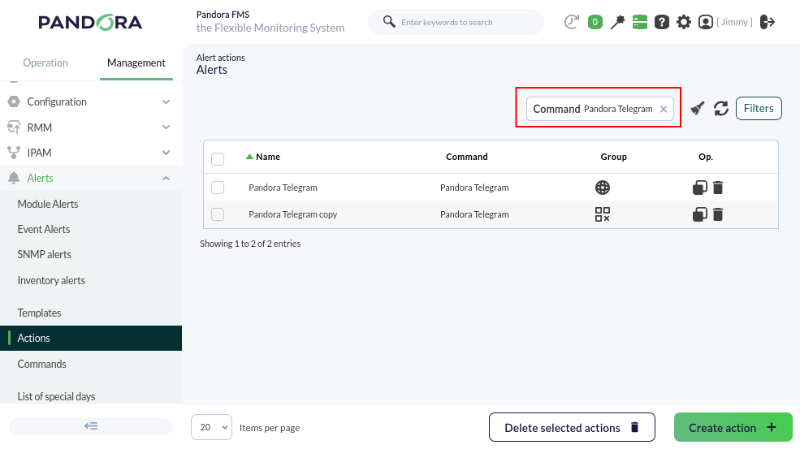](https://pandorafms.com/guides/public/uploads/images/gallery/2026-01/pfms-telegram-integration-144.png) You may: - Use the default action when installing Pandora FMS. - Copy the previous action and customize it as needed. It may be the case that several groups of agents use different alert actions configured according to each case. - Create an action based on the Telegram alert command (read-only).For any of the three cases, the Chat ID must always be configured, obtained as indicated in the [previous topic](https://pandorafms.com/guides/public/books/telegram-bot-cli-8f8/page/configuration).
Whether editing, copying and editing, or creating, the configuration process is similar: [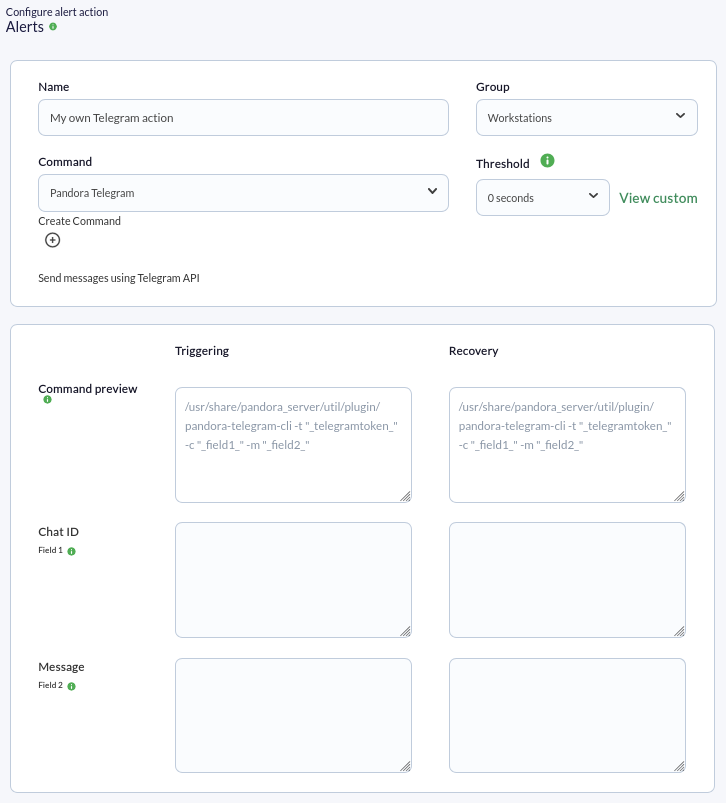](https://pandorafms.com/guides/public/uploads/images/gallery/2026-01/pfms-telegram-integration-146.png) - Indicate and select the name and group as appropriate. - Ensure that **Pandora Telegram** is selected in **Command** list. - In **Chat ID**, enter the corresponding identifier. *This field does not accept macros; only enter the identifier.* - In the **Message** field for **Triggering**, if it is empty, insert `[PANDORA] Alert FIRED on _agent_ / _module_ / _timestamp_ / _data_` . See the other [macros available](https://pandorafms.com/manual/en/documentation/pandorafms/management_and_operation/01_alerts#ks15) to insert more information. - In the **Message** field for **Recovery**, if it is empty, insert `[PANDORA] Alert RECOVERED on _agent_ / _module_ / _timestamp_ / _data_` . See the other [macros available](https://pandorafms.com/manual/en/documentation/pandorafms/management_and_operation/01_alerts#ks15) to insert more information. - Press the **Create** button if you are creating an alert action or (**Update** if you are editing) to save the parameters. Click **Create**. Once you have created this alert action, it can be included in [a policy](https://pandorafms.com/manual/en/documentation/pandorafms/complex_environments_and_optimization/02_policy "PFMS: Policies monitoring"), [a template](https://pandorafms.com/manual/en/documentation/pandorafms/technical_annexes/34_pfms_templates_policies_massives "PFMS: Differences between Templates, Policies, and Mass Operations"), or [Module](https://pandorafms.com/manual/es/documentation/pandorafms/management_and_operation/01_alerts#ks5_2 "PFMS: Gestionar alertas desde el agente").If additional information is required, please visit the [documentation for the *plugin*](https://pandorafms.com/library/telegram-bot-cli/).