RabbitMQ
This plugin allows to obtain monitoring data from a RabbitMQ environment.
The information is obtained via web through the RabbitMQ API, so it is not necessary to install any additional software for its operation.
- Introduction
- Compatibility matrix
- Pre requisites
- Configuration
- Manual execution
- Configuration in pandora
- Modules generated by the plugin
Introduction
This plugin allows to obtain monitoring data from a RabbitMQ environment.
The information is obtained via web through the RabbitMQ API, so it is not necessary to install any additional software for its operation.
This plugin is designed to work both as a server plugin and as an agent plugin, offering flexibility in its deployment according to your infrastructure and monitoring needs.
Compatibility matrix
Developed against:
RabbitMQ 3.7.18
Pre requisites
Connection to the RabbitMQ API is required from the machine where the plugin is launched.
Connection with the Tentacle service associated to your Pandora FMS server is required if it is not executed as an agent plugin.
The deployment of this plugin by binaries does not require any special requirement.
Configuration
The plugin configuration file is divided into blocks:
API access settings
##################
## RabbitMQ access
##################
## API host:port
host=192.168.80.20:8080
## OVM Manager user
user=guest
## OVM Manager password
pass=guest
host
IP address and connection port for the RabbitMQ API
user
RabbitMQ API login user
pass
Password of the specified user
Agent configurations
###################
## Agent parameters
###################
## Agent name (if not running as agent plugin)
agent_name=RabbitMQ
## Agent interval
interval=300
agent_name
Name of the agent to which the monitoring will be sent if the plugin is not running as an agent plugin.
interval
Monitoring interval for the indicated agent.
XML file transfer settings
######################
## Transfer parameters
######################
## Temporal folder
tmp=/tmp
## Transfer mode used to send XML file (tentacle or local)
transfer_mode=tentacle
## Local folder to copy XML file (used only if transfer_mode is not tentacle)
local_folder=/var/spool/pandora/data_in/
## Tentacle server IP
tentacle_ip=127.0.0.1
## Tentacle server port
tentacle_port=41121
## Tentacle extra options (if needed)
#tentacle_opts=
## Define Module Group
#module_group=General
tmp
Temporary directory where the agent XML files will be generated before transferring them to Pandora FMS server (if the plugin is not executed as agent plugin).
transfer_mode
File transfer method to be used. If it is not set as "tentacle" it will be considered that the transfer method is "local" (copying the XML files from the temporary directory to a defined one).
local_folder
Directory to which the XML files will be copied to if the transfer method is not set to "tentacle".
tentacle_ip
IP address to which the XML files will be sent if the transfer method is set to "tentacle".
tentacle_port
Port to connect to the Tentacle server specified in the "tentacle_ip" parameter.
tentacle_opts
Additional options for transferring files to the indicated Tentacle server.
module_group
Defines the group to which the modules will belong.
Additional configurations
###################
## Extra parameters
###################
## Set to 1 to run de plugin as an agent plugin
as_agent_plugin=1
as_agent_plugin
If set to "1" the plugin will be executed as an agent plugin. If set to "0" the plugin will generate XML files that will be transferred to Pandora FMS server to be processed.
Manual execution
To run the plugin configure the configuration file "rabbitmq_monitor.conf" according to the instructions above.
Execution of the plugin:
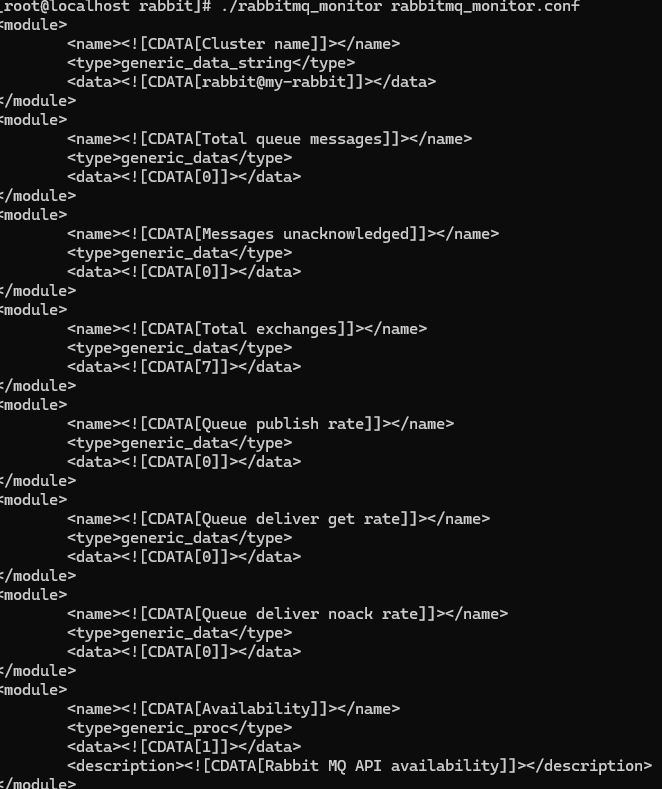
./rabbitmq_monitor rabbitmq_monitor.confWith as_agent_plugin 1:
It will print by console the XML with the RabbitMQ information.
With as_agent_plugin 0:
It will create the agent and the associated modules in Pandora, printing 1 as the final result.

Configuration in pandora
As a server plugin
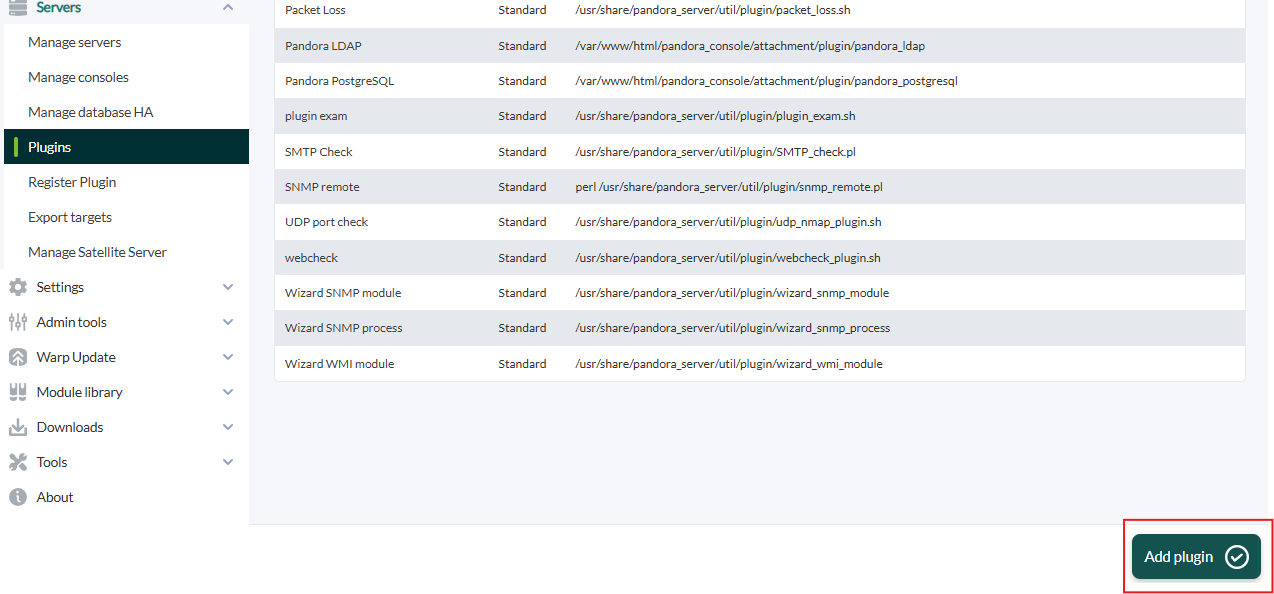
 click in "add plugin":
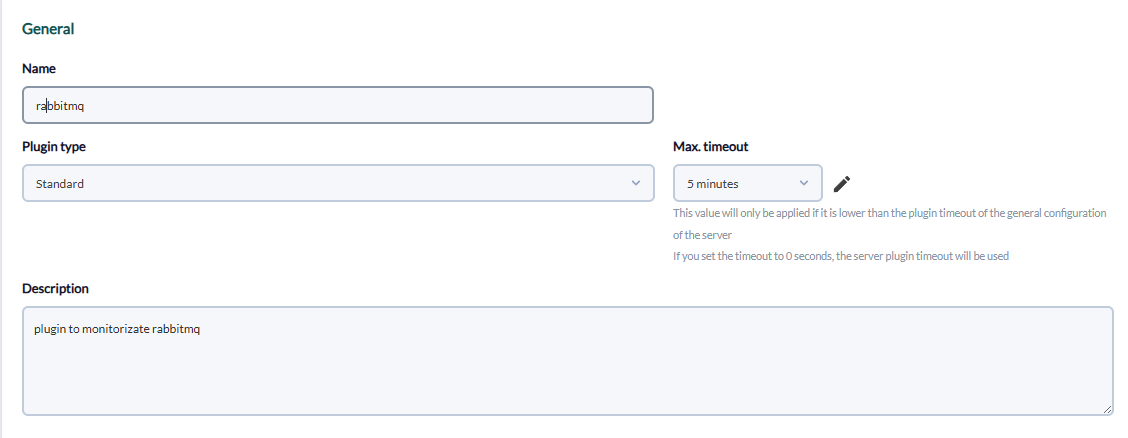
We put in the name and description of your choice:
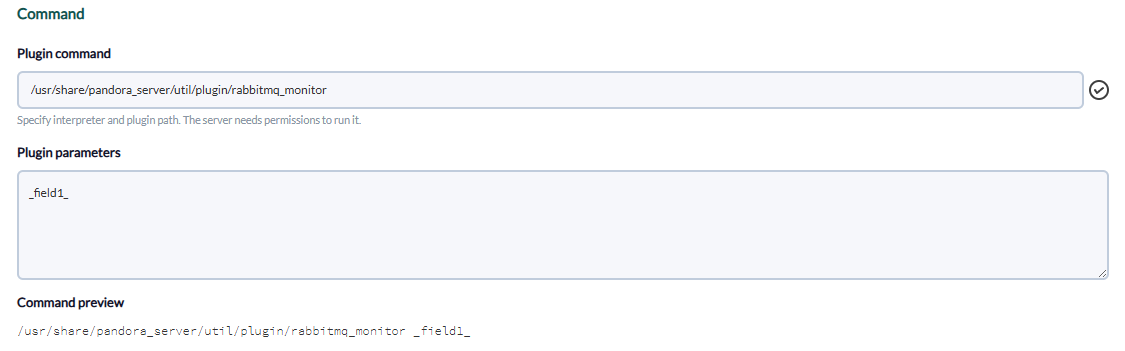
We enter as command the path to the plugin, and as parameters the ones we have entered by executing the plugin, the "_field_" fields are macros defined below.
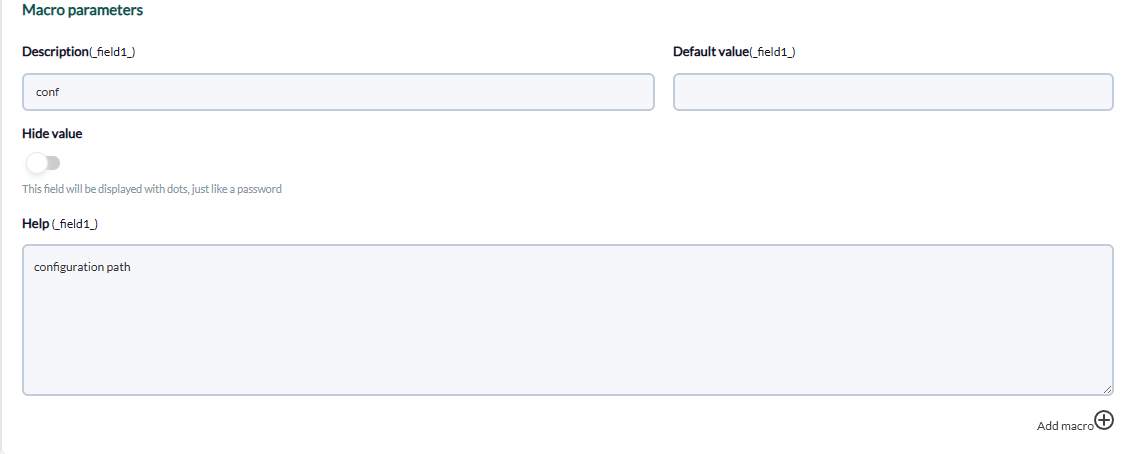
We put for each macro the description of your choice and as value the data of your rabbitMQ
As agent plugin
We should enable the remote configuration, to enable it we have to open the pandora_agent.conf file:
vim /etc/pandora/pandora_agent.confInside we look for the remote_config line, to enable it we set it to 1.

And after that we restart the agent :
/etc/init.d/pandora_agent_daemon restartThe remote configuration will have been activated, go to the agents menu and click on the remote configuration icon, which is as follows:

Then we go to plugin menu :

We enter the command, click in add:

Example:
/usr/share/pandora_server/util/plugin/rabbitmq_monitor /usr/share/pandora_server/util/plugin/rabbitmq_monitor.confA new plugin will have been created:

Once this is done, we restart the agent:
/etc/init.d/pandora_agent_daemon restartAnd if we go to the agent with the remote configuration, the rabbitMQ modules will have been created.
Modules generated by the plugin
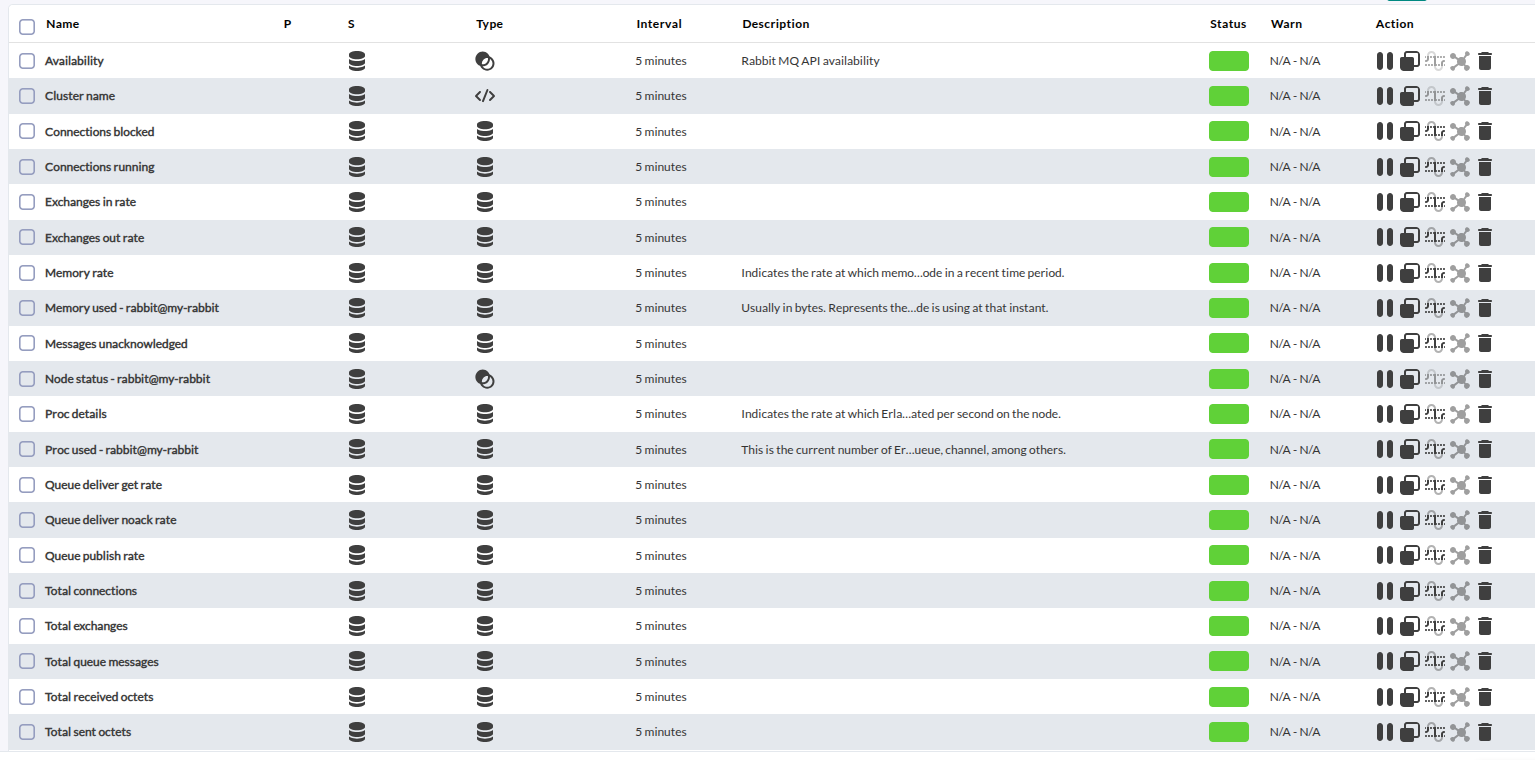
The standard execution of this plugin will return the following modules:
- Availability.
- Cluster name.
- Total queue messages.
- Messages unacknowledged.
- Total exchanges.
- Queue publish rate.
- Queue deliver get rate.
- Queue deliver noack rate.
- Mem used rate - nodename.
- Proc used rate - nodename.
- Node status - nodename.
- Exchanges in rate.
- Exchanges out rate.
- Total connections.
- Connections running.
- Connections blocked.
- Total received octets.
- Total sent octets.