Menú **Management** **→ Discovery →Host & Devices →Network scan**.
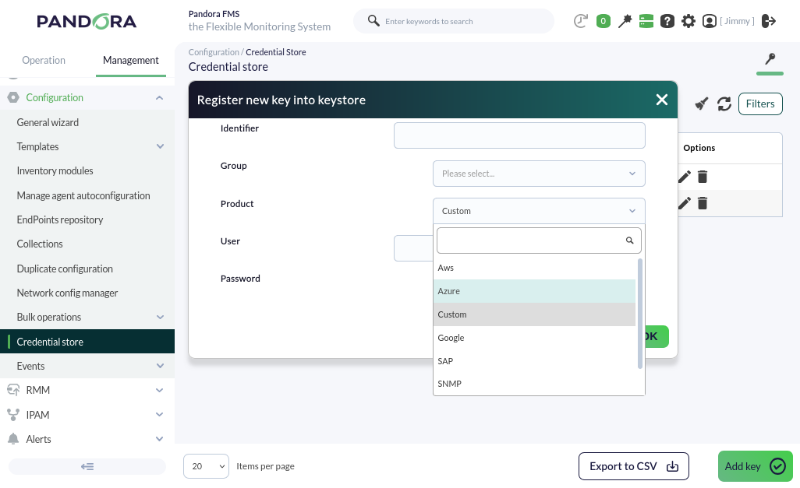
[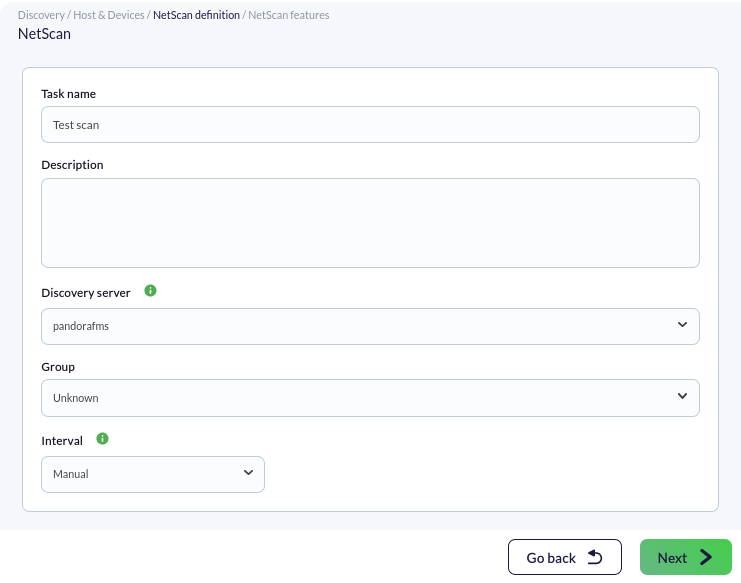](https://pandorafms.com/guides/public/uploads/images/gallery/2026-01/pfms-discovery-network-scan-image-010.png) El proceso de configuración es similar al anterior, esta vez seleccionando el modo avanzado y accederemos a las opciones de configuración de la tarea de descubrimiento en la parte inferior: [](https://pandorafms.com/guides/public/uploads/images/gallery/2026-01/pfms-discovery-network-scan-image-020.png) Para habilitar la monitorización con SNMP y WMI deberemos activar el *token* correspondiente y facilitar los datos requeridos por cada protocolo. - **SNMP** dispone de "comunidades" que son como *contraseñas* de acceso. Si no conoce su **SNMP community** pruebe `public`. Puede introducir tantos como quiera, de forma que se probará con todos ellos. - Las credenciales para el servicio **WMI** (y otros) se pueden definir en **Management** **→ Configuration** **→ Credential store**.**Las *credential store*** son almacenes seguros de usuario/contraseña que se utilizan posteriormente en chequeos remotos, configuraciones de equipos, acceso remoto, etcétera. De forma que se puedan reutilizar en diferentes puntos de Pandora FMS:
[](https://pandorafms.com/guides/public/uploads/images/gallery/2026-01/pfms-discovery-network-scan-image-030.png) Habilitaremos también el token **Review results**, que nos permitirá ver los componentes encontrados por Pandora FMS en la tarea de descubrimiento una vez que termine, mostrando lo que ha encontrado y permitiendo añadirlo a la monitorización remota del agente con un solo clic. [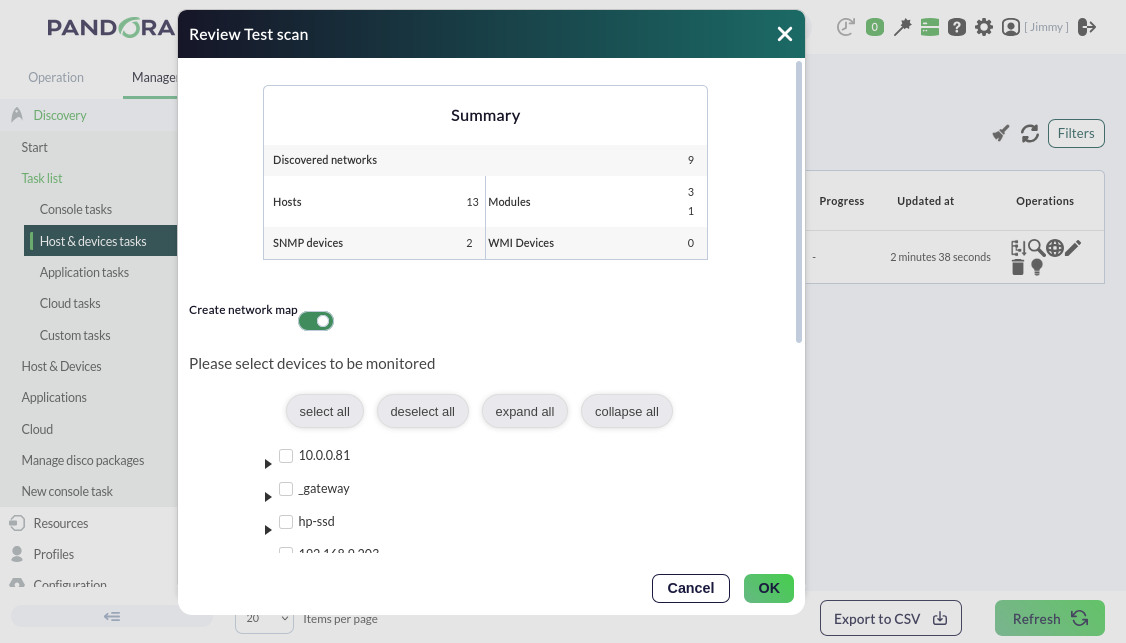](https://pandorafms.com/guides/public/uploads/images/gallery/2026-01/pfms-management-discovery-host-and-devices-netscan-11.png) Si no necesitas más monitorización ni configuración, pasemos al alerta de métricas [aquí ](https://pandorafms.com/guides/public/books/primeros-pasos-con-pandora-fms/page/13-alertas-por-mail)¿No se están logrando los resultados explicados en el capítulo? Acceda a la sección de [ayuda](https://pandorafms.com/guides/public/books/primeros-pasos-con-pandora-fms/page/21-donde-mirar-en-caso-de-problemas) o [soporte](https://pandorafms.com/guides/public/books/primeros-pasos-con-pandora-fms/page/22-soporte)