Plugin ssh inventory
Plugin to launch commands in switches and show their output in PandoraFMS
- Introduction
- Compatibility matrix
- Pre requisites
- Parameters
- Manual execution
- Configuration in PandoraFMS
Introduction
The purpose of this plugin is to execute ssh commands in switches to return information that can be consulted in PandoraFMS, such as its configuration or its firmware version.
The plugin connects to the switch, executes the command configured by the user and shows its output in the configured agent inventory.
Compatibility matrix
| Systems where tested | Rocky linux, Fedora 34 |
| Systems where it works | Any linux system |
Pre requisites
- Connectivity from PandoraFMS to the target switch
Parameters
| "address" | Host or ip of the switch to which you want to connect. |
| "username" | User |
| "password" |
Password. In case you need to enable password, specify separating password and enable with "/" : password/enable. Example : P4nd0r4/S3uK! |
| "command" | Command to be executed on the target machine |
| "extra_command" | In case paging is required (the output is shown cut off), use this parameter to launch a command to enable paging mode. |
| "--debug" | To display extra run information |
Manual execution
The plugin execution format is as follows :
./ssh_inventory < host > < user > < password > < command > < command paging > < apply filter : 1 or 0 >In case you need enable password :
./ssh_inventory < host > < user > < password / enable password > < command > < command paging > < apply filter : 1 or 0 >Example of execution on cisco switch (with enable password):
./ssh-plugin 192.168.23.212 admin pandora/en4Bl3 "show running-config" "terminal length 0" 1Example of execution in mikrotik switch (without enable password):
./ssh_inventory 192.168.87.21 admin pandora "system resource print" "" 1Example of execution on switch A10 (with enable password):
./ssh-plugin 192.168.1.27 admin pandora/pandora "show running-config" "" 1Configuration in PandoraFMS
Para configurar el plugin en PandoraFMS, se deben seguir los siguientes pasos :
1. Upload the plugin to PandoraFMS, for example in the following path:
/etc/pandora/plugin2. Go to the inventory modules menu and create a new one.
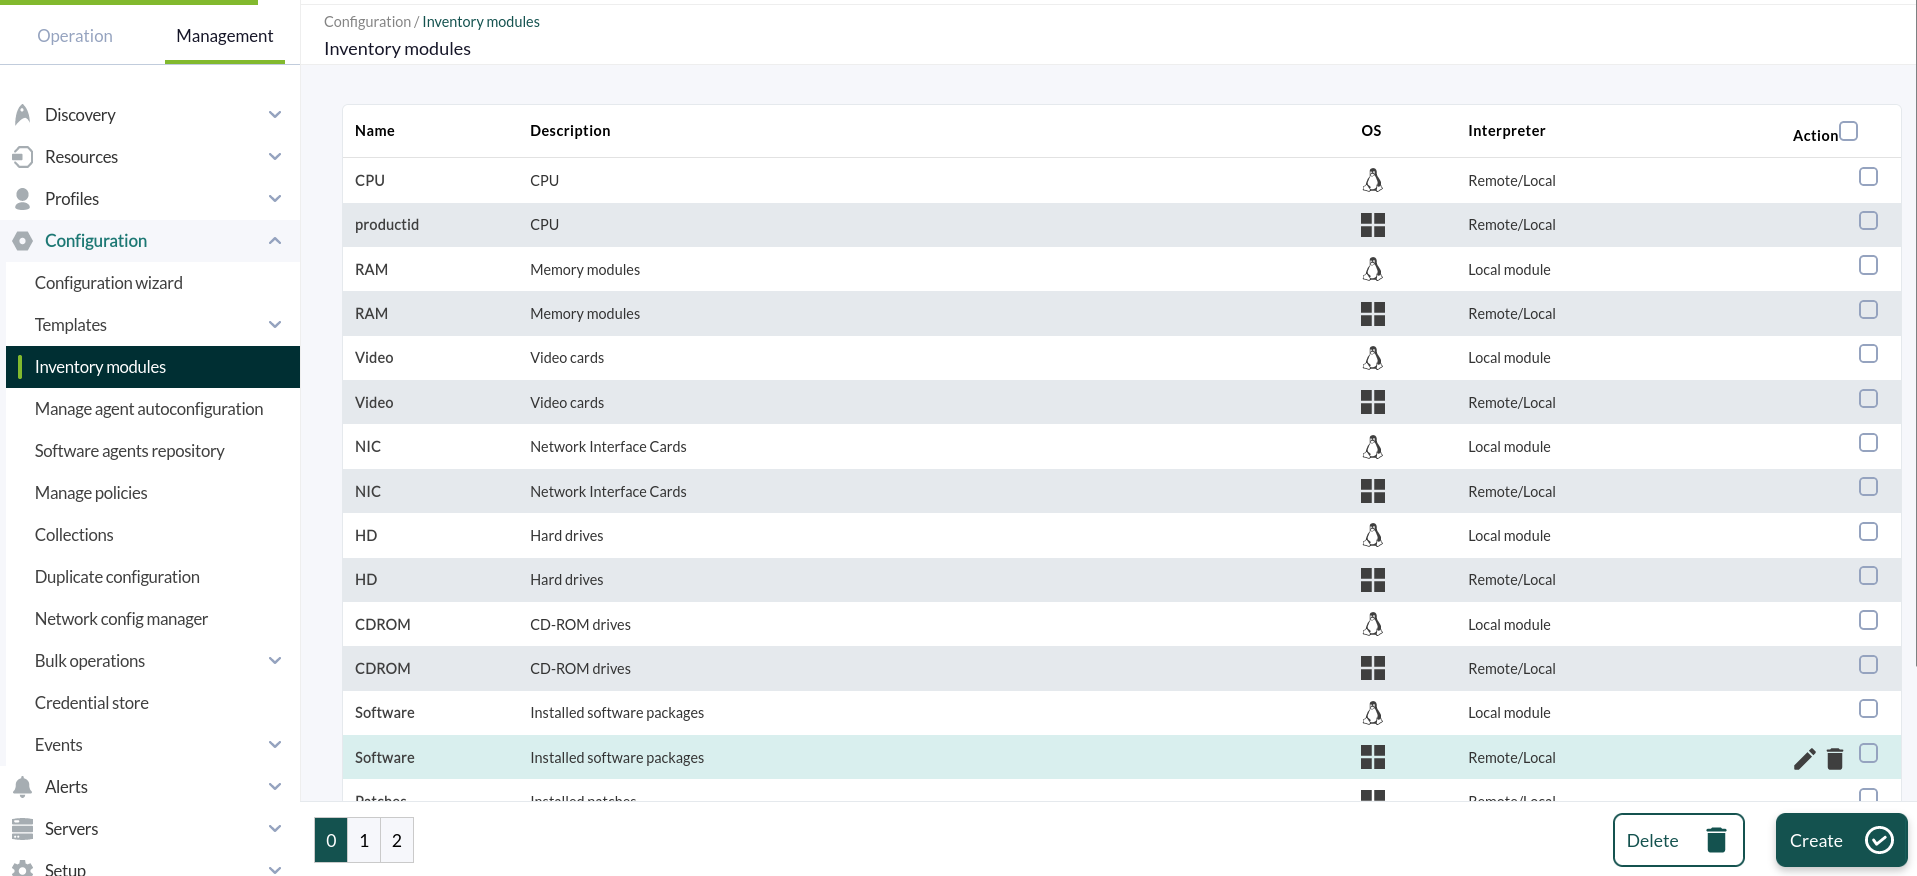
3. Create a new inventory module
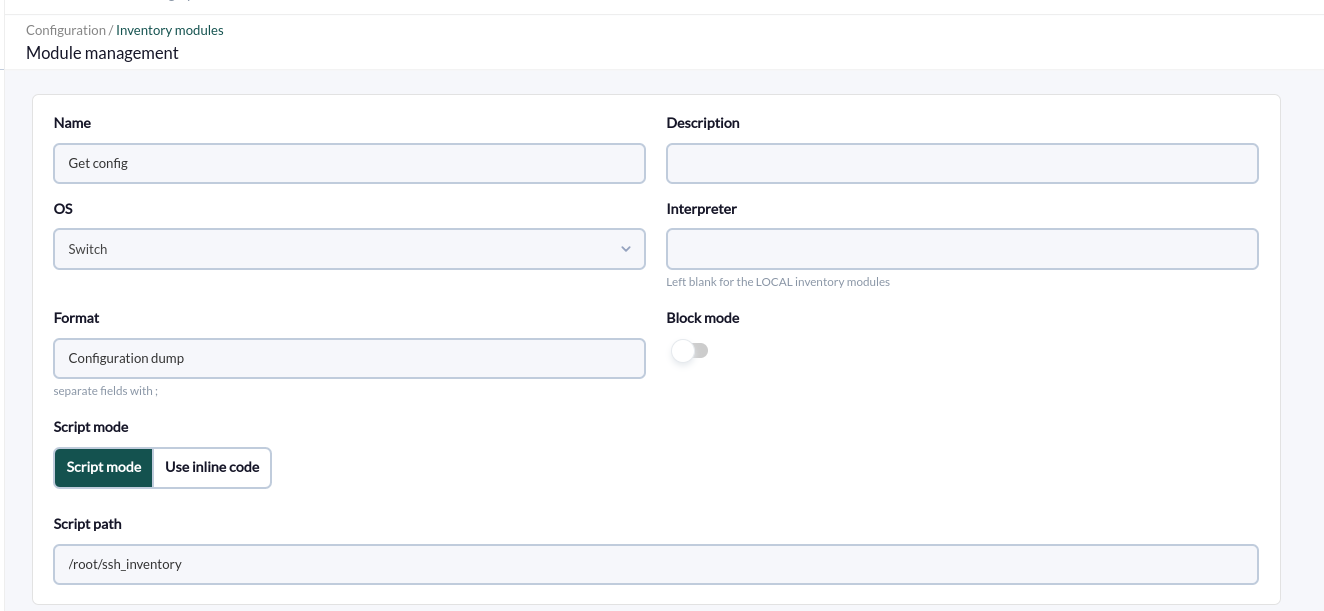
The interpreter must be left empty, in script mode, the path to the plugin must be entered.
4. Go to an agent and configure the plugin
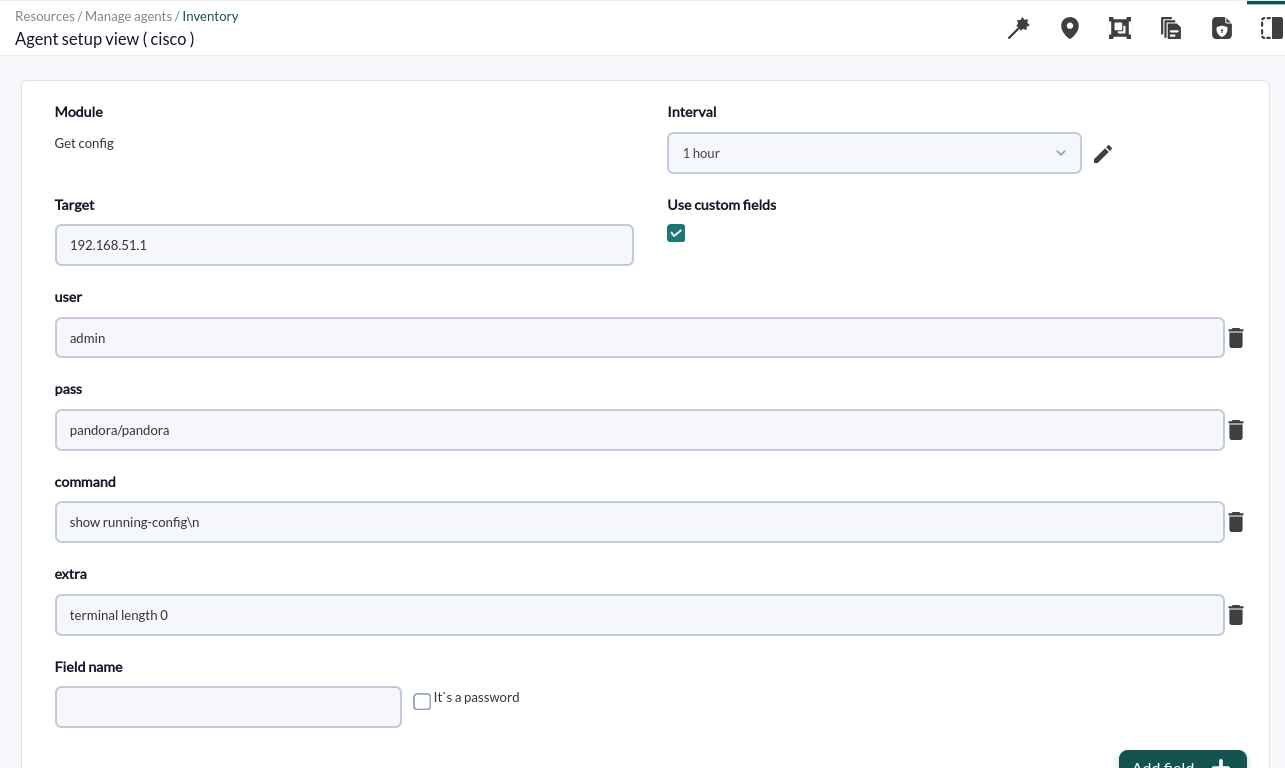
The custom fields option must be checked, add the target and an interval, the following custom fields must be added:
- user: user
- password: the password (if there is enable it should be specified in this field separated from the password with "/" as in the example),
- command: The command to launch
- extra command: if required, otherwise leave blank.
Once these steps are done, the plugin should be added and the result of the command execution will be shown in the agent inventory view:
