Plugin Openstack
Plugin to take monitoring data from an open stacks installation.
- Introduction
- Compatibility matrix
- Prerequisites
- Configuration
- General plugin parameters
- Plugin-specific parameters
- Manual execution
- Configuration in Pandora
- Modules generated by the plugin
- Frequently asked questions
Introduction
View. 20/07/2021
With this plug-in you can view the monitoring data of your openstack instances and hypervisors.
It connects to the account via a token.
Type: Server plug-in
Compatibility matrix
| Systems where it has been tested |
CentOS 7 |
| Systems where it should work |
Any linux system |
Prerequisites
Required:
- An Openstack installation
- Generate an API read token using a curl command with your Openstack account credentials.
- Have python3 installed on the machine where pandora is installed.
- Have installed the requests module in its python3 version.
- Have the Pandora FMS Data Server enabled.
- Have Pandora FMS Plugin Server enabled.
Configuration
The plugin makes use of a token, which will authenticate with the api when we introduce it as a parameter in the command. To create this token, we will go to our Dashboard and click on "api access":

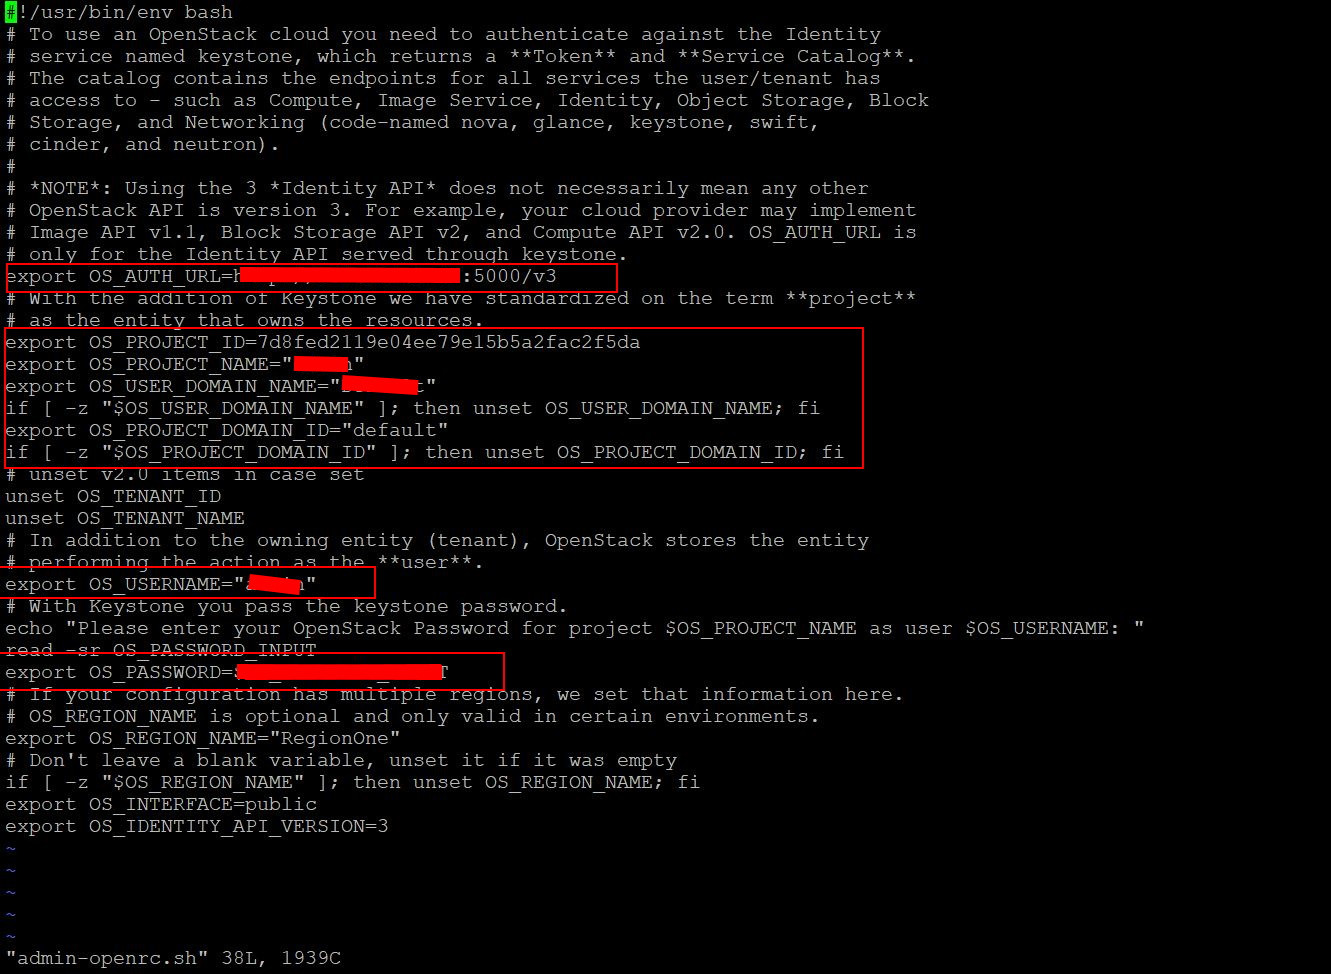
Inside here, we are going to download the file "admin-openrc.sh", inside this file we will be able to see all the credentials that we have to put in a curl to generate the token (if you know all these credentials, it is not necessary to download the file, in the section "see credentials" there are some but not all, between this section and the file you will be able to check all the data).

We open the file and see the credentials:
This file is also used to authenticate on the machine where openstack is installed and to use the CLI, but we are not going to use it in this manual (the following image would be a sample of how it would be executed, after that it would ask for the password, which is the same as the one you use to enter the dashboard).

After doing this, we run the following command, entering our credentials in each section:
curl -v -s -X POST $OS_AUTH_URL/auth/tokens?nocatalog   -H "Content-Type: application/json"   -d '{ "auth": { "identity": { "methods": ["password"],"password": {"user": {"domain": {"name": "'"$OS_USER_DOMAIN_NAME"'"},"name": "'"$OS_USERNAME"'", "password": "'"$OS_PASSWORD"'"} } }, "scope": { "project": { "domain": { "name": "'"$OS_PROJECT_DOMAIN_NAME"'" }, "name":  "'"$OS_PROJECT_NAME"'" } } }}' \
| python -m json.tool
We will need to enter the following data :
| Parámetro | Tipo | Descripción |
| User Domain (requerido) | string | Dominio del user. |
| username (requerido) | string | Nombre del user. |
| password (requerido) | string | Password del user. |
| Project Domain (opcional) | string | Dominio del proyecto. |
| Project Name (opcional) | string | Nombre del proyecto. |
| Project ID (opcional) | string | Id del proyecto |
Example of the use of curl:
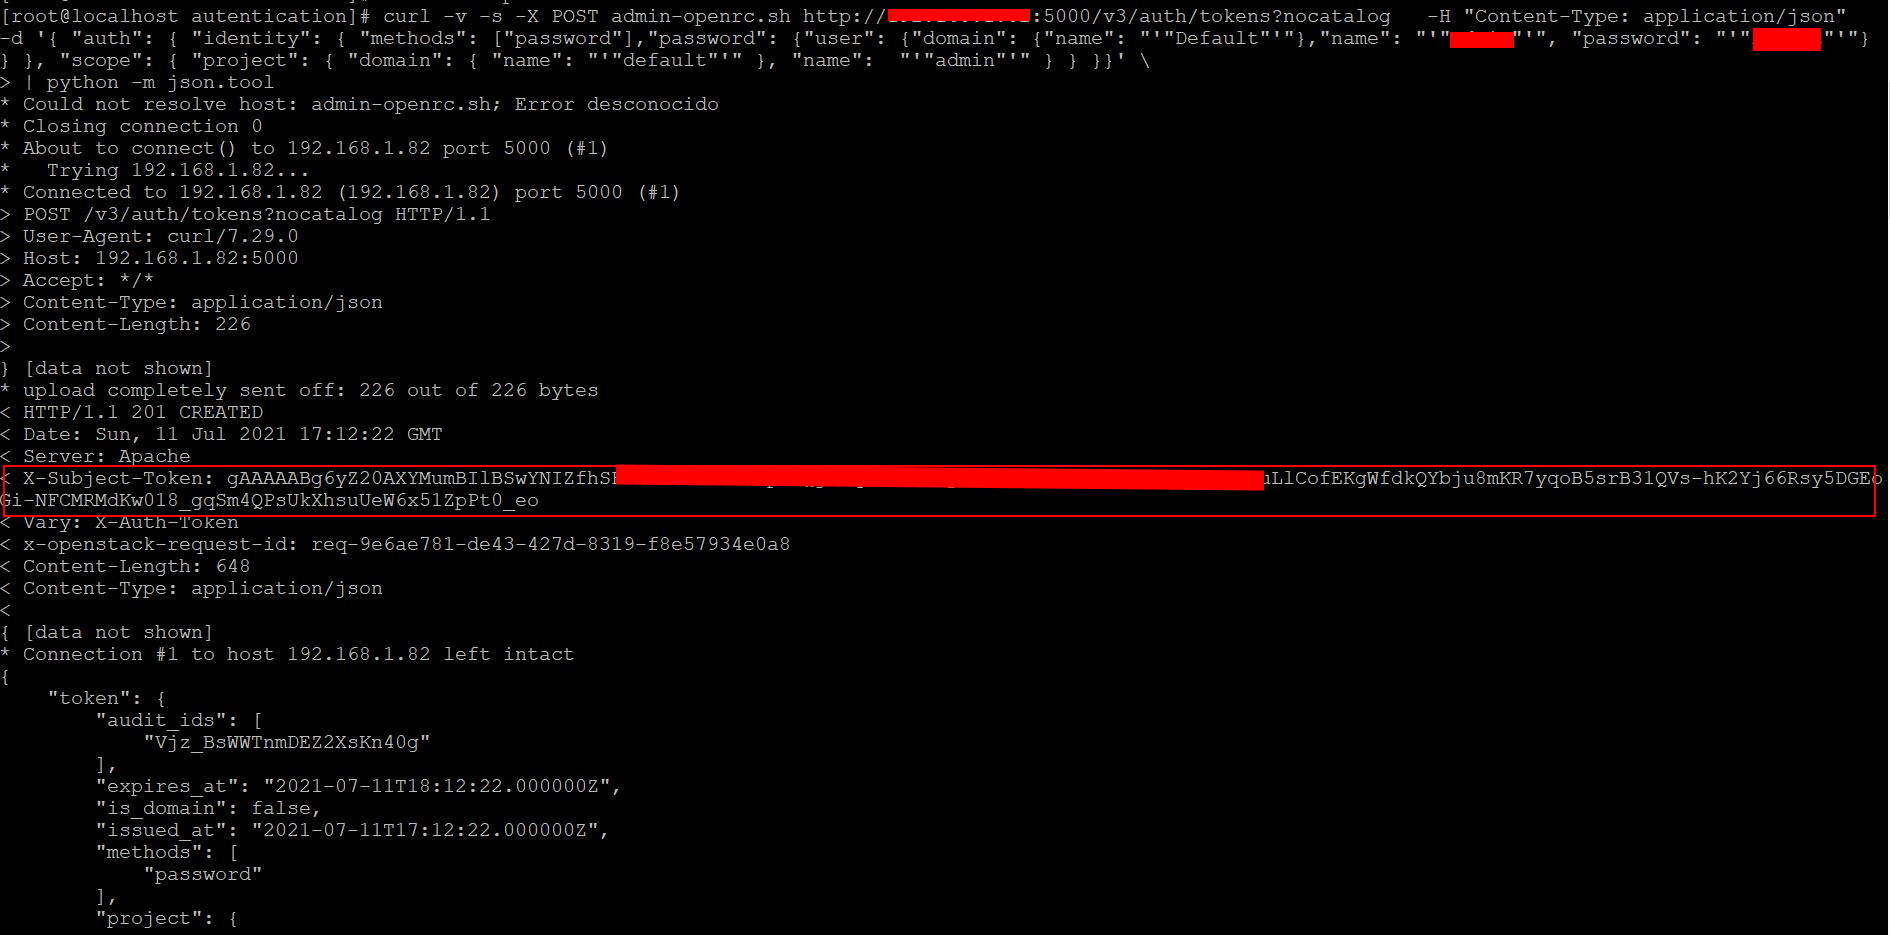
In X-Subject-Token we can see the generated token. This will be the token that will have to be introduced when executing the plugin.
At the same time, to use the plugin we will need to have python 3 and the requests module installed, for python 3 we will use the following command in centOS7:
yum install python3To install the requests module we will use :
pip3 install requests
General plugin parameters
python3 pandora_openstack -u <url> -t <token> [ -g <group> ] [ --data_dir <data_dir > ]If the execution was successful we will see a '1' when the plugin is executed.

Plugin-specific parameters
The plug-in has the following parameters:
|
Parámetro |
Descripción |
|
-u URL, --url URL |
Es obligatorio. Para introducir tu url de autenticación. |
|
-h, --help |
Muestra un pequeño mensaje de ayuda. |
|
-t TOKEN, --token TOKEN |
Es obligatorio. Para introducir el token generado en Digital Ocean |
|
-g GROUP, --group GROUP |
Grupo de destino de Pandora FMS |
|
--data_dir DATA_DIR |
Directorio de datos de Pandora FMS. Por defecto es /var/spool/pandora/data_in/ |
Help example :

Manual execution
We can test the plugin from the terminal to see if it works, to check it, we run the plugin:

Configuration in Pandora
Installation from the console
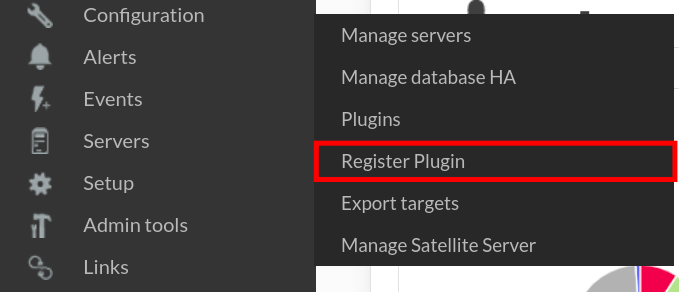
To register the plugin, from the console, go to the "register plugin" section.
Click on the file to select it.

We will select the .pspz2 file that we have previously downloaded.

Once uploaded, this message will be displayed, showing that it has been uploaded correctly.

Once the plugin is registered, we will see it in the plugins section.

We will be able to see how it has been loaded and access it by clicking on its title.

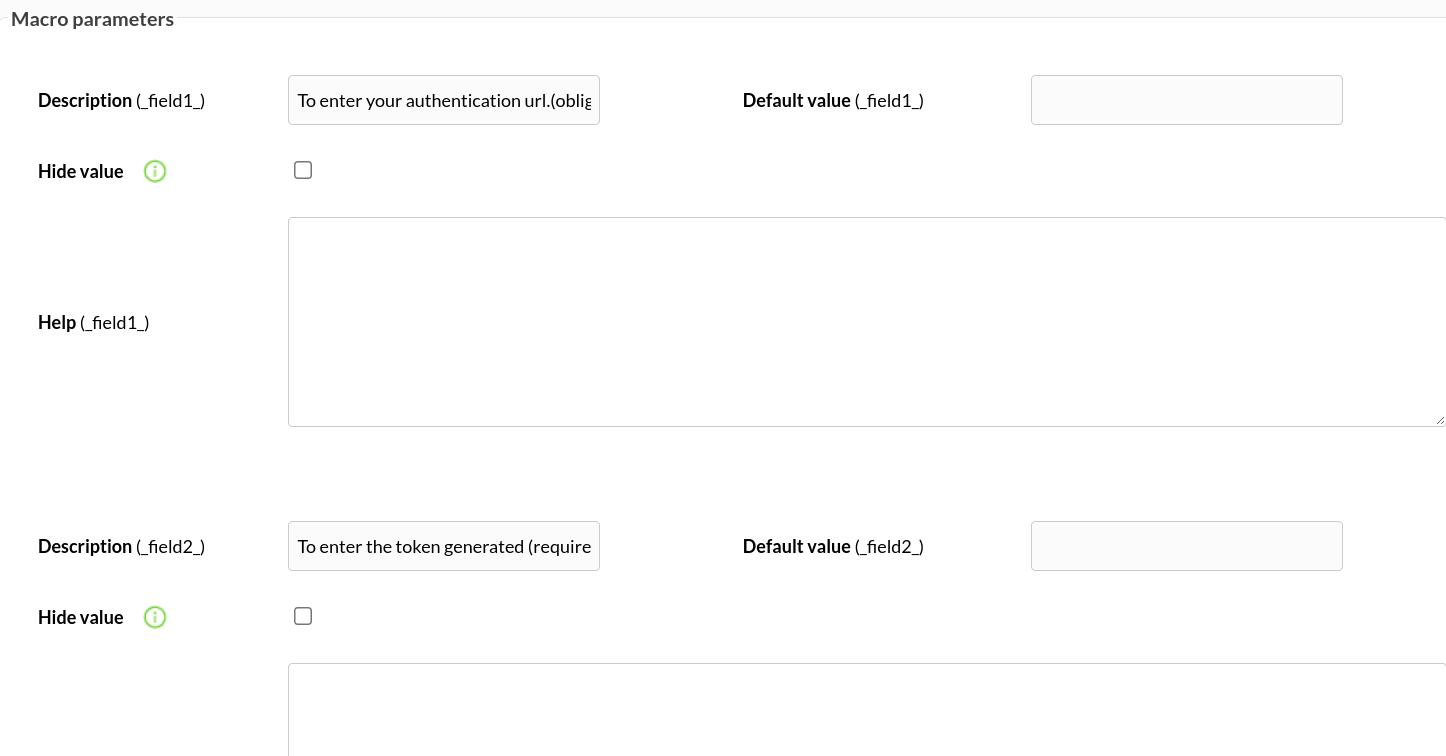
In the menu of the plugin we will be able to see the preloaded macros, nevertheless all of them will appear, it is necessary to investigate which are the appropriate ones for each use, and in the case that it is not necessary the use of some of them, to delete them.
Below, you can insert the value of the macro in the "Default value" field.
The best way to manage server plugins in Pandora is from "/usr/share/pandora_server/util/plugin" so we will send it by pscp to that path:
https://pandorafms.com/guides/public/link/269#bkmrk-nos-ubicamos-en-el-t
We go to the terminal from the path where we have located the plugin and we introduce the following command:
pscp -P 22 pandora_openstack.py root@<ip-de-la-maquina>:/usr/share/pandora_server/util/plugin
Now, if we go into the folder where we have placed the plugin:
cd /usr/share/pandora_server/util/pluginand run it with the parameters mentioned above:
python3 pandora_openstack.py -u <url> -t <token>
the agents will be created in our pandora console, in resources > manage agents

It could also be created from the server plugins menu, to do this, go to the "servers" menu and click on "plugins":

Download and click on "add plugins":

We name and describe it:

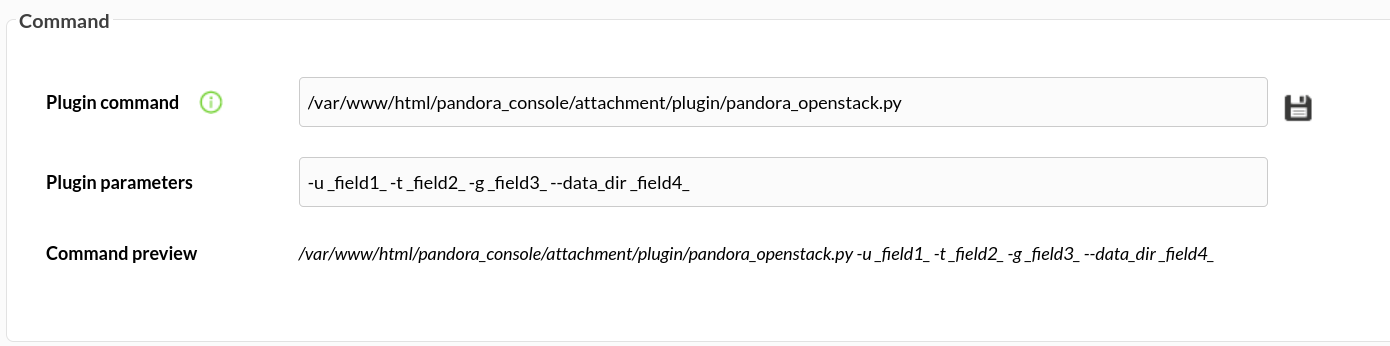
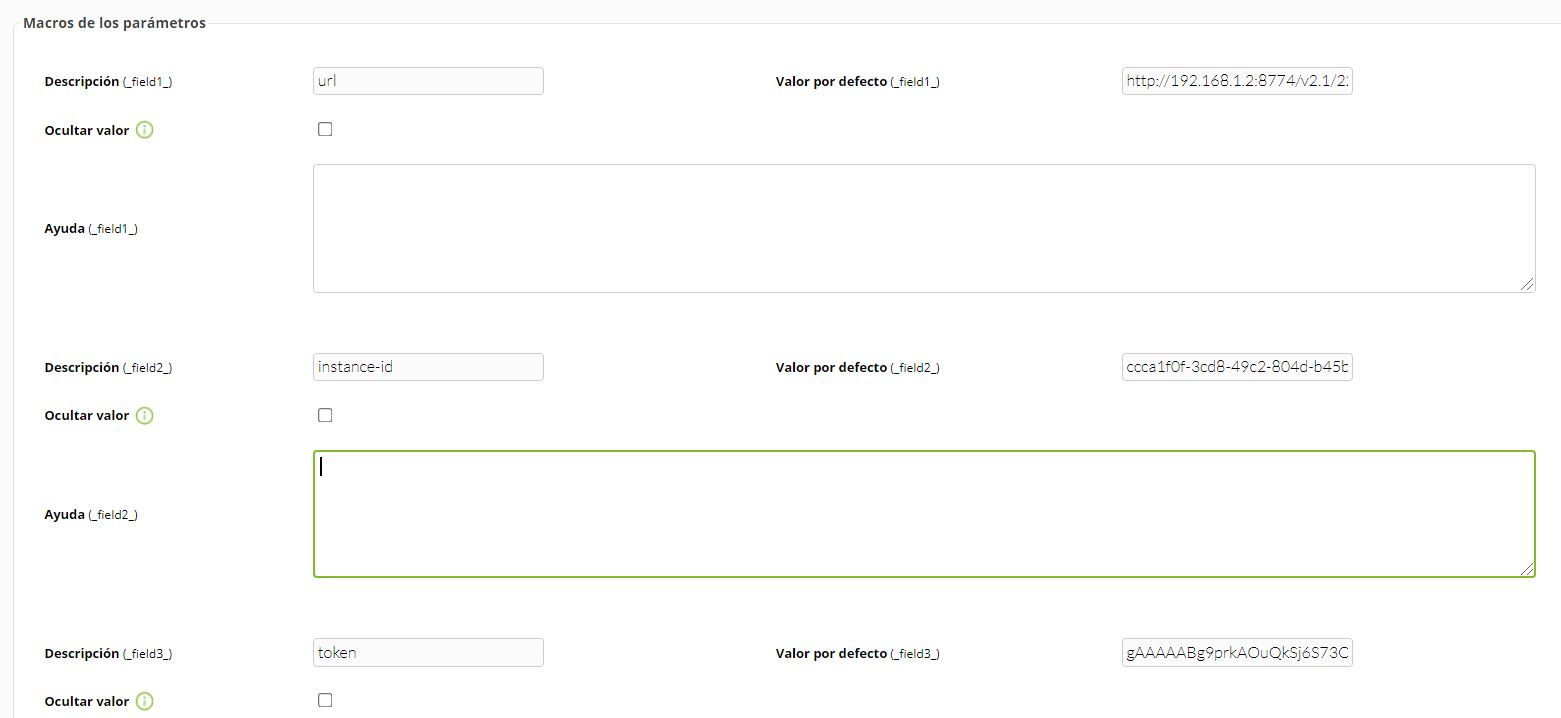
We configure the parameters that it is going to use, in this case, the 3 essential ones are those of the url, instance and token, they are macros. In plugin command, we introduce the path where we have located the plugin.

We configure the macros by entering the name we want for each one, and its attribute.
To see how we can get the token, see the "configuration" section of this manual.
To see how we can find out the url and instance id, go to "frequently asked questions".
Modules generated by the plugin
An agent will be created for each machine in our openstack installation., with its metrics (to load the data of another instance, we will have to execute the plugin again, changing the id of the instance. Apart from this, an agent will be created for each hypervisor used in our installation.

Instance agent modules
| Nombre | Descripción |
| memory | memory used by the machine |
| memory-actual | memory actual used by the machine |
| memory-rss | Resident Set Size and is used to show how much memory is allocated |
| vda_errors | diagnostics for a libvirt based instance, vda receibed errors |
| vda_read | diagnostics for a libvirt based instance, vda dates read |
| vda_read_req | diagnostics for a libvirt based instance, vda dates requests read |
| vda_write | diagnostics for a libvirt based instance, vda dates write |
| vda_write_req | diagnostics for a libvirt based instance, vda write requests dates |

Modules generated in the hypervisor agents:
| Nombre | Descripción |
| free_disk_gb | avalaible disk space |
| free_ram_mb | available ram |
| disk_available_least | this value is dependent on over committed value of disk, disk_available_least = disk_free_gb - disk_over_committed |
| local_gb | the total available disk for the node's virtual machine, local_gb = local_gb_used + free_disk_gb |
| local_gb_used | the sum of the node's virtual machine disk |
| memory_mb | the total ram of the node, memory_mb_used + free_ram_mb |
| memory_mb_used | the sum of the rams of the node's virtual machine |
| vcpus | node physical cpu total threads |
| vcpus_used | the sum of the vcpus of the node virtual machine |
| current_workload | hypervisor current workload |
| host_ip | hypervisor host ip |
| hypervisor_type | hypervisor type |
| hypervisor_version | hypervisor version |
| running_vms | number of virtual machines running |

Frequently asked questions
Where can I find the API authentication url of my openstack installation?
In API access, the "Compute" service endpoint.

How do I generate an authentication token?
This is explained in detail in the "configuration" section of this manual.