# Plugin inventory Cisco configuration

# Introduction

**Ver.** 17-09-2022

Inventory plug-in to show the configuration of a cisco device.

**Type:** Inventory plug-in

# Download plugin

You can download the plugin from the library at the following link:

[https://pandorafms.com/library/plugin-cisco-inventory-configuration/](https://pandorafms.com/library/plugin-cisco-inventory-configuration/)

  
The downloaded .zip file must be unzipped and move the compiled get-config to pandora, to a path where it can be used later, for example “/usr/share/pandora\_server/util/plugin/”.

# Parameters

##### **Plugin configuration parameters**

<table border="1" id="bkmrk-address-ip-o-host-de" style="border-collapse: collapse; width: 100%;"><tbody><tr><td style="width: 50%;">address</td><td style="width: 50%;">IP o host del switch</td></tr><tr><td style="width: 50%;">username</td><td style="width: 50%;">Usuario switch</td></tr><tr><td style="width: 50%;">sshpassword</td><td style="width: 50%;">Password ssh switch</td></tr><tr><td style="width: 50%;">enablepassword</td><td style="width: 50%;">Enable password switch</td></tr><tr><td style="width: 50%;">sleep</td><td style="width: 50%;">wait time commands</td></tr></tbody></table>

# Manual Execution

You can run the plugin using the following parameters:

- IP
- User
- Password
- Enable password

```
./get-config <ip> <user> <password> <enable pass>
```

Example:

```
./get-config 192.168.51.8 admin pandora p4ndora!
```

<p class="callout warning">if enable pass is not configured, enter empty “” in the last parameter.</p>

# Configuration in PandoraFMS

To configure the plugin you must access the inventory modules menu in the configuration section.

[![image.png](https://pandorafms.com/guides/public/uploads/images/gallery/2025-04/scaled-1680-/STDimage.png)](https://pandorafms.com/guides/public/uploads/images/gallery/2025-04/STDimage.png)

A new inventory plugin must be created, configured as follows.

[![image.png](https://pandorafms.com/guides/public/uploads/images/gallery/2025-08/scaled-1680-/kxfimage.png)](https://pandorafms.com/guides/public/uploads/images/gallery/2025-08/kxfimage.png)
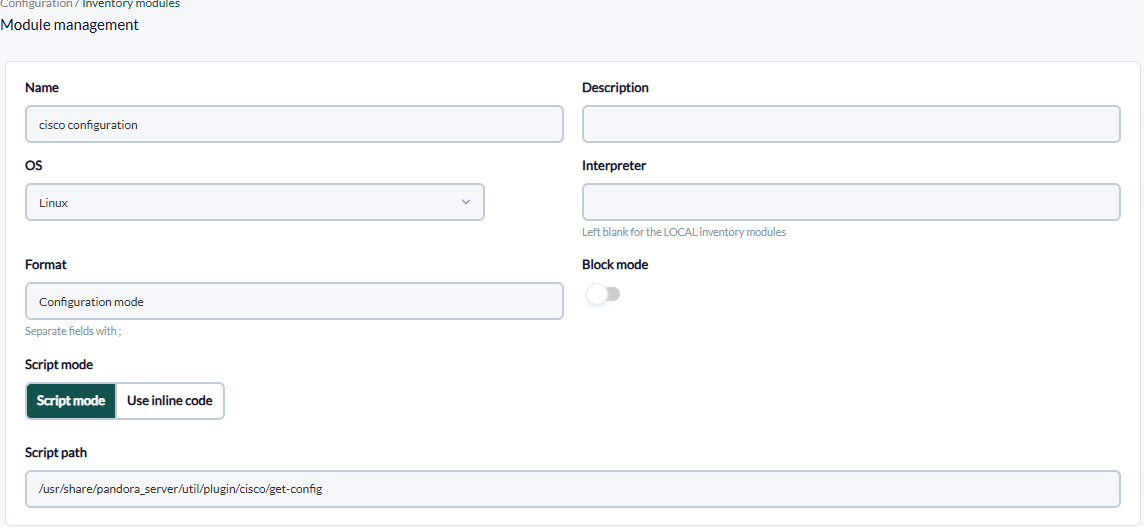
In “Script path” the path of the plugin must be added. The option use inline code can be ignored, since its use is for non-compiled scripts.

Once created, access the inventory menu in the agent and select the inventory module created.

[![image.png](https://pandorafms.com/guides/public/uploads/images/gallery/2025-04/scaled-1680-/B9oimage.png)](https://pandorafms.com/guides/public/uploads/images/gallery/2025-04/B9oimage.png)

Once selected, the custom field option must be enabled and the parameters must be entered in order, if you do not have enable pass, you must enter quotation marks in the empty section.

[![image.png](https://pandorafms.com/guides/public/uploads/images/gallery/2025-08/scaled-1680-/dFMimage.png)](https://pandorafms.com/guides/public/uploads/images/gallery/2025-08/dFMimage.png)
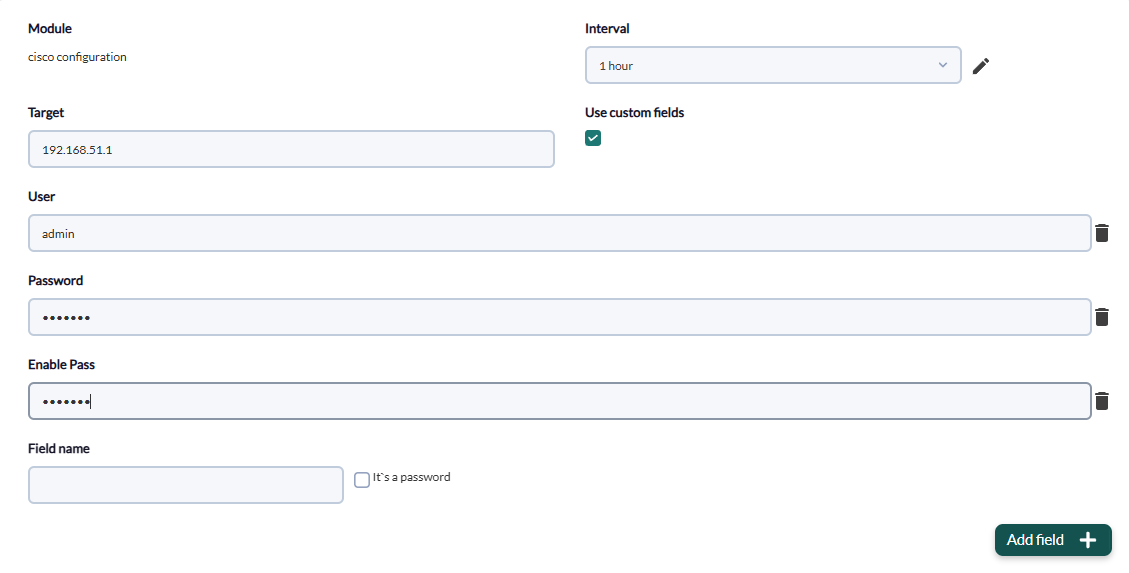
<p class="callout warning">Remember to activate the “It's a password” checkbox for the password and enable password fields.</p>

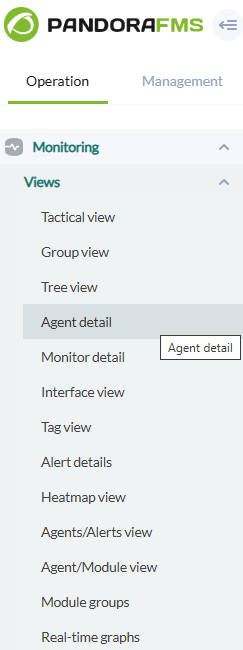
Once these steps have been configured, the only thing left to do is to add the new module. This will be visible from the agent view in the inventory menu.  
[![image.png](https://pandorafms.com/guides/public/uploads/images/gallery/2025-08/scaled-1680-/5EZimage.png)](https://pandorafms.com/guides/public/uploads/images/gallery/2025-08/5EZimage.png)
[![image.png](https://pandorafms.com/guides/public/uploads/images/gallery/2025-08/scaled-1680-/Fvjimage.png)](https://pandorafms.com/guides/public/uploads/images/gallery/2025-08/Fvjimage.png)
