# Configuration
## Creation of the BOT in Telegram
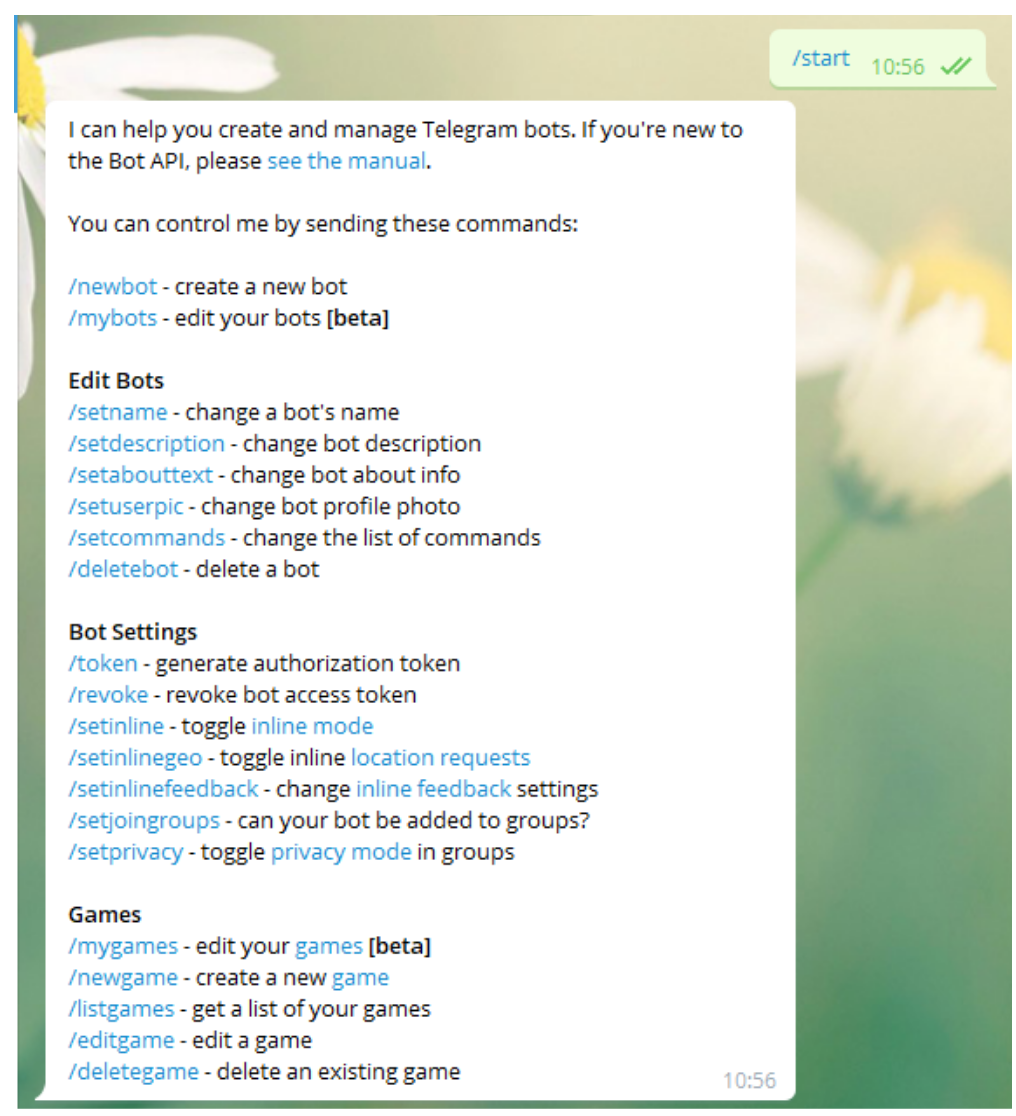
From a Telegram account you must write* /start* to the user **BotFather** ([https://telegram.me/botfather](https://telegram.me/botfather)) to create a bot.
It will return us a series of parameters and instructions that we can make for the creation and manipulation of bots.
[](https://pandorafms.com/guides/public/uploads/images/gallery/2020-12/image-1608158507569.png)
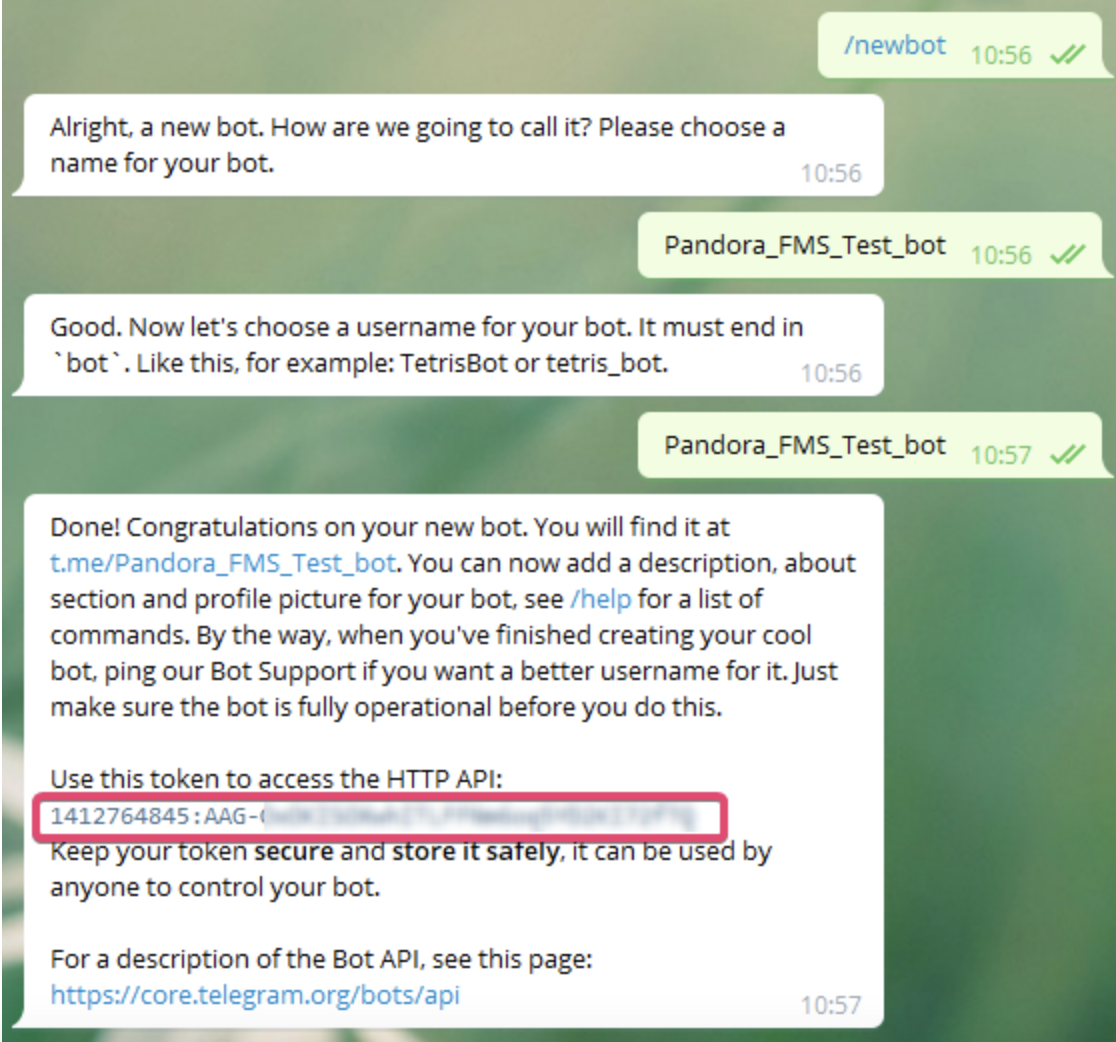
We will use the option ***/newbot*** with which we will create a new bot.[ ](https://pandorafms.com/guides/public/uploads/images/gallery/2020-12/image-1608158507569.png)It will ask us the name we want to give our bot, in my case I have selected ***Pandora\_FMS\_Test\_bot*** you can put the one you prefer.
Now it will ask us for a user ID for the bot, this has to end in \_bot, in this case I will use the same. ***Pandora\_FMS\_Test\_bot***
Now it will return us The information about our bot and some instructions for its administration, we will copy and save the API token with which we will authenticate ourselves as that bot
[](https://pandorafms.com/guides/public/uploads/images/gallery/2021-01/pandorafms-ntelegram01.png)