IOT Discovery
This document describes the IOT functionality of PandoraFMS discovery. Consisting of an MQTT broker server and a discovery plugin.
- Introduction
- Elements of IOT integration
- Manual installation
- Pre requisites
- MQTT server parameters
- Configuring the MQTT server
- Discovery plugin parameters
- Manual execution
- Discovery
- Configuring message filtering
- Agents and modules generated by the plugin
Introduction
The purpose of the Pandora IOT integration is to monitor messages received from an mqtt broker server.
For this, the integration makes use of an MQTT broker server, which opens the possibility of subscribing to a topic to receive messages and a Discovery plugin, which allows configuring a filtering of these messages and visualizing the post-processing of these messages in the PandoraFMS console through agents and modules that are sent via XML to the Pandora server.
The monitoring of IoT (Internet of Things) devices allows to supervise in real time the status of connected equipment and sensors, facilitating fast and effective decision making. By integrating these devices into monitoring systems, companies can detect problems in advance, optimize their operations and reduce downtime.
Why is it useful to monitor IoT devices?
Imagine you have temperature sensors in an industrial plant and the MQTT server receives messages with temperature values every minute, the integration can filter those values that are out of the acceptable range (e.g. > 80°C) and generate an alert module in PandoraFMS, which can help prevent problems and protect against possible incidents.
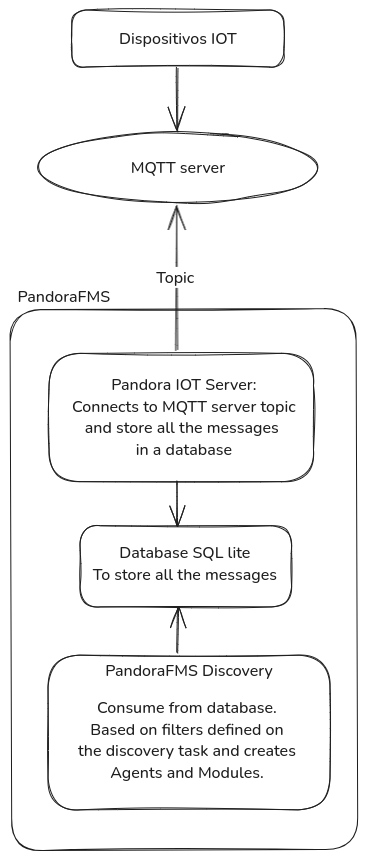
Elements of IOT integration
The IOT integration is mainly composed of two key elements, an MQTT broker server that will be in charge of receiving the messages and storing them in a database and a discovery plugin that will be in charge of filtering these messages previously stored in the database and process them for a visualization as required that will facilitate the automation of alarms or whatever needs to be done with this data.
-
MQTT Server
This service is responsible for connecting to an MQTT server, receiving messages of a specific topic and storing them in a database. It also records logs in files and in the console, periodically cleans old data and correctly handles program shutdown to avoid data loss. -
Plugin discovery
This script is in charge of connecting to the database in which the messages have been previously stored with the receiver, performs a message filtering based on a configuration previously made by the user and creates agents and modules based on the messages that pass the filters.
Manual installation
Starting with Pandora FMS 783, this component is included in the server installation, so manual installation is no longer required.
You can perform a manual installation of the MQTT server as follows:
el8
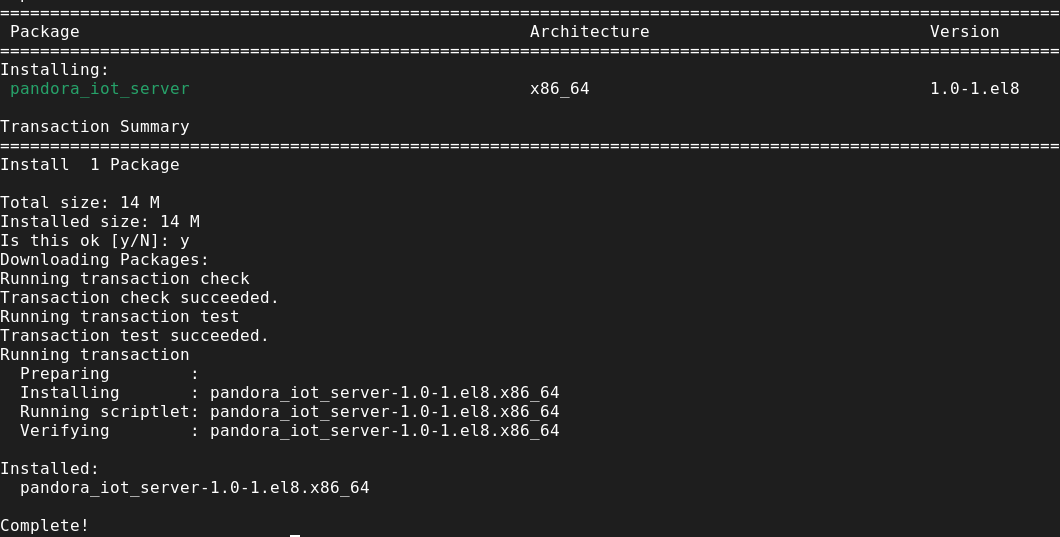
You have to install the .rpm file named pandora_iot_server-1.0-1.el8.x86_64.rpm
sudo dnf install ./pandora_iot_server-1.0-1.el8.x86_64.rpmel9
You have to install the .rpm file named pandora_iot_server-1.0-1.el9.x86_64.rpm
sudo dnf install ./pandora_iot_server-1.0-1.el9.x86_64.rpmubuntu
You must install the .deb file named pandora_iot_server_1.0-1.deb
sudo dpkg -i pandora_iot_server_1.0-1.debOnce the command is executed, it will ask for confirmation to install the server.

After accepting, the server will be installed and we can start configuring the message listener.
Pre requisites
- The MQTT server must be installed in the environment where the message listening is to be done.
- The discovery plugin must be previously loaded in PandoraFMS to be able to configure the tasks.
- Connectivity to the MQTT server
- Connectivity to the database receiving the messages
MQTT server parameters
Parameters
| -c,--conf_file | Path to configuration file |
| -v,--verbosity | Activate debug mode |
Configuration file (--conf)
[DEFAULT]
;;topic
topic = < Topic to subscribe to receive messages. >

;; connection
host = < Host of the server on which messages will be listened >
port = < Port of the server on which messages will be listened >
;; protocol supports: tcp, websockets, unix
; protocol = < Protocol type. Supported : tcp, websockets, unix
; user = < User >
; password = < Password >
; ssl = 0 < Enable ssl encryption >
; trust_ssl = < Certificate verification >

;; Database
; dblocation = < Database file location >
; dbname = < Database file name >
; data_cleaning_interval = 300 < Data reset period >
; data_cleaning_period = < Data aging period to reset>

;; Logs
;; log_name = < Log file name >
; log_location = < Log file path >
; log_level = < Log level >
; max_log_bytes = < Maximum log size >
; log_rotation_count = < Number of log files to be stored after rotation, by default: 3 >
Example
[DEFAULT]

;;topic
topic = testtopic/#

;; connection
host = test.mosquitto.org
port = 1883
;; protocol supports:  tcp, websockets, unix
; protocol = websockets
; user = ro
; password = readonly
; ssl = 0
; trust_ssl = 1

;; Database
dblocation = /opt/pandora/pandora_iot_server/db
dbname = pandora_iot.db
; data_cleaning_interval = 300
; data_cleaning_period = 86400

;; Logs
log_name = pandora_iot.log
log_location = /var/log/pandora/
; log_level = debug
; max_log_bytes = 50_000_000
; log_rotation_count = 3
Configuring the MQTT server
This script allows you to subscribe to an MQTT topic, receive messages and store them in a SQLite database. The steps to configure and execute it correctly are described below.
1. Configuration of the configuration file
Before running the script, a configuration file in .ini format must be created. This file contains the necessary parameters for the connection to the MQTT broker, the database and the log configuration. An example of a configuration file is as follows:
[DEFAULT]

;;topic
topic = testtopic/#

;; connection
host = test.mosquitto.org
port = 1883
;; protocol supports:  tcp, websockets, unix
; protocol = websockets
; user = ro
; password = readonly
; ssl = 0
; trust_ssl = 1

;; Database
dblocation = /opt/pandora/pandora_iot_server/db
dbname = pandora_iot.db
; data_cleaning_interval = 300
; data_cleaning_period = 86400

;; Logs
log_name = pandora_iot.log
log_location = /var/log/pandora/
; log_level = debug
; max_log_bytes = 50_000_000
; log_rotation_count = 3
Key parameters:
- topic: Defines the MQTT topic to which the script will subscribe (e.g. testtopic/#).
- host : Specify the address of the MQTT broker.
- port: Specify the port of the MQTT broker.
- protocol: The protocol to use for the MQTT connection (e.g. tcp or websockets).
- ssl: Enables or disables the SSL connection (0 for disable, 1 for enable).
- trust_ssl: Controls whether to trust the broker's SSL certificates.
- dblocation: Directory where the SQLite database will be stored.
- dbname: Name of the SQLite database.
- data_cleaning_interval: Time interval (in seconds) between each execution of the data cleaning process.
- data_cleaning_period: Time (in seconds) to remove old data from the database.
- log_name: Name of the file where the logs will be stored.
- log_location: Directory where the log files will be stored.
- log_level: Log detail level (e.g. debug).
- max_log_bytes: Maximum size (in bytes) that a log file can reach before being rotated.
- log_rotation_count: Maximum number of log files that will be kept before deleting the oldest ones.
2. Start the service.
The service can be launched with the following command :
systemctl start pandora_iot_serverTo stop receiving and storing messages, you can pause the service with :
systemctl stop pandora_iot_serverThe service must be restarted with each configuration change for it to take effect:
systemctl restart pandora_iot_server3. Start server from console
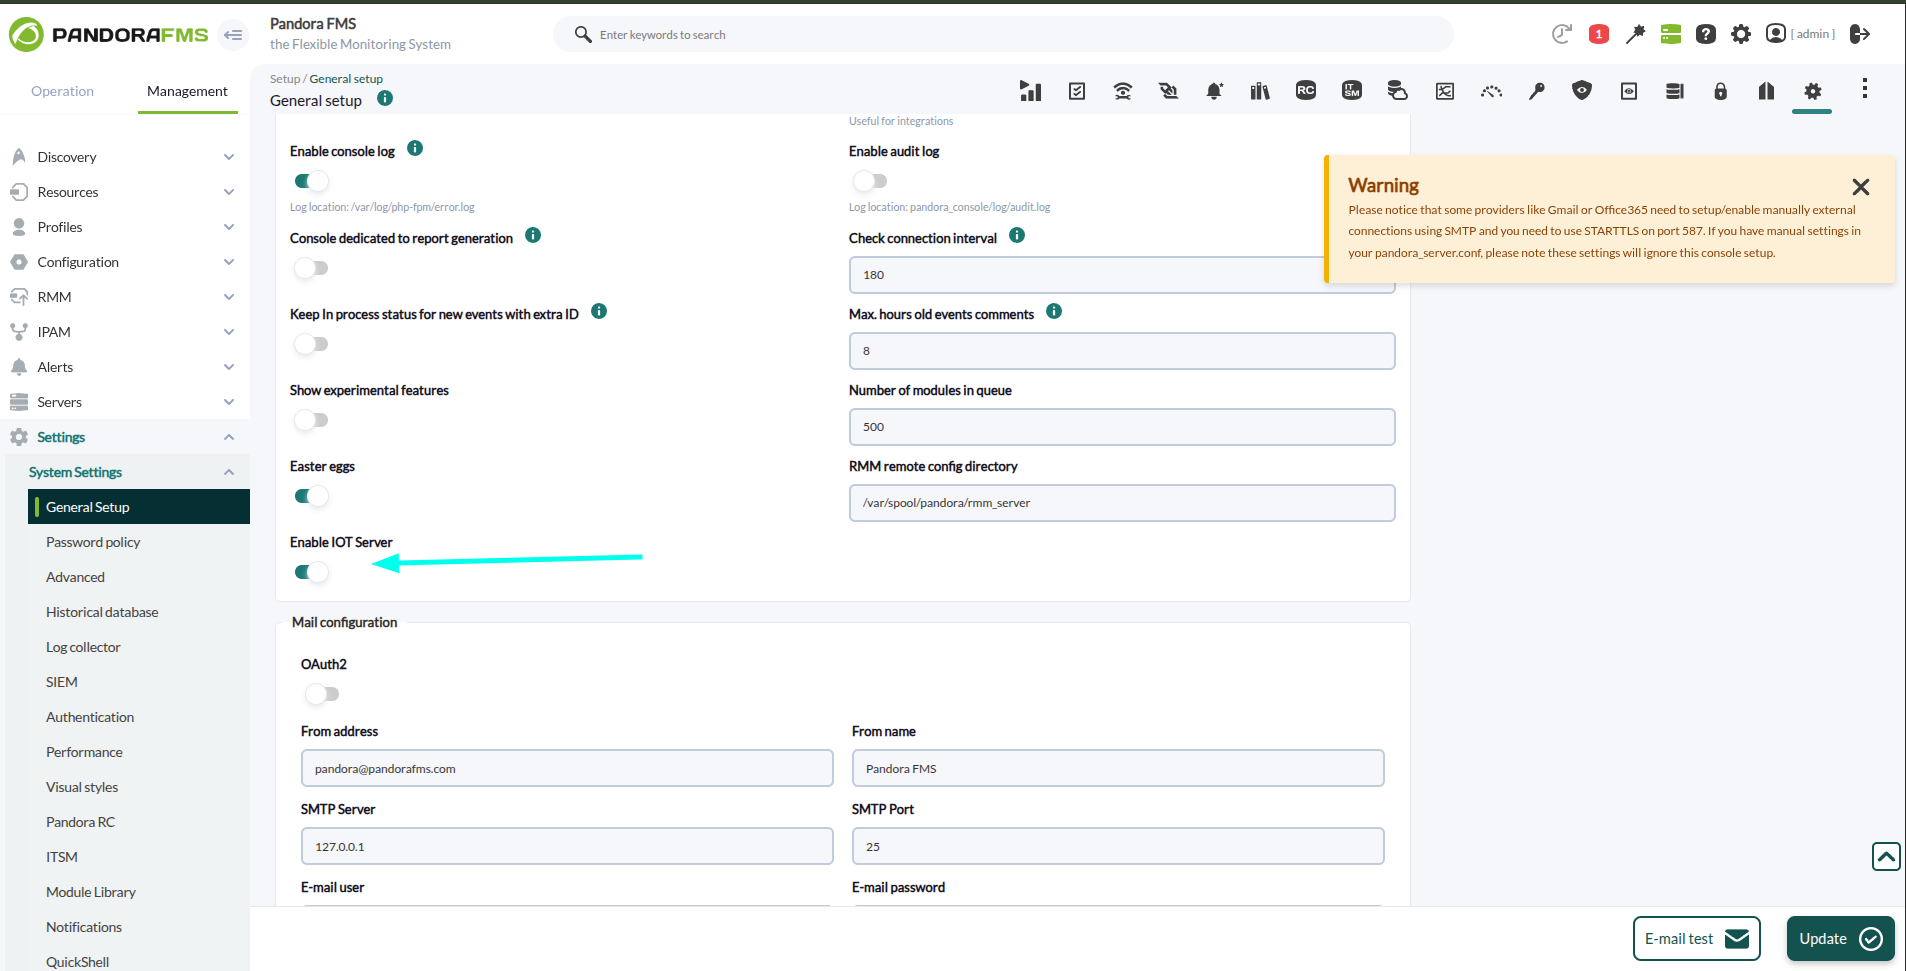
In version 783, the following token was introduced to enable the IOT server.
To get there, we need to go to the Management > Settings > System Settings > General Setup
Then enable the Enable IOT server field and finally press Update.
Discovery plugin parameters
Parameters
| --conf | Path to configuration file |
| --filter_conf | Path to message filter archive |
| --verbosity | Used to activate debug mode |
Conf file (--conf)
db_path = < Path to sql database lite >
threads = < Maximum number of threads used >
timestamp_filter = < Timestamp in seconds from which the messages will be filtered >
agents_group_name = < Group name for the created agents >
interval = < Interval in seconds for the agents >
tentacle_ip = < IP of the target machine for the created agents >
tentacle_port = < Tentacle port, default : 41121 >
Example
db_path = /var/spool/pandora/data_in/discovery/pandorafms.iot/mqtt_messages.db
threads = 4
timestamp_filter = 1738000000
agents_group_name = Unknown
interval = 300
tentacle_ip = 127.0.0.1
tentacle_port = 41121
File to filter messages (--filter_conf)
#=======================================================================
# Filter Configuration
#=======================================================================
filter_begin: < Marks the beginning of a filter configuration. Everything until filter_end belongs to the same filter. Mandatory. >
filter_module_name: < Name assigned to the module that generates the filter. Mandatory. >
filter_module_type: < Type of module that generates the filter. Mandatory. >
filter_topic: < Regular expression or exact text that must match the message topic for the filter to apply. Optional. By default, it matches any topic. >
filter_topic_exact_match: < Defines whether filter_topic is treated as a regular expression (0) or exact text (1). Optional. Default is 0. >
filter_message: < Regular expression or exact text that must match the message content for the filter to apply. Optional. By default, it matches any message. >
filter_message_exact_match: < Defines whether filter_message is treated as a regular expression (0) or exact text (1). Optional. Default is 0. >
filter_message_capture_regex: < Regular expression with capture groups to extract values from the message. >
                               < Captured values will be stored in macros '__regexN__', where N is the capture group index. >
filter_message_capture_json: < List of JSON paths (separated by '|') to extract values, using the same format as jq. >
                               < Captured values will be stored in macros '__jsonN__', where N is the path index. >
filter_module_value: < Value assigned to the module that generates the filter. Mandatory. >
filter_end: < Marks the end of a filter configuration. Everything from filter_begin belongs to the same filter. Mandatory. >

# Available macros for use in filter_module_name and filter_module_value:
__topic__: < Replaced with the exact topic of the processed message. >
__regexN__: < Replaced with the corresponding value captured by filter_message_capture_regex. >
__jsonN__: < Replaced with the corresponding value captured by filter_message_capture_json. >
Example
filter_begin
filter_module_name __topic__ temperatura
filter_module_type generic_data_string
filter_topic testtopic/weathervue/homeoffice
filter_topic_exact_match 1
filter_message measurement
filter_message_exact_match 1
filter_message_capture_regex "temperature":"([-+]?\d*\.\d+|\d+)"
filter_message_capture_json
filter_module_value temperature: __regex1__
filter_end
filter_begin
filter_module_name __topic__ Ibra
filter_module_type generic_data_string
filter_topic testtopic/ibratest
filter_topic_exact_match 1
filter_message_exact_match 0
filter_message_capture_regex "(.*)"
filter_module_value Ibra says: __regex1__
filter_end
filter_begin
filter_module_name __topic__ val
filter_module_type generic_data_string
filter_topic testtopic/meter/M1/voltage_l1
filter_topic_exact_match 1
filter_message
filter_message_exact_match 1
filter_message_capture_regex
filter_message_capture_json $.val
filter_module_value __json1__
filter_endManual execution
The format of the plugin execution is as follows:
./proccess_messages --conf < path to configuration file > --filter_conf < path to file with message filters >For example:
./proccess_messages --conf /var/spool/pandora/data_in/discovery/pandorafms.iot/file.conf --filter_conf /var/spool/pandora/data_in/discovery/pandorafms.iot/file_filters.confThe execution will return an output in JSON format with information about the execution, and will generate an XML file for each agent (topic) and each message that has passed the filters, which will be sent to the Pandora FMS server by the transfer method indicated in the configuration.
For example:
{"summary": {"Total agents": 2, "Total messages": 141}}
{"summary": {"Total agents": 2, "Total messages": 2}}Discovery
This plugin can be integrated with Pandora FMS Discovery.
To do so, you must load the “.disco” package that you can download from the Pandora FMS library:
https://marketplace.pandorafms.com/entries/pandorafms.iot

Once loaded, you will be able to receive and monitor messages from a broker, creating Discovery tasks from the Management > Discovery > App.
The following minimum data will be requested for each task:
- DB path: Database file path. By Default: /opt/pandora/pandora_iot_server/db/pandora_iot.db
- Timestamp: Timestamp in seconds from which it will be filtered.
- Tentacle IP: IP of the Tentacle server to which the agents' data will be sent. Normally this parameter will not be modified.
- Tentacle port: Tentacle server port to send the data to. Normally this parameter will not be modified.
- Tentacle extra options: Tentacle extra options.
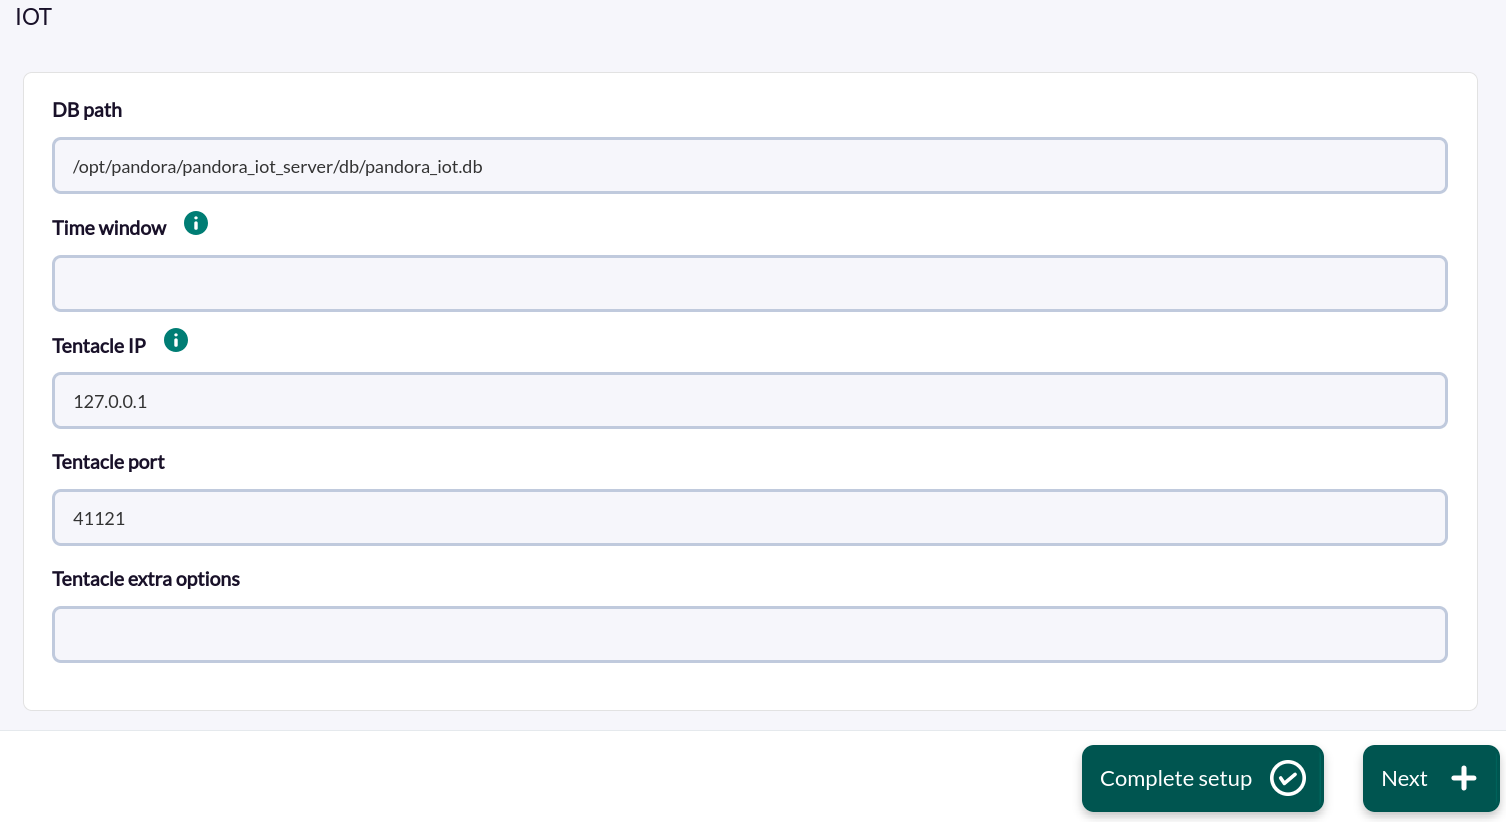
Filter settings can also be adjusted to customize the desired monitoring:
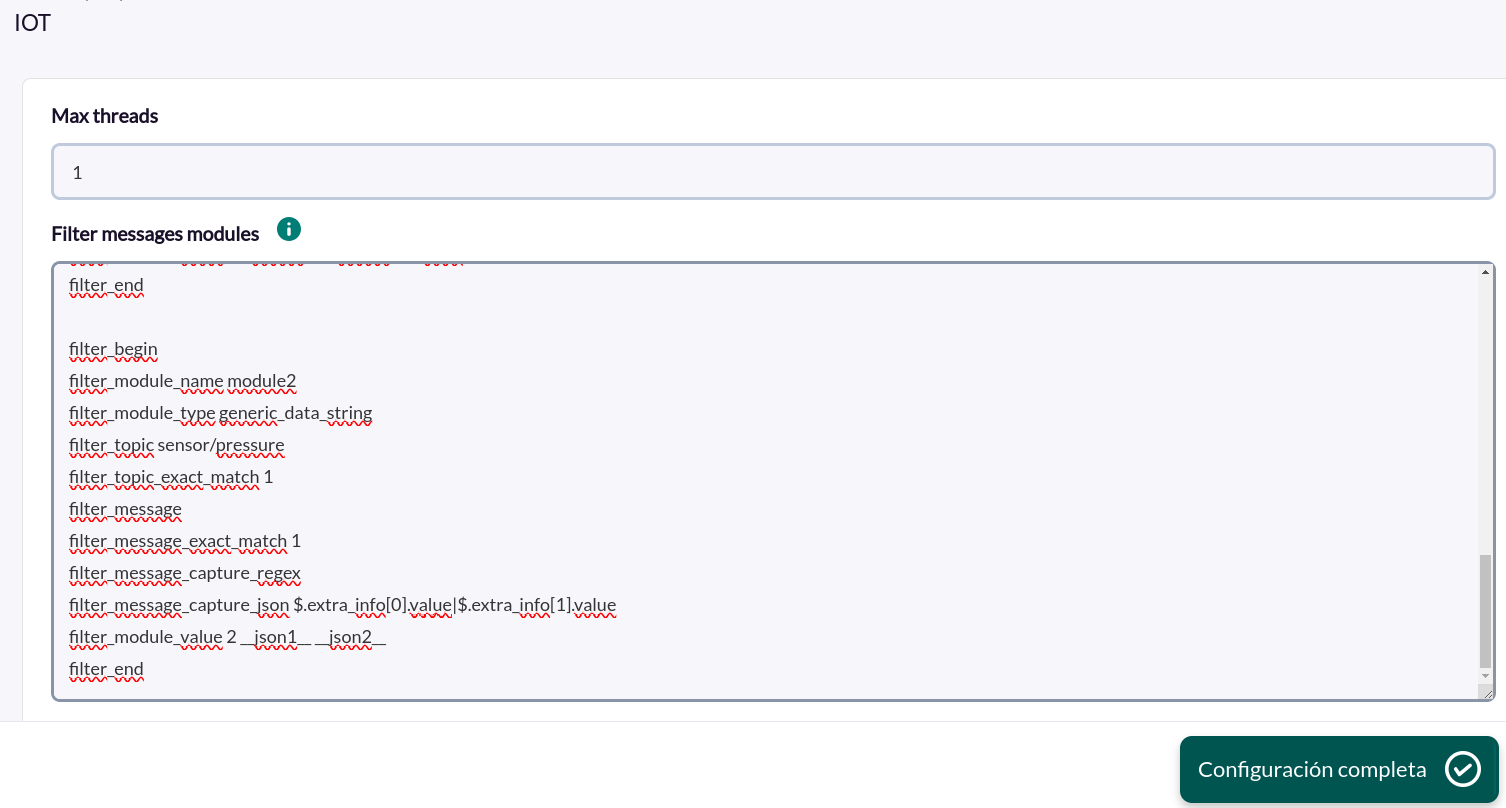
- Max threads: Number of wires to be used.
- FIlter message modules: Filter configuration options for the modules. More details on the possible options and labels to be used in this section can be found in the “parameters” section of this manual.
Successfully completed tasks will have an execution summary with the following information:

- Total agents : Total number of agents generated by the task.
- Total messages: Total number of messages that have passed the filters.
Configuring message filtering
The plugin makes use of different filters to filter messages.
Topic filtering
For topic filtering, the Filter_topic and Filter_topic_exact_match tags are used.
-
Filter_topic
Regular expression or exact text that must match the message topic for the filter to be satisfied. This is optional. By default it would match any topic.
-
Filter_topic_exact_match
Indicates whether what is specified in filter_topic will be treated as a regular expression (0) or as an exact text (1). It is optional. Default value is 0.
Examples
Using the Filter_topic and Filter_topic_exact_match filters we can choose the topic to subscribe to.
We can directly indicate the name of the topic or look for a regex pattern in it.
Suppose you have a MQTT topic called:
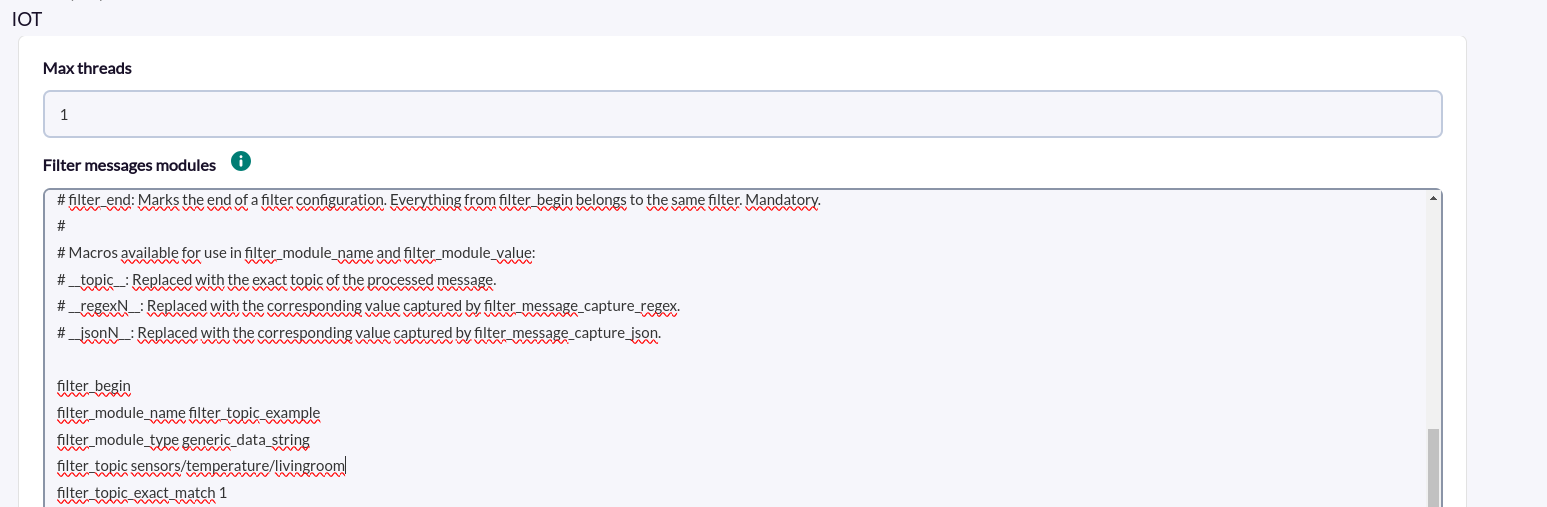
sensors/temperature/livingroomEXAMPLE 1 filter_topic_exact_match 1 (Exact text)
You could configure filter_topic by specifying the topic name.
filter_topic sensors/temperature/livingroomand set filter_topic_exact_match to 1, so that it searches only that topic.
filter_topic_exact_match 1If instead of specifying the complete topic name, we specify only a part of the topic:
filter_topic sensors/temperature/I would also agree.
EXAMPLE 2 filter_topic_exact_match 0 (Regular Expression)
You could configure filter_topic by specifying a regular expression that matches the name of the topic you want to subscribe to. For example, the following, which would look to start with “sensors” and end with “livingroom”.
filter_topic ^sensors/.*?/livingroom$and set filter_topic_exact_match to 0, so that it filters by regular expression, instead of exact text.
filter_topic_exact_match 0
Message filtering
For topic filtering, the Filter_topic and Filter_topic_exact_match tags are used.
-
Filter_message
Regular expression or exact text that must match the message for the filter to be satisfied. This is optional. By default it would match any message.
-
FIlter_message_exact_match
Indicates whether what is specified in filter_message will be treated as a regular expression (0) or as an exact text (1). It is optional. Default value is 0.
Ejemplos
Using the filters Filter_message and Filter_message_exact_match we can filter the messages to be received.
We can indicate directly the content of the message or look for a regex pattern in it.
Suppose you have a message like this:
{"message":"Move up right",
"status":"active",
"datetime":"2025-02-11T14:30:54.260Z",
"data":{"yaw_rate":0.11466979980468749,
"pitch_rate":0.6159210205078126,
"yaw_direction":"right",
"pitch_direction":"up"}}
EXAMPLE 1 filter_message_exact_match 1 (exact wording)
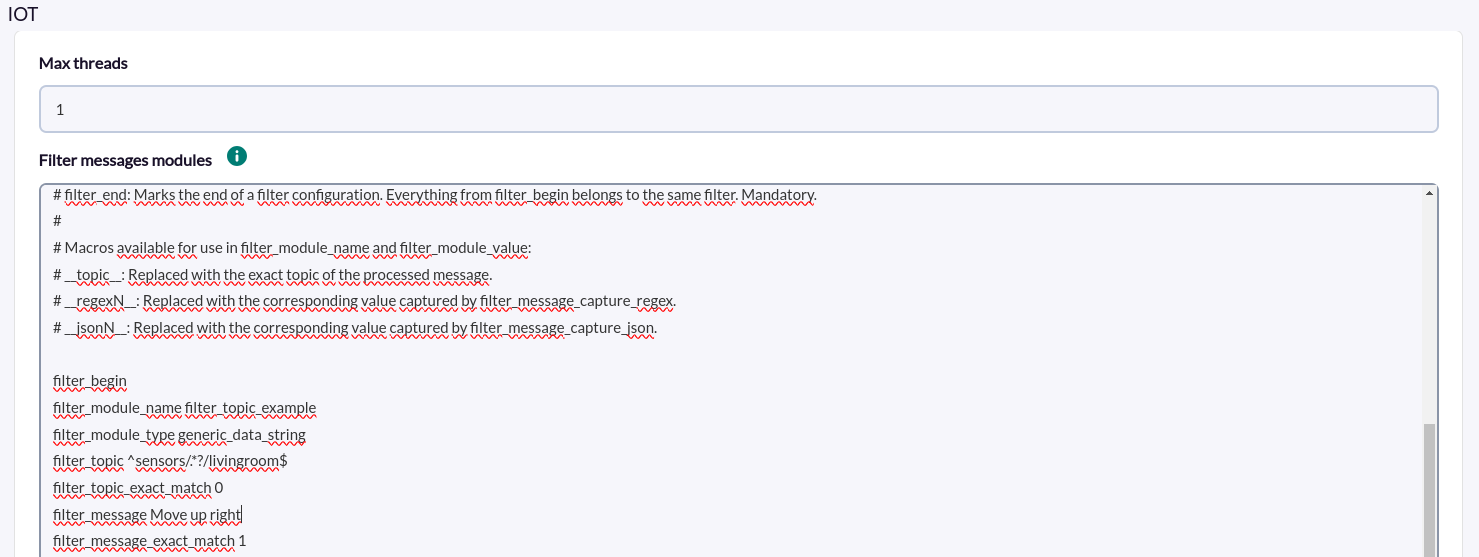
We could configure filter_message by specifying the message text.
filter_message Move up rightand set filter_topic_exact_match to 1, so that it searches only that topic.
filter_message_exact_match 1
filter_message_exact_match 1If instead of specifying the complete topic name, we specify only a part of the topic:
filter_message Move upIt would also match
EXAMPLE 2 filter_message_exact_match 0 (Regular Expression)
We could configure filter_message by specifying a regular expression that matches the messages to be filtered. For example, the following would look for a message containing the words “move” and “right”.
filter_message Move.*right|right.*Move
filter_message Move.*right|right.*Moveand set filter_message_exact_match to 0, so that it filters by regular expression, instead of exact text.
filter_message_exact_match 0
Macro generation and use
Examples
Imagine we have the following message:
{
  "message": "Move up right",
  "status": "active",
  "datetime": "2025-02-11T14:30:54.260Z",
  "data": {
    "yaw_rate": 0.11466979980468749,
    "pitch_rate": 0.6159210205078126,
    "yaw_direction": "right",
    "pitch_direction": "up"
  }
}
And we want to capture some parts of the message, for example:
yaw_direction, which is"right".pitch_direction, which is"up".message, which contains"Move up right".
In addition, we also want to capture the topicto which the message belongs in a macro to include it in the value.
To do this we should follow the following steps, which can be done with Filter_message_capture_regex and FIlter_message_capture_json:
-
FIlter_message_capture_regex
With Filter_message_capture_regex a regular expression with capture groups is expected to get values from the message. What matches the capture groups will be stored in macros “__regexN__”, where N is the position of the capture group of the regex. The steps to configure the macros to capture would be the following:
1. Configure filter_message_capture_regex to capture the necessary parts:
We use a regular expression to capture "yaw_direction", "pitch_direction" and the content of "message".
filter_message_capture_regex \"yaw_direction\":\\s?\"(\\w+)\".*\"pitch_direction\":\\s?\"(\\w+)\".*\"message\":\\s?\"([^\"]+)\"2. Configure filter_module_value to include the macros containing the captured values and the topic.
filter_module_value __topic__ | Dirección de guiñada: __regex1__ | Pitch Direction: Mensaje: __regex3__Example of complete configuration
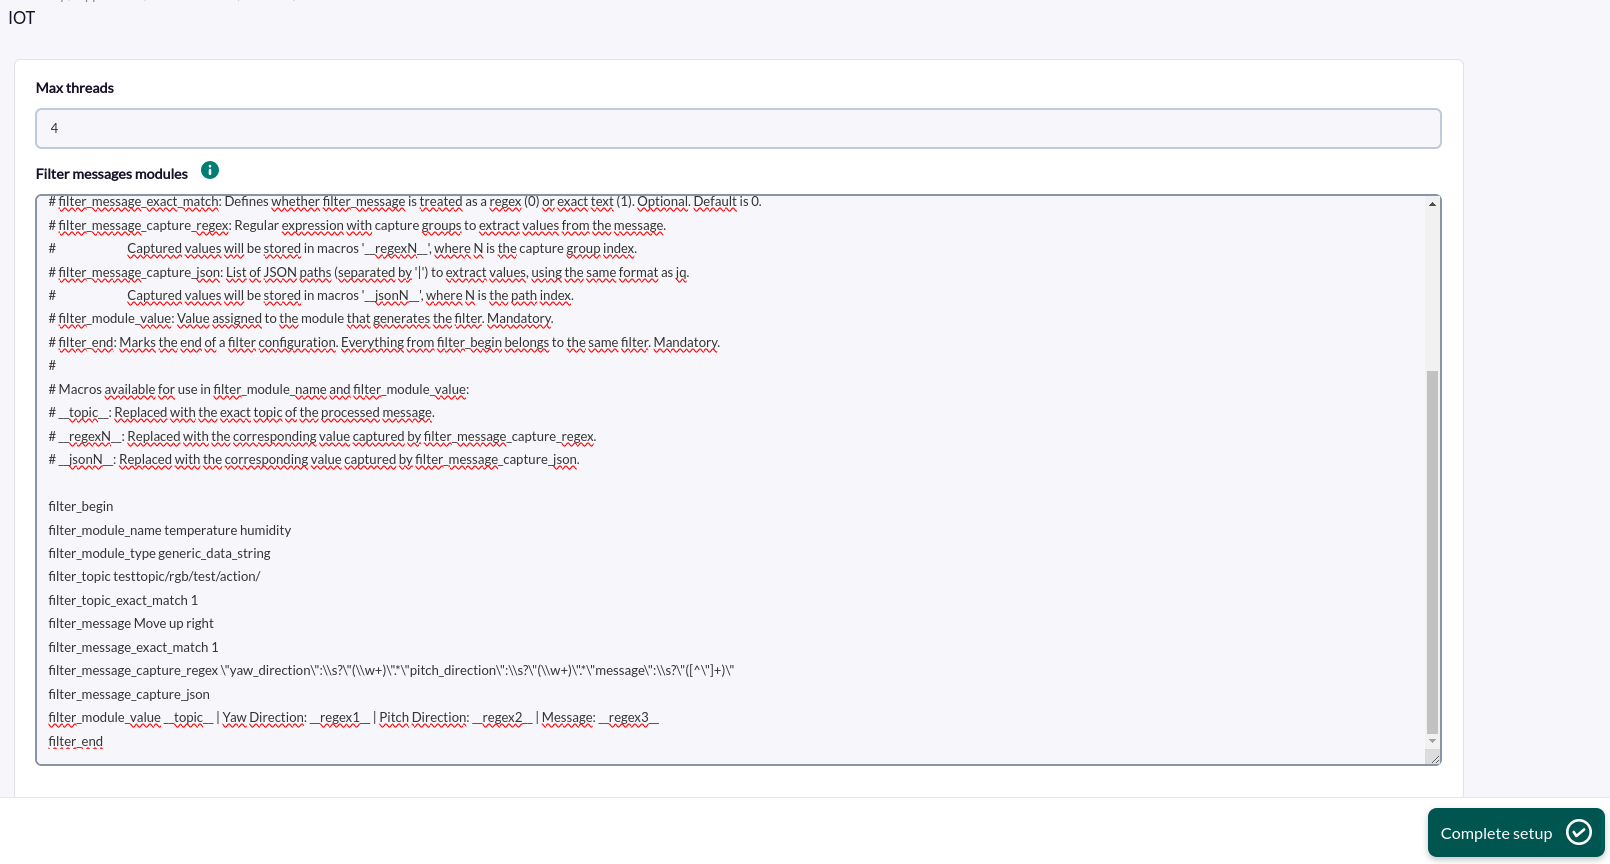
filter_begin
filter_module_name __topic__ get right
filter_module_type generic_data_string
filter_topic testtopic/rgb/test/action/
filter_topic_exact_match 1
filter_message Move up right
filter_message_exact_match 1
filter_message_capture_regex \"yaw_direction\":\\s?\"(\\w+)\".*\"pitch_direction\":\\s?\"(\\w+)\".*\"message\":\\s?\"([^\"]+)\"
filter_message_capture_json
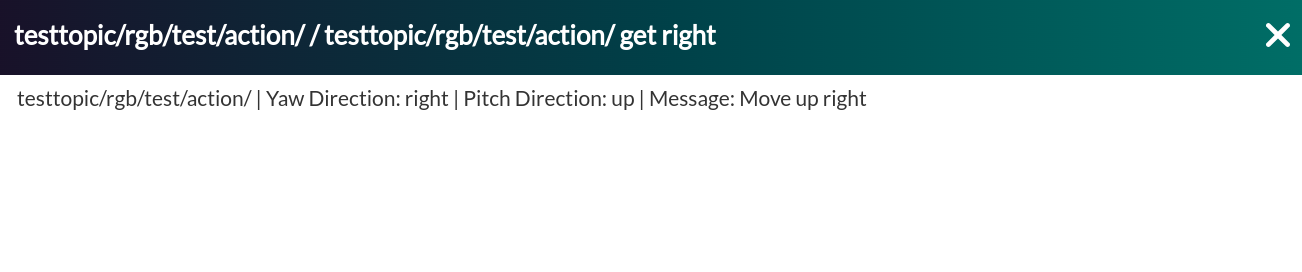
filter_module_value __topic__ | Yaw Direction: __regex1__ | Pitch Direction: __regex2__ | Message: __regex3__
filter_endThen, with the previously shown message and configuration examples, the following agent would be created:

And the following message module:

-
Filter_message_capture_json
With Filter_message_capture_json we expect a list of paths within a JSON (separated by “|”) from which to capture their values. Using the same format as the jq command, what is captured for each path will be stored in “__jsonN__” macros, where N is the position of the path in the list . The steps to configure the macros to capture would be the following:
- Configure filter_message_capture_json to capture the necessary parts of the JSON.
filter_message_capture_json $.data.yaw_direction|$.data.pitch_direction|$.messageJSONPaths must begin with $ because it represents the root of the JSON document.
2. Configure filter_module_value to include the macros containing the captured values and the topic.
filter_module_value __topic__ | Yaw Direction: __json1__ | Pitch Direction: __json2__ | Message: __json3__Example of complete configuration
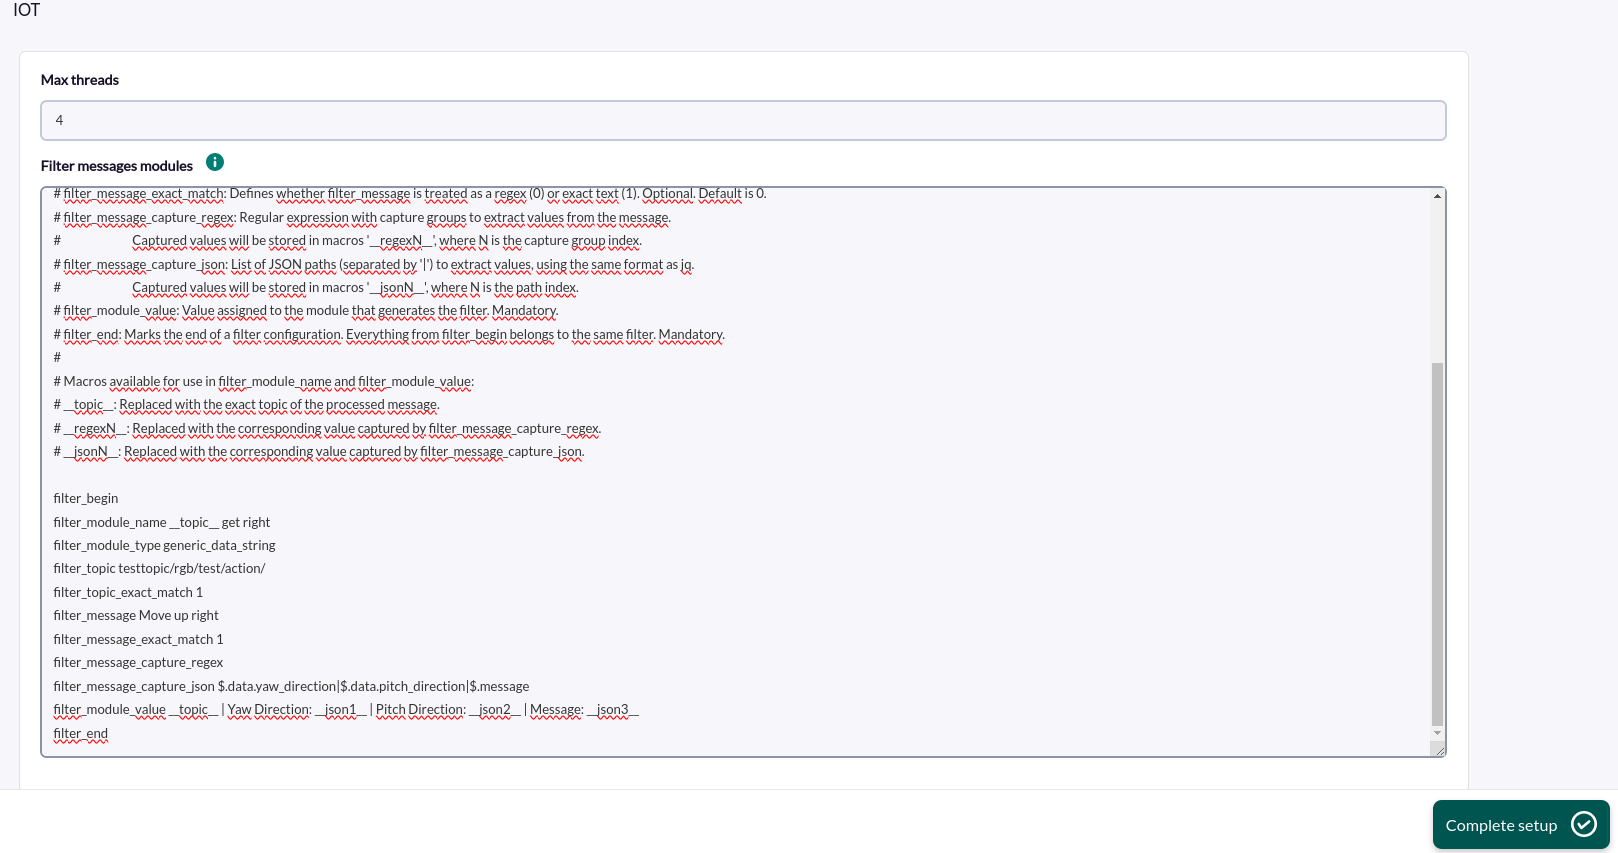
filter_begin
filter_module_name __topic__ get right
filter_module_type generic_data_string
filter_topic testtopic/rgb/test/action/
filter_topic_exact_match 1
filter_message Move up right
filter_message_exact_match 1
filter_message_capture_regex
filter_message_capture_json $.data.yaw_direction|$.data.pitch_direction|$.message
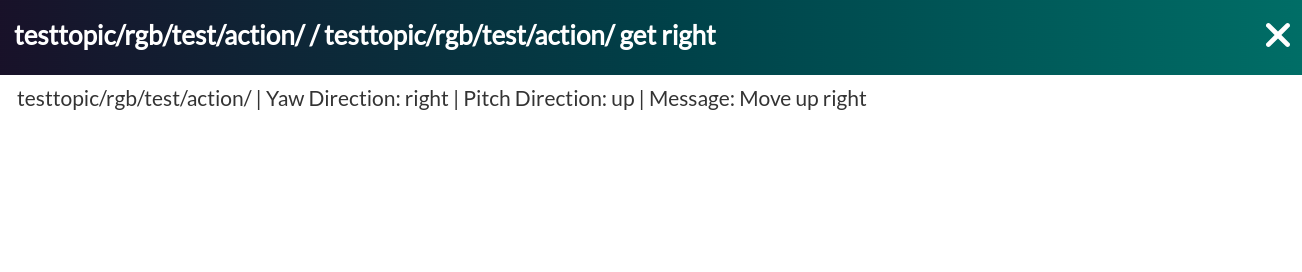
filter_module_value __topic__ | Yaw Direction: __json1__ | Pitch Direction: __json2__ | Message: __json3__
filter_endThen, with the previously shown message and configuration examples, the following agent would be created:

And the following message module:

Agents and modules generated by the plugin
- An agent will be created for each topic containing messages that have passed the filters.
- A module will be created for each message that has passed the filters.
Remember that there cannot be more than one module with the same name in the same agent.