Google Drive
The function of this plugin is to monitor the occupied space and the last change of a file.
- Introduction
- Compatibility matrix
- Pre requisites
- Parameters
- Manual execution
- Configuration in PandoraFMS
- Agent and modules generated by the plugin
Introduction
Ver. 26-03-2024
This plugin is intended to monitor the space and the date of the last change of a Google Drive file.
Tipo: Plug-in server
Compatibility matrix
| Systems where tested | Rocky linux, Fedora 34 |
| Systems where it works | Any linux system |
Pre requisites
Prerequisites
Google Drive API enabled
JSON file with credentials
Enable Google Drive API:
Go to the Google Developer Console.
Create a new project or select an existing one.
In the left pane, click "Library."
Search for "Google Drive API" in the list of available APIs.
Click "Google Drive API".
Click "enable" to enable the API for your project.
Create API credentials:
Set up the OAuth consent screen:
Go to APIs & Services > Credentials.
Click on "Create Credentials" and select "OAuth 2.0 Client IDs".
Set the application type ("Desktop app") and download the credentials JSON file.
Generate token for the plugin:
Run the plugin manually with the mandatory parameters specified in section "parameters" (example in section "manual execution", in a GUI environment, to generate a token.json file.
The browser will open and we will be asked to log in with a google account.
The generated token.json should be located in the same directory where the PandoraFMS plugin is configured. Next to the creds.json.
It is necessary to run in a GUI environment to authenticate for the first time and generate a token.
Parameters
Meraki connection parameters
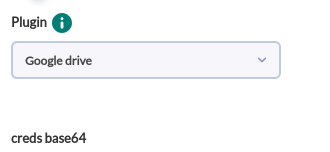
| --creds_json | json file with google credentials |
| --creds_base64 | Base 64 of json file with google credentials |
| --port | Port. Default : 8080 |
| --file_name | Name of the file, which is to be monitored and the date of its last change. Need be propietary or have edit privileges. |
| --log_file | Log file path |
Pandora configuration parameters
| --agent_prefix |
Prefix for all agents created by the plugin |
| --module_prefix | Prefix for all modules created by the plugin |
| --interval | Agent monitoring interval |
| --temporal | PandoraFMS temporary directory |
| --data_dir |
PandoraFMS Data Directory |
| --transfer_mode |
Data transfer mode, local or tentacle |
| --tentacle_client |
Tentacle client path, by default "tentacle_client". |
| --tentacle_opts |
Additional tentacle options |
| --tentacle_port |
Tentacle Port |
| --tentacle_address |
Tentacle IP |
Manual execution
The plugin execution format is as follows :
./pandora_googledrive --creds_json/creds_base64 <file credentials> \
[--file_name <file_name>] \
[--module_prefix <module_prefix>] \
[--agent_prefix <agent_prefix>] \
[--group <group>] \
[--interval <interval>] \
[--temporal <temporal>] \
[--data_dir <data_dir>] \
[--transfer_mode <transfer_mode>] \
[--tentacle_client <tentacle_client>] \
[--tentacle_opts <tentacle_opts>] \
[--tentacle_port <tentacle_port>] \
[--tentacle_address <tentacle_address>] \
[--log_file <log_file>]
Example:
./pandora_google_drive --creds_json "creds.json" --tentacle_address 174.42.42.123 --file_name "sistema_de_alertas.mp4"
Configuration in PandoraFMS
To configure the plugin in PandoraFMS, the following steps must be followed :
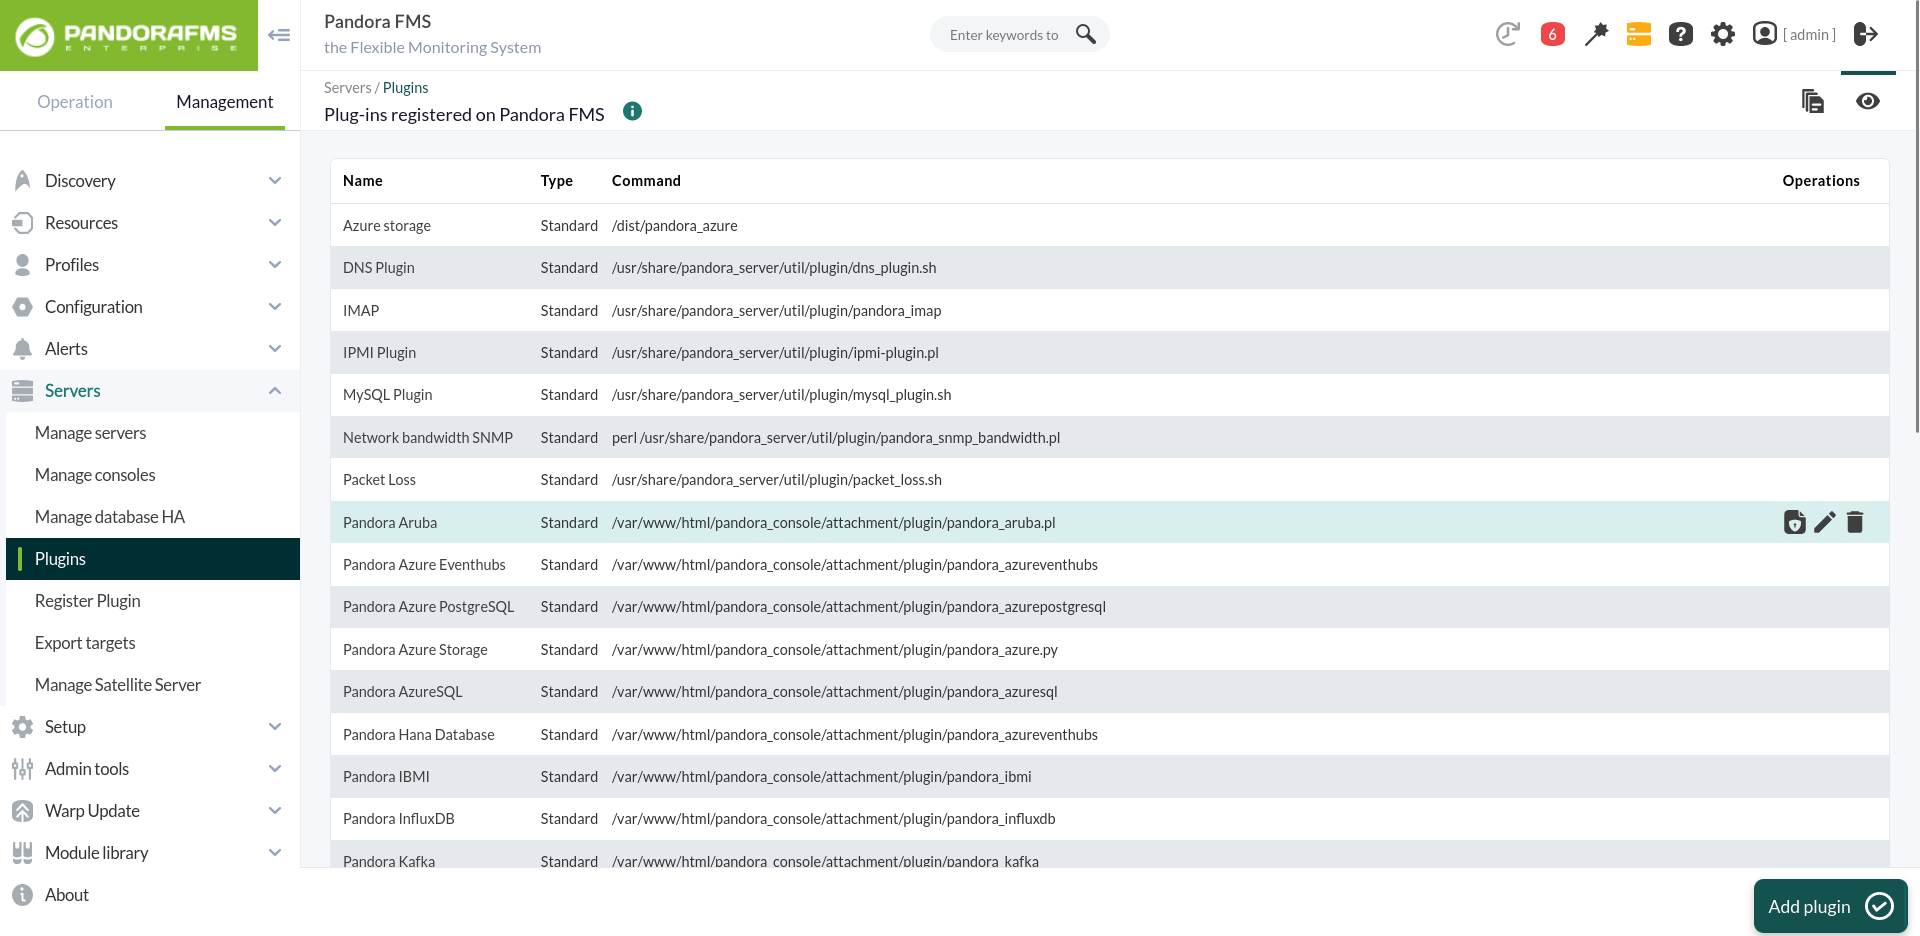
1. Upload the plugin to PandoraFMS, for example in the following path:
/usr/share/pandora_server/util/plugin2. Go to the plugins section and create a new one:
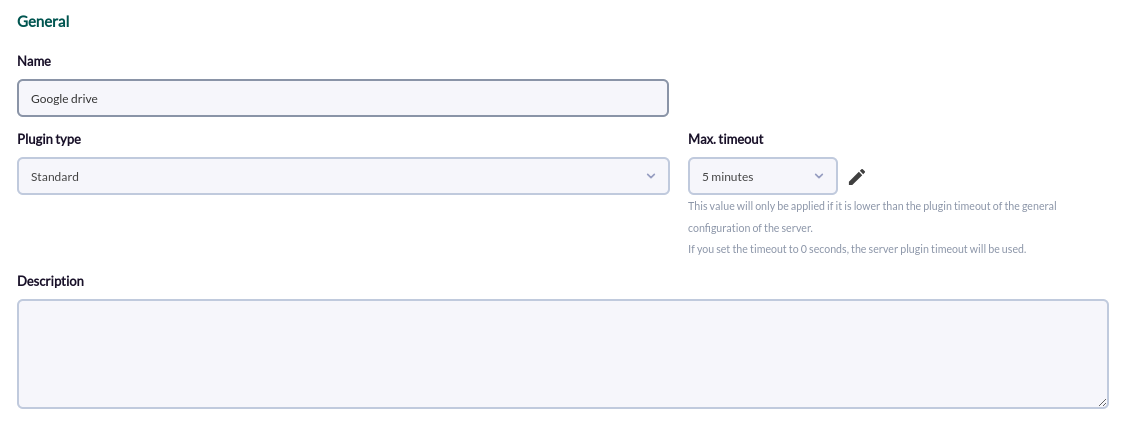
3. Name, description and timeout are added:
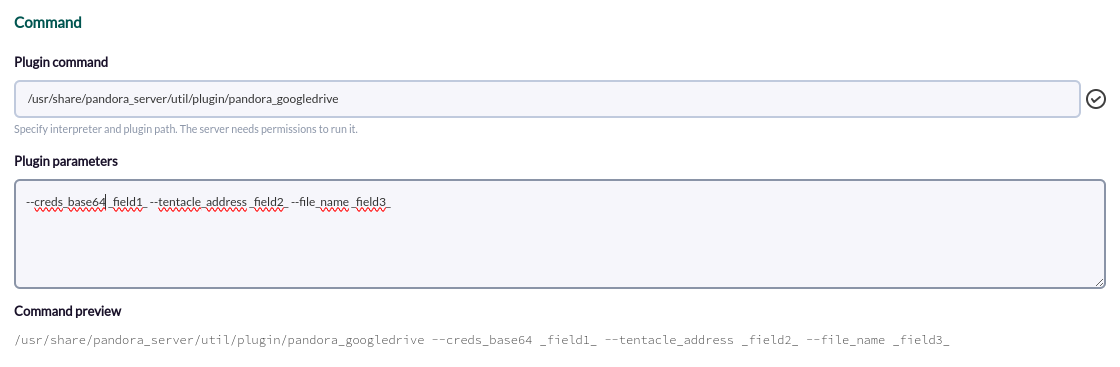
4. The path of the plugin is added to the command and the necessary parameters for its execution.
For each parameter a macro must be configured, the syntax of this macro being the following : _fieldx_, where x is the positional number of the parameter.
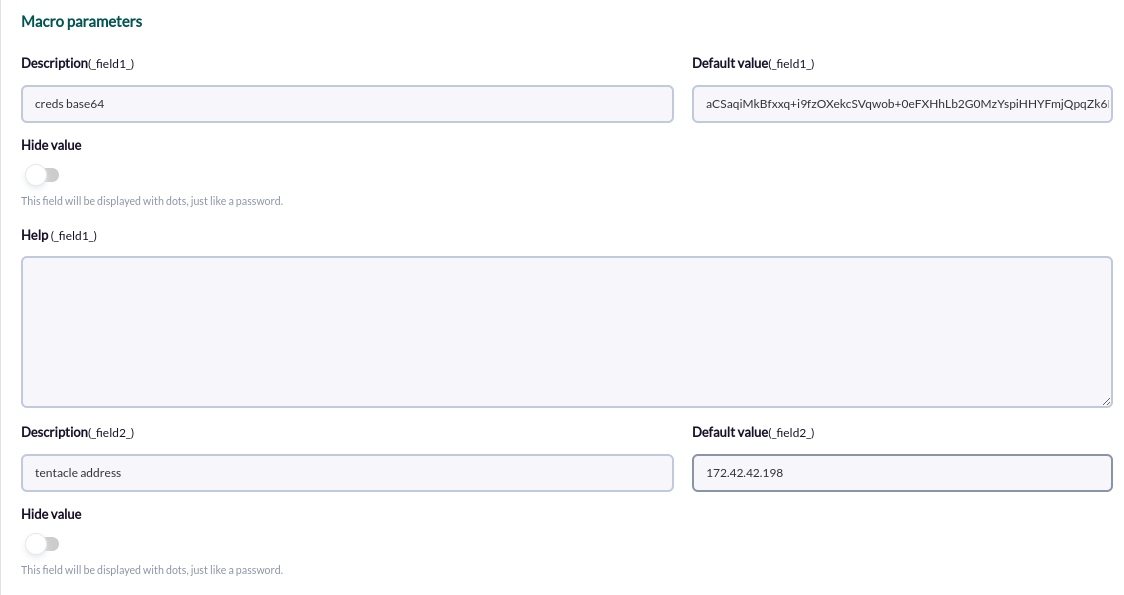
5. The previous macros are configured, adding the value of the parameter in each one:
6. Once configured, we should create a module in an agent that executes the plugin. In the modules menu of an agent we create a new plugin type module:
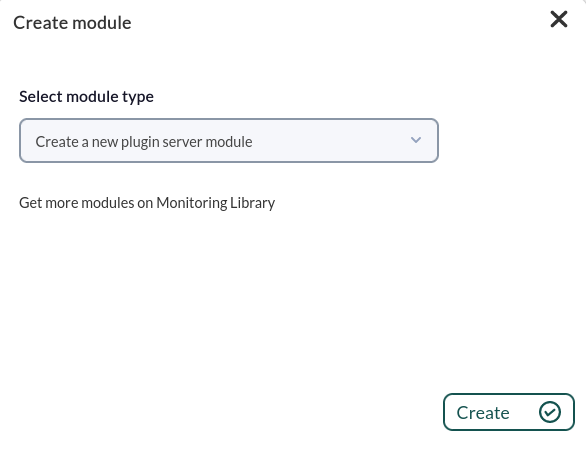
7. In the module configuration menu, give it a name, select the plugin configured before and click on "create".
8. The agent will be created with the modules or the modules in the selected agent in the next execution of the plugin:

Agent and modules generated by the plugin
The plugin will create an agent named <Prefix>Google Drive, with the following modules:
| < Prefix > < Google Drive Used > |
| < Prefix > < File name > |