| **Systems where it has been tested** | CentOS 7, Rocky Linux 8 and Ubuntu 22.04 |
| **Systems where it works** | Any x86\_64 Linux system |
This plugin is not compatible with ARM systems
# Pre-requisites - Have Collectd installed and configured. - On newer Linux operating systems (such as Rocky Linux 8 or Ubuntu 22.04) it is necessary to install the `collectd-utils` dependency. This dependency is not necessary, for example, on CentOS 7. - Execution permissions of the `pandora_collectd` plugin. # Parameters| -h, --help | **Help information on the plugin arguments.** |
| -c, --collectdctl | **Path of** `collectdctl`. |
| -r, --add\_regexp | **Regular expression (regexp) to add metrics** (by default `.*`). |
| -R, --ignore\_regexp | **Regular expression (regexp) to remove metrics** (by default none). |
| -d, --agent\_description | **Description of the agent created by the plugin** (by default "Agent from pandora\_collectd"). |
| -a, --agent\_alias | **Name of the agent created by the plugin** (by default `pandora_collectd`). |
| -i, --tentacle\_ip | **IP address of the Tentacle server** (by default 127.0.0.1). |
| -p, --tentacle\_port | **Tentacle port** (by default 41121). |
| -O, --tentacle\_extra\_opts | **Tentacle extra options** (by default none) |
| -v, --verbose | **Displays all values obtained on the screen.** |
Python regular expressions [https://docs.python.org/3/library/re.html#regular-expression-syntax](https://docs.python.org/3/library/re.html#regular-expression-syntax)
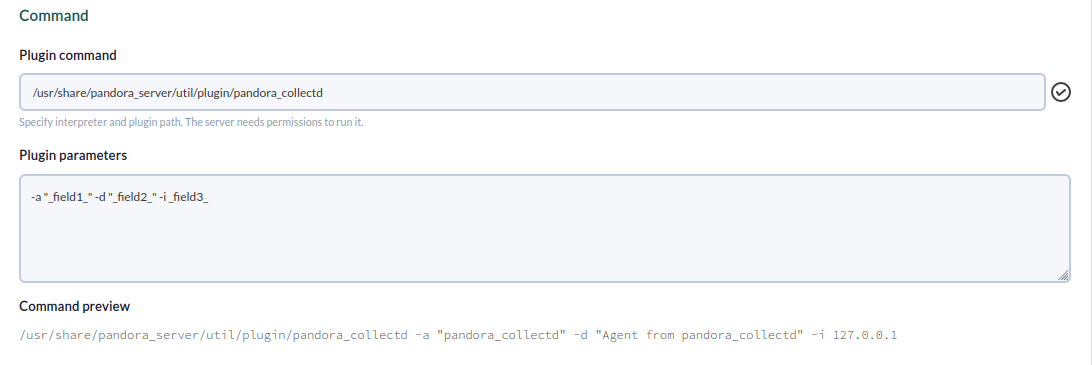
# Ejecución manual #### Default execution ```bash ./pandora_collectd ``` #### Execution with regular expressions ```bash ./pandora_collectd -r ".*cpu.*" -R ".*memory.*" ``` #### Execution with agent name, description and address of Tentacle ```bash ./pandora_collectd -a Monitores_Servidor -d "Monitores del Servior Web" -i 127.0.0.1 ``` # PandoraFMS configuration This plugin can be configured as a server plugin or as an agent plugin. #### Server Plugin **1. We can upload the plugin to our server in the default path:** ```bash /usr/share/pandora_server/util/plugin ``` **2.Go to the plugins section and add a new one:** [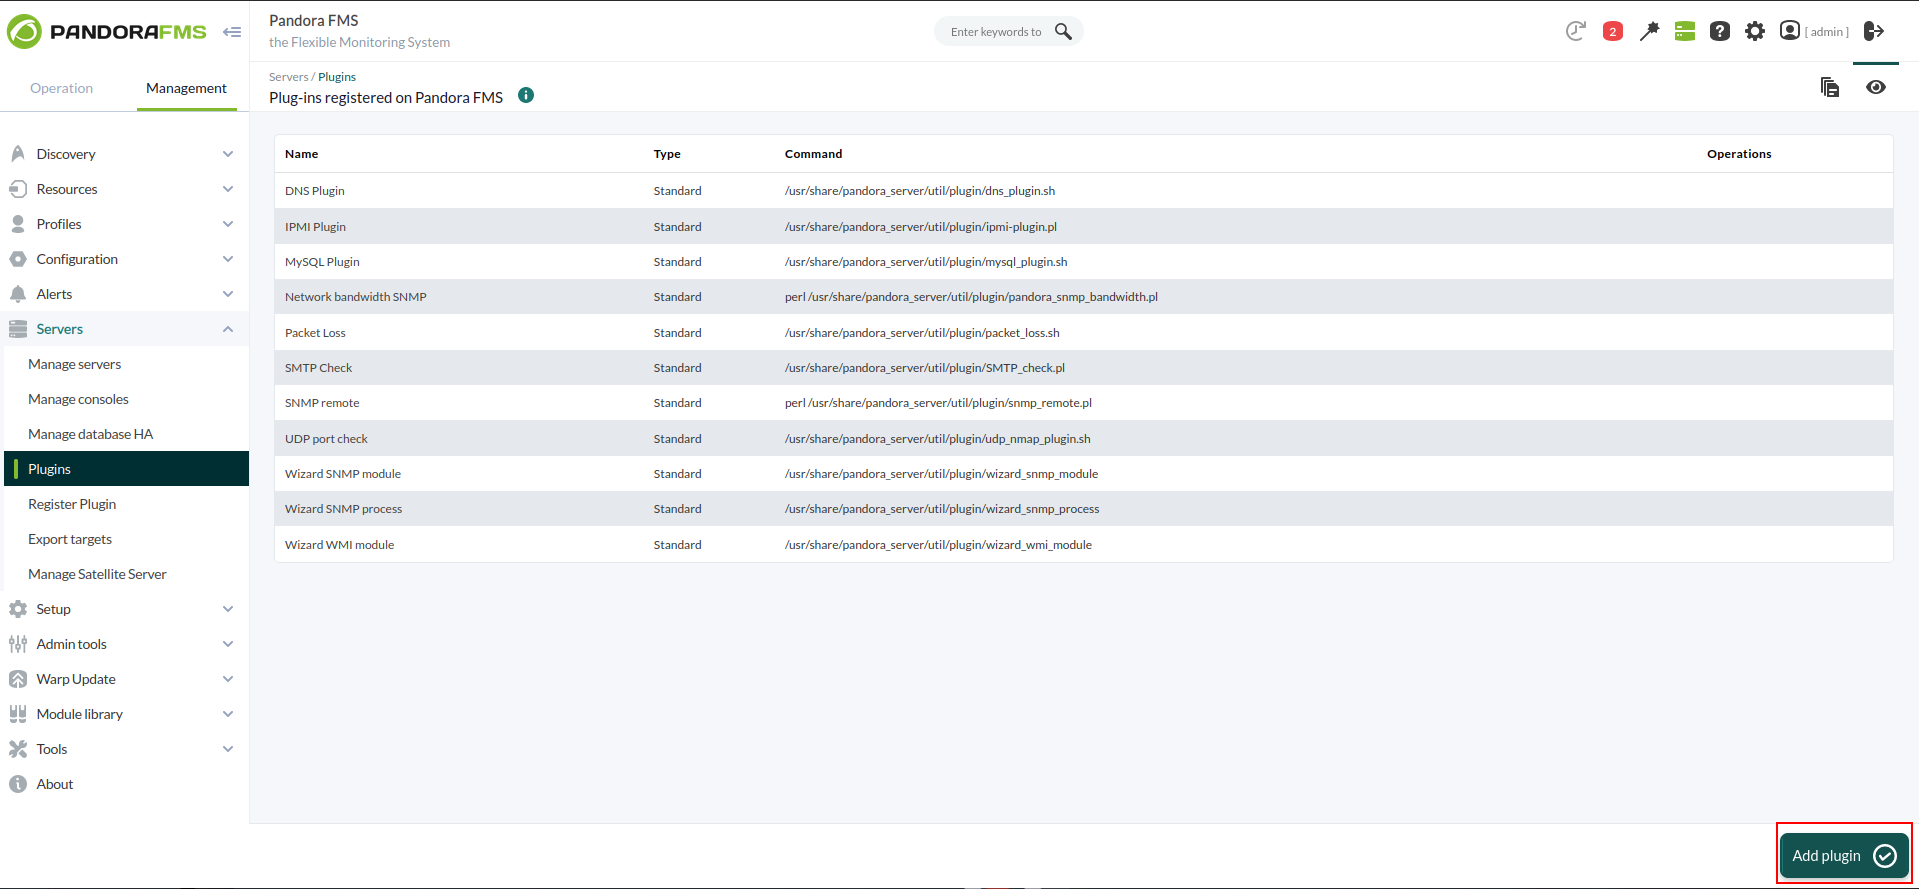](https://pandorafms.com/guides/public/uploads/images/gallery/2024-02/imagen.png) **3. Add the name, description and timeout of the plugin:** [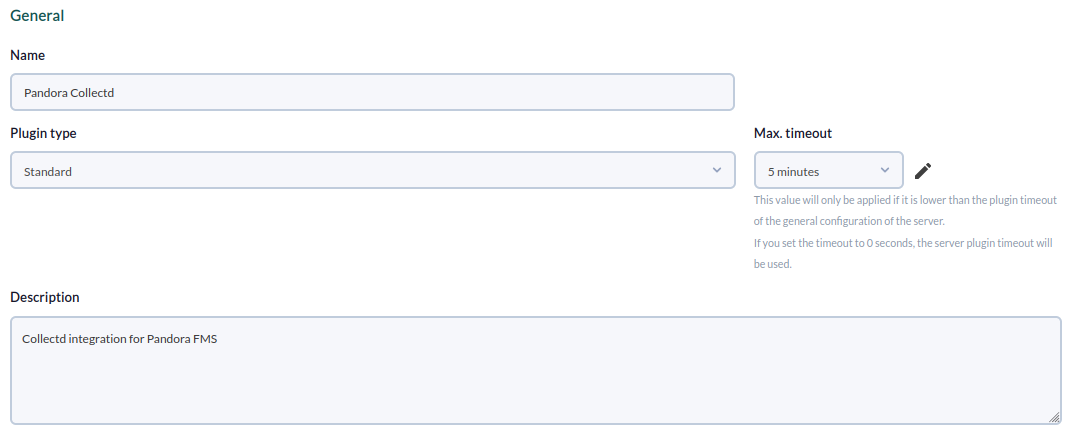](https://pandorafms.com/guides/public/uploads/images/gallery/2024-02/CUXimagen.png) **4. Enter the execution path of the plugin and all the parameters we are going to use:** [](https://pandorafms.com/guides/public/uploads/images/gallery/2024-02/m1timagen.png)When executing the plugin in the Pandora FMS server in this case, we can introduce the parameters directly in the "Plugin Command" section. If, in spite of this, we want to modify the parameters of the plugin, we will introduce them with macros in the "Plugin Parameters" section to indicate them later in the creation of the module.
[](https://pandorafms.com/guides/public/uploads/images/gallery/2024-02/mQ0imagen.png) [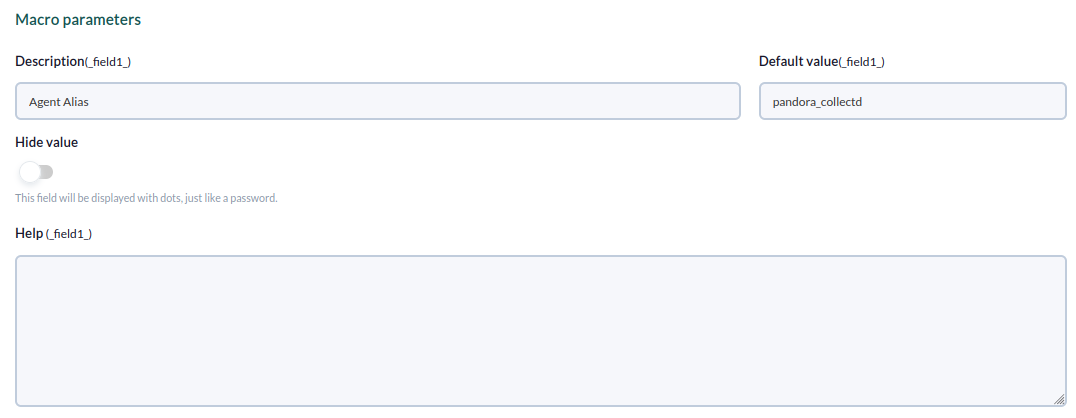](https://pandorafms.com/guides/public/uploads/images/gallery/2024-02/r5Pimagen.png) [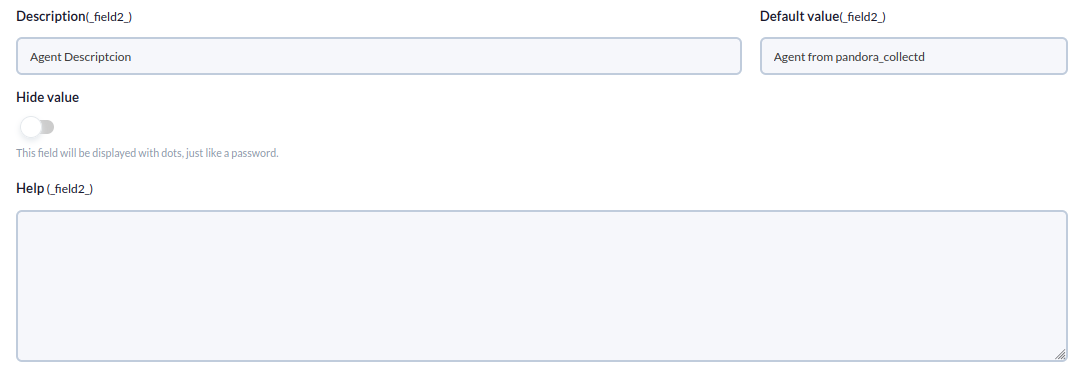](https://pandorafms.com/guides/public/uploads/images/gallery/2024-02/sfXimagen.png) [](https://pandorafms.com/guides/public/uploads/images/gallery/2024-02/4Bvimagen.png) **5. We create the plugin module in one of our Pandora FMS agents:** [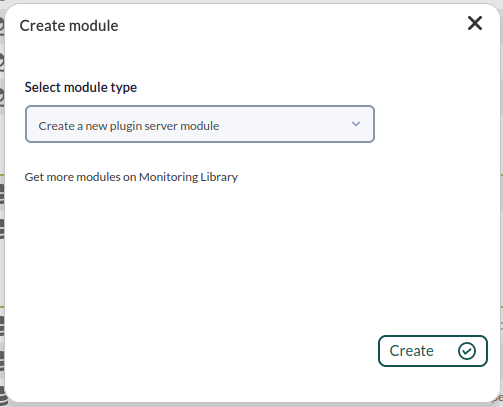](https://pandorafms.com/guides/public/uploads/images/gallery/2024-02/vkWimagen.png) **6. We indicate the plugin and the data we want to modify and create the module:**[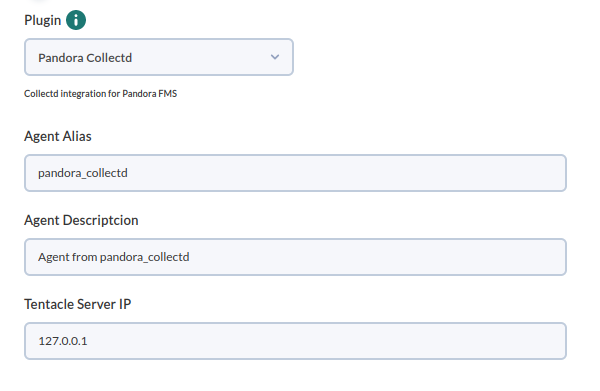](https://pandorafms.com/guides/public/uploads/images/gallery/2024-02/QZdimagen.png) #### Agent Plugin **1. We can upload the plugin to our agent in the default path:** ```bash /usr/share/pandora_agent/plugins ``` **2. Access to the Plugins configuration of our agent and add the plugin with the parameters we want:** [](https://pandorafms.com/guides/public/uploads/images/gallery/2024-02/qslimagen.png) [](https://pandorafms.com/guides/public/uploads/images/gallery/2024-02/ILbimagen.png) # Agent and modules generated by the plugin The execution of the plugin (in agent or server) will result in the creation of a Pandora FMS Agent, with the modules corresponding to the collection of collectd monitors: [](https://pandorafms.com/guides/public/uploads/images/gallery/2024-02/1L8imagen.png)[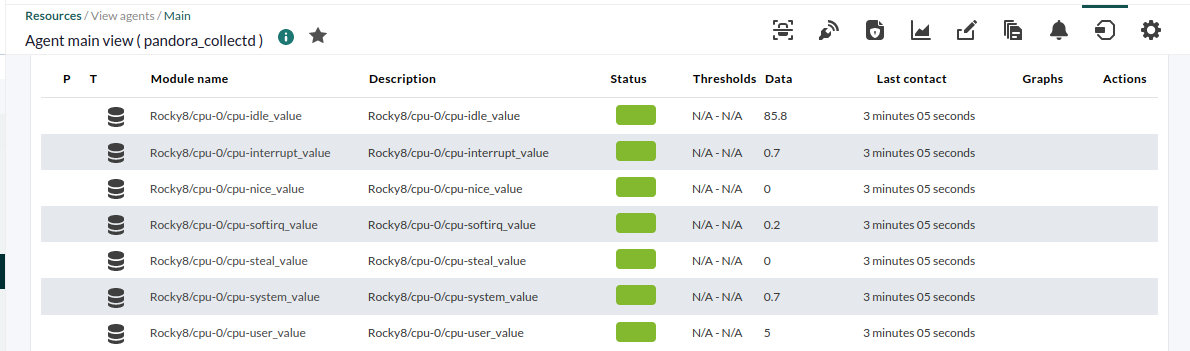](https://pandorafms.com/guides/public/uploads/images/gallery/2024-02/M0Uimagen.png) [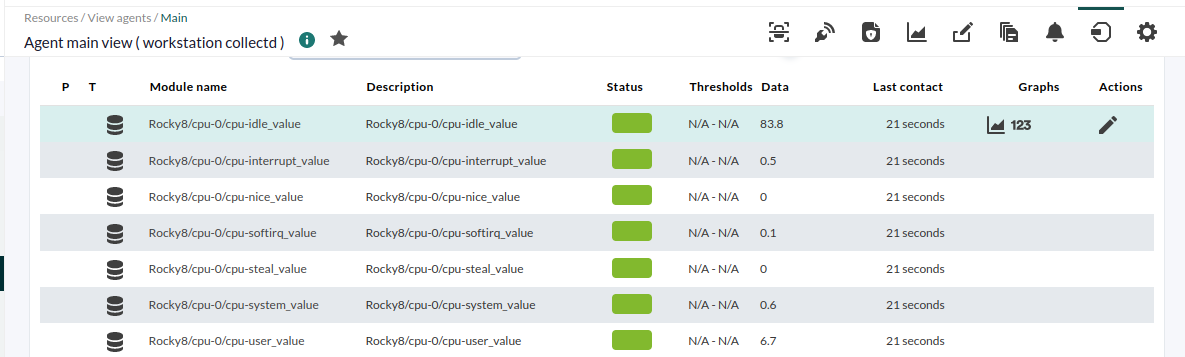](https://pandorafms.com/guides/public/uploads/images/gallery/2024-02/RCOimagen.png)